Mute City (Arcade)
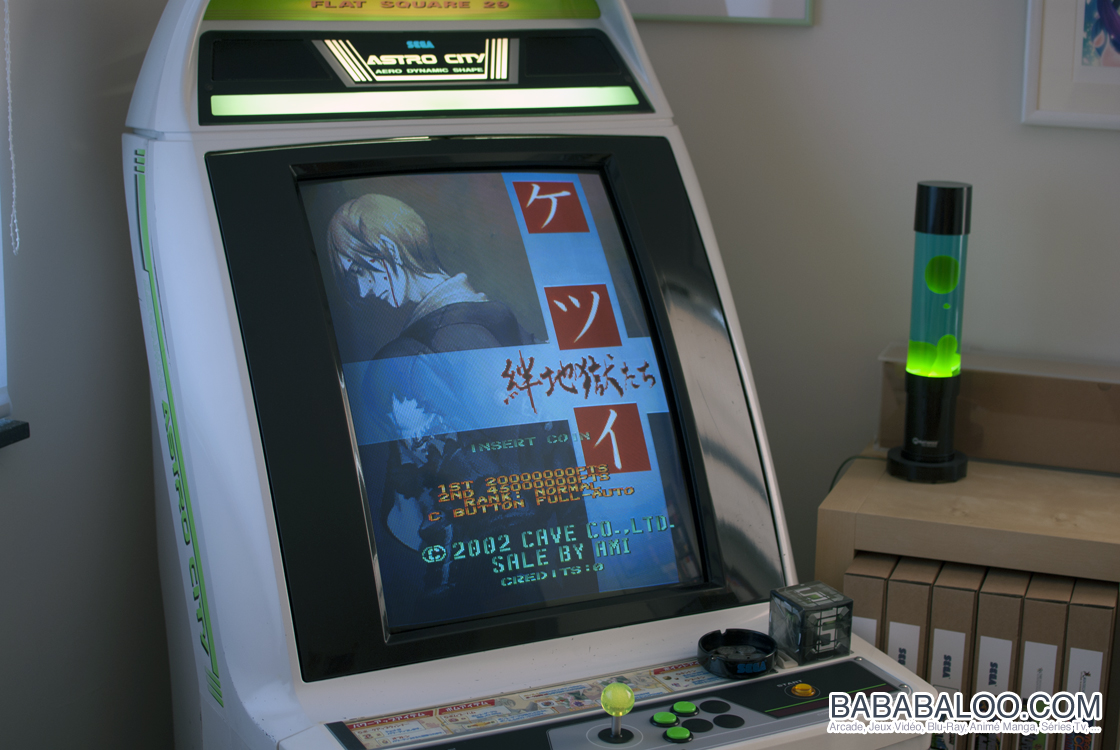
Someone showed up in an online community I frequent, asking around $4000 for a classic SEGA "Astro City" arcade cabinet. I've always wanted one, but almost immediately I realized I'd have to drive five hours to even take a look at it, and then pay, and then truck all 93kg of it home, and there was no guarantee it'd still work when I got it back. It could easily cost thousands more to fix, even if it was outwardly solid.
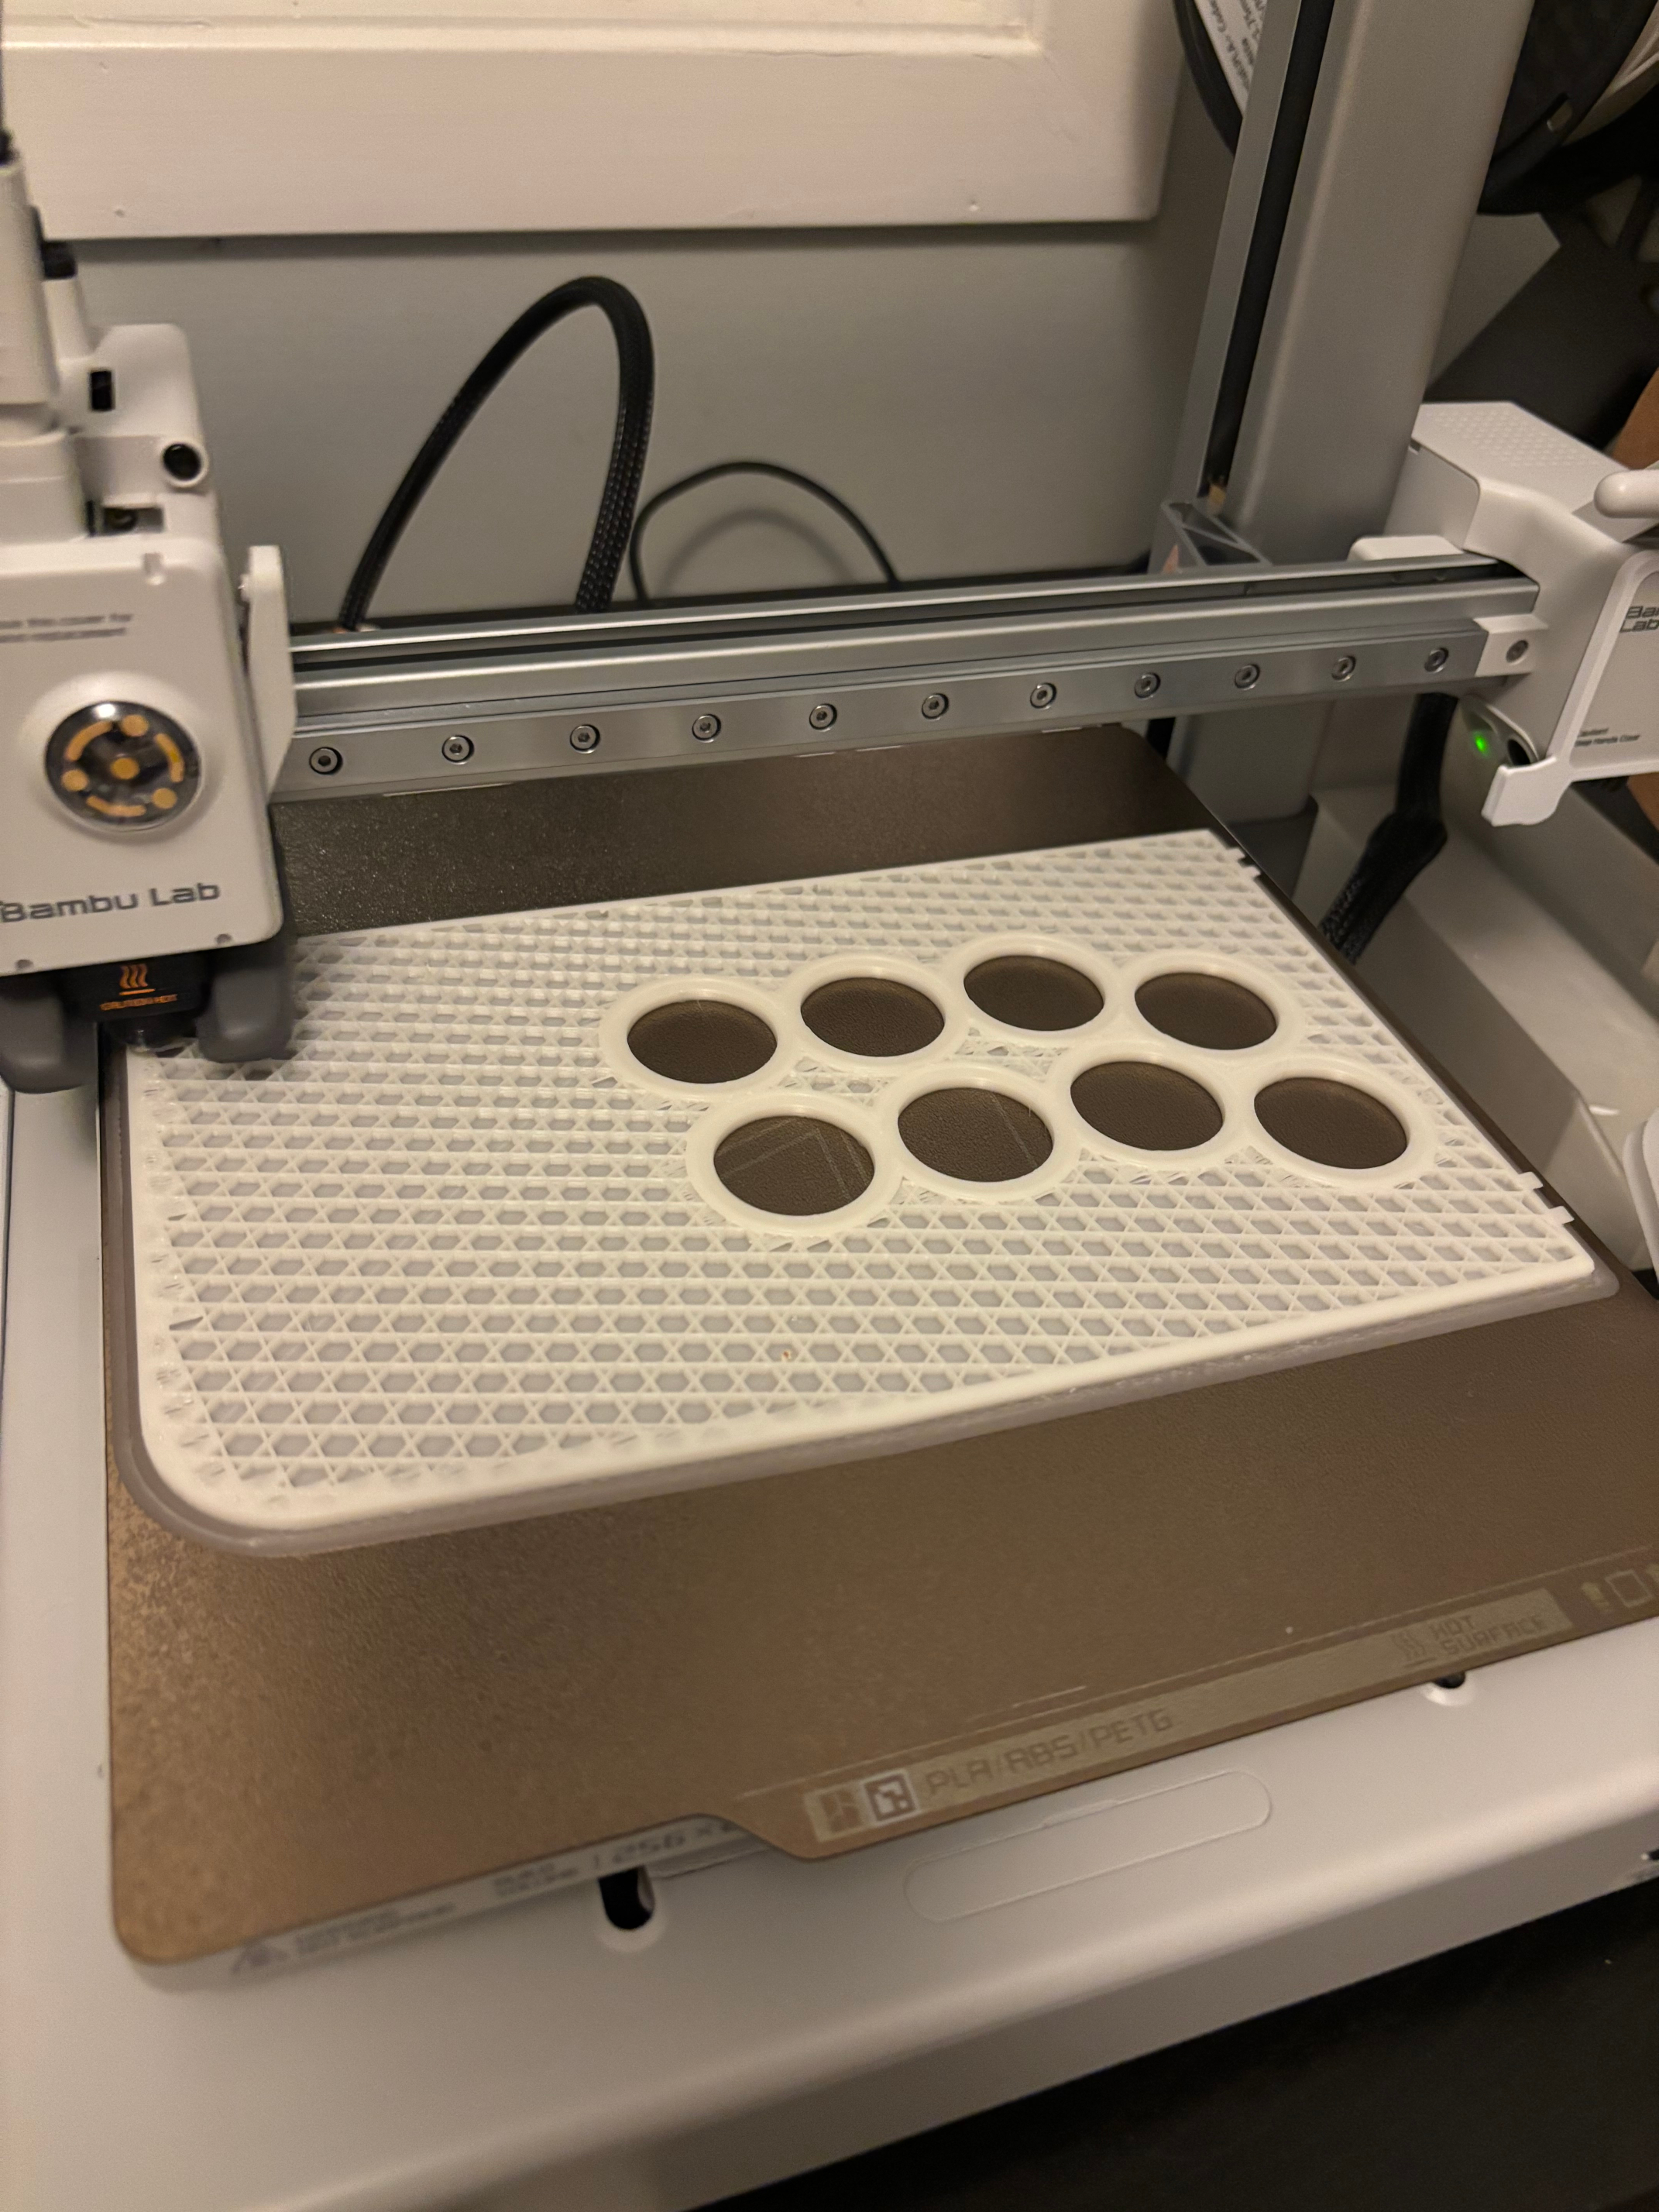
Coincidentally, I had been considering buying a new 3D printer to replace my ailing old second-hand Prusa Mk2.5S, and I came across a deal that same day, a reputable model (Bambu A1 + AMS) for $689.
The math was pretty easy. So I set about building my own cabinet.
Materials
I can't offer you a proper bill of materials because this wasn't an orderly project, and it was a couple months of very-part-time work and endless iteration. What I can tell you is that the total cost of materials, including all technology inside except whatever runs the games, was around $250 maximum, likely less.
Here's what I used:
- 5~6kg of SUNLU PETG White filament
- Small amounts of other white and translucent PET and PETG filament
- DELL 2007FPb 4:3 LCD I got for $20 at a thrift store
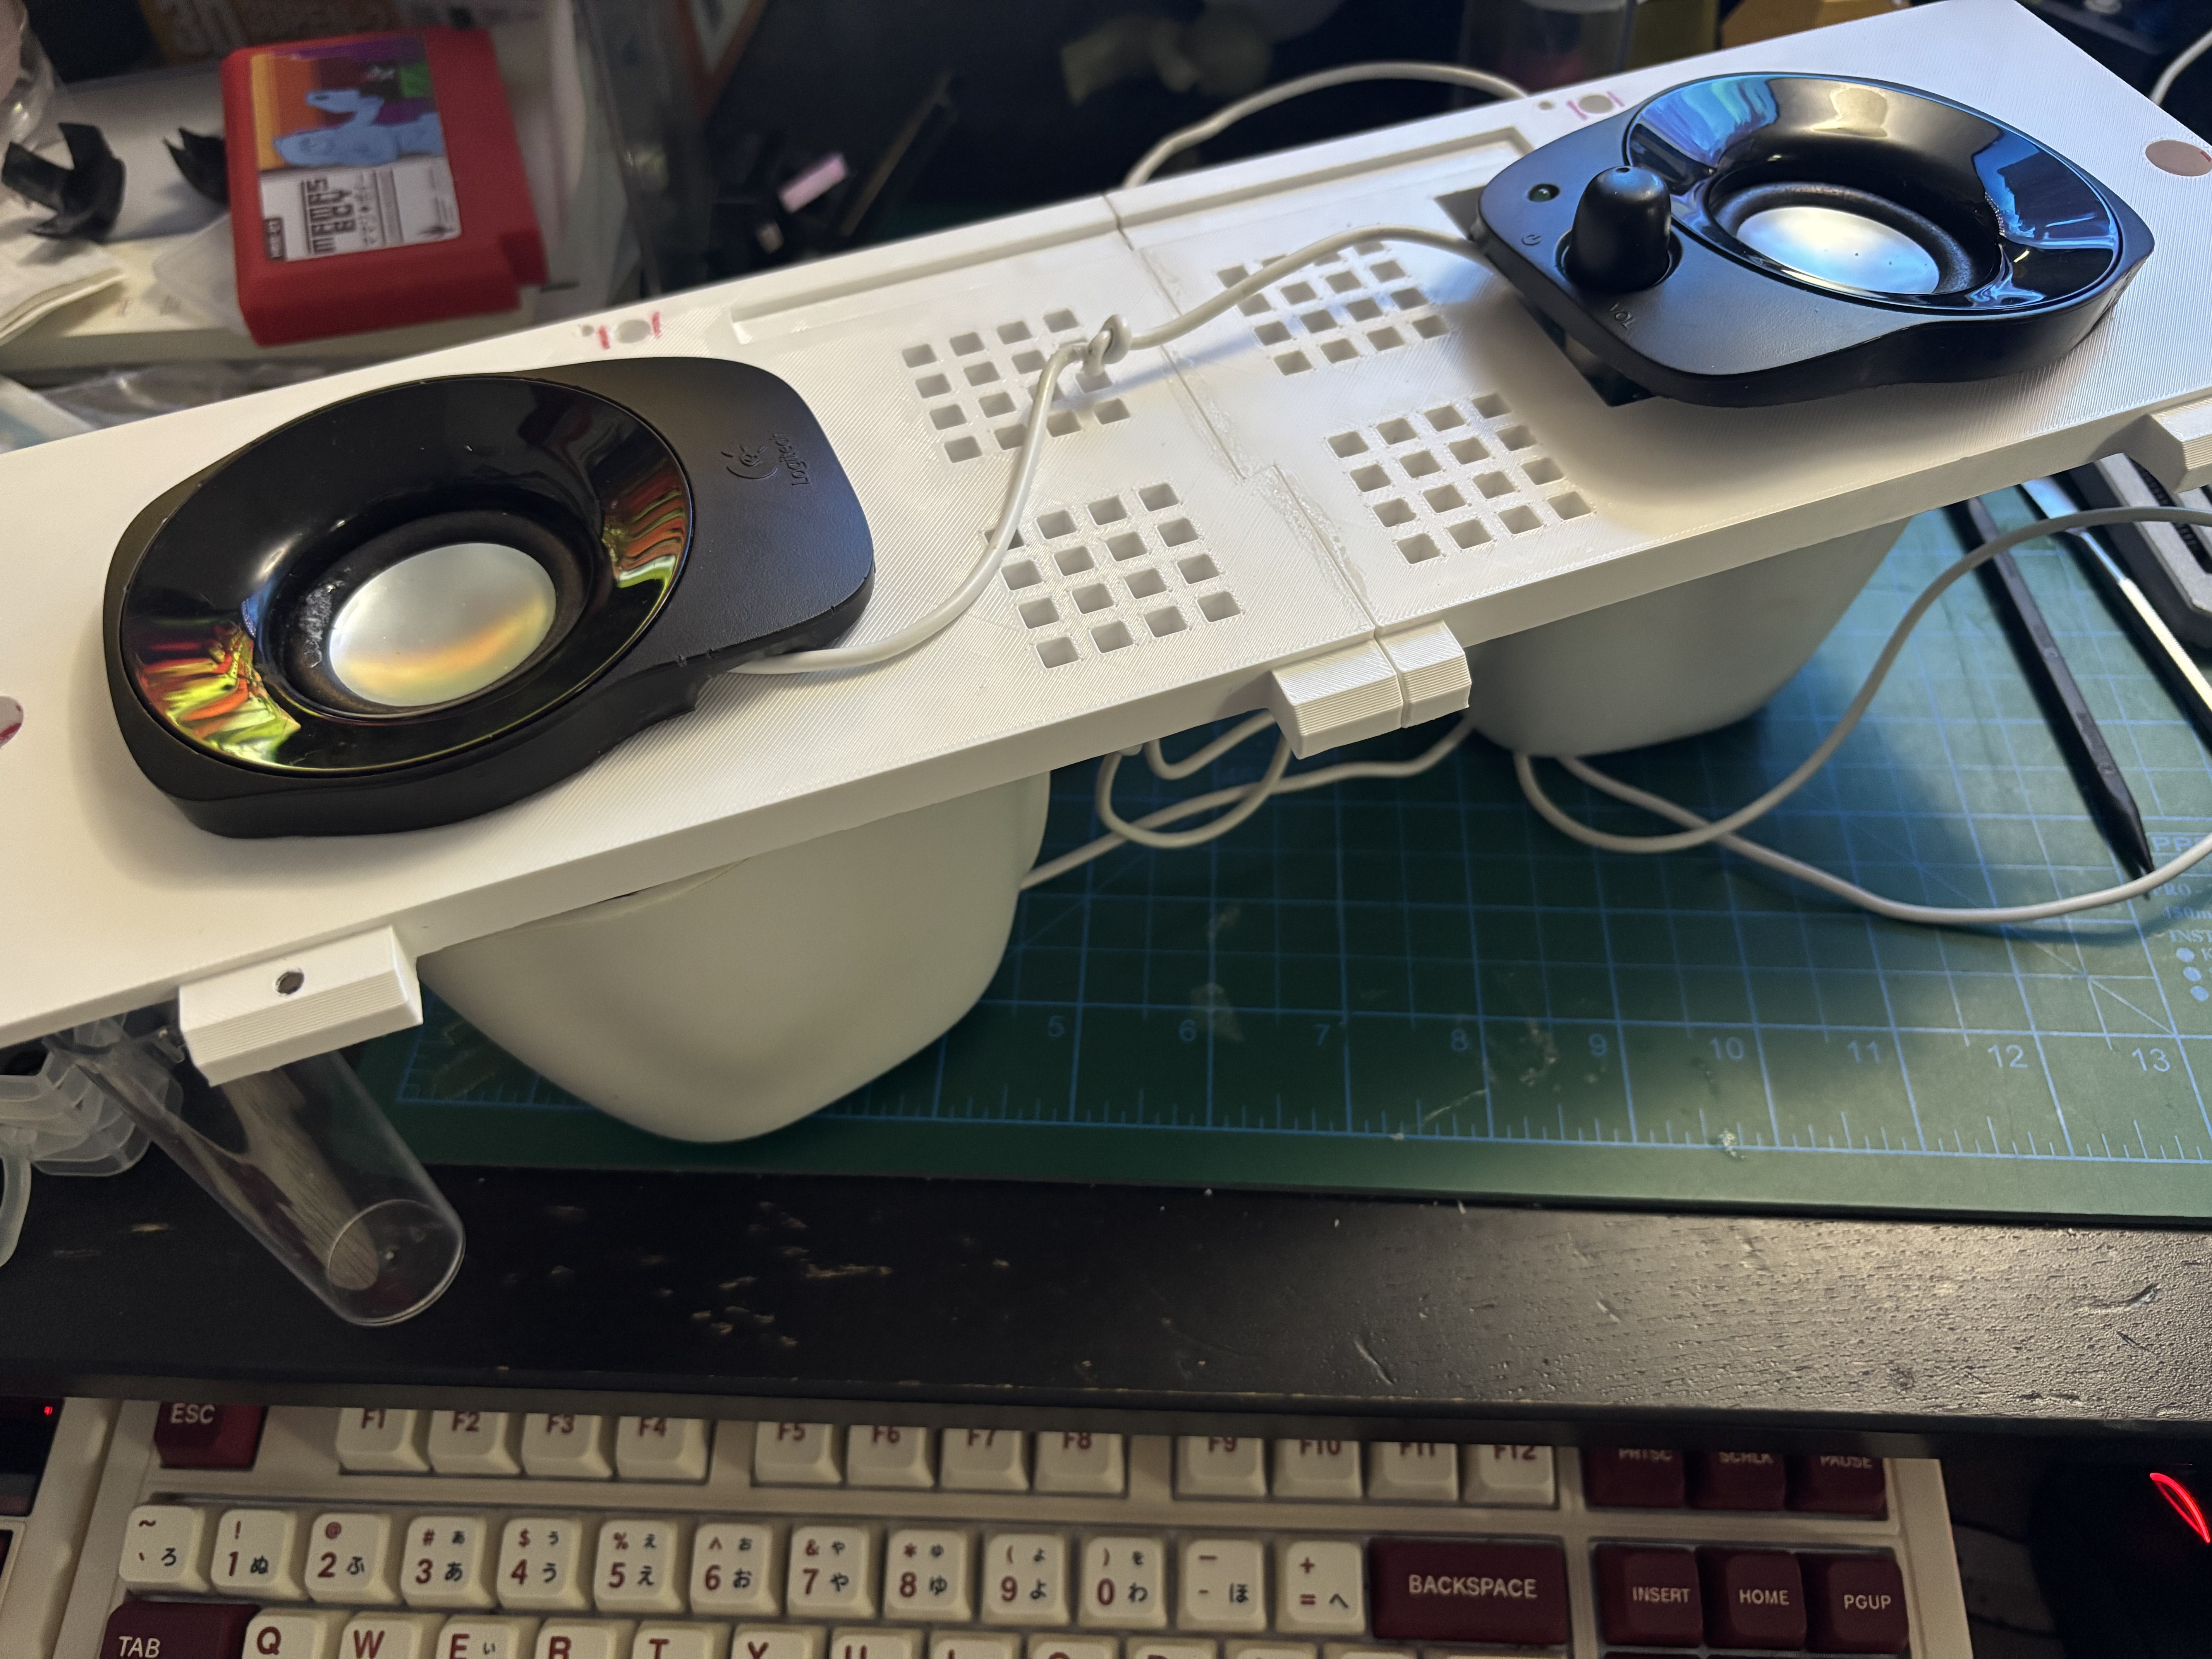
- Logitech desktop speakers I got for $15 at the same store
- Brook Universal Fighting Board, Brook arcade wiring harness
- SANWA JLF arcade stick and buttons from a broken stick
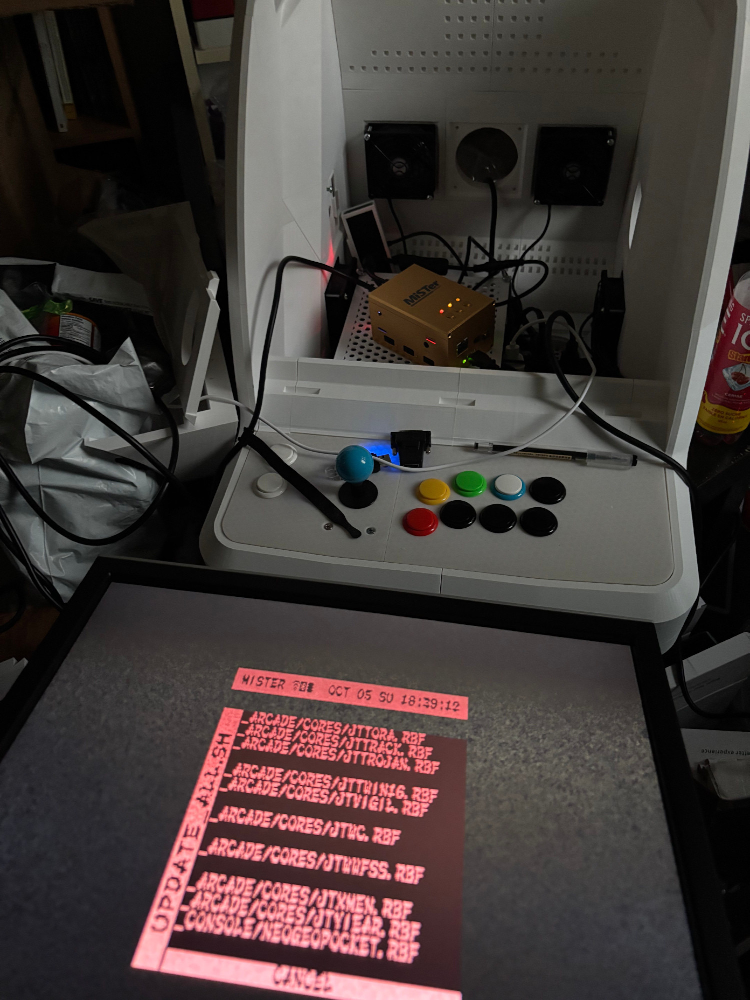
- A 4-pack of cheap 80mm PC fans
- A cheap 4-port USB Hub
- A cheap Power+USB surge protector with many ports
- A cheap customizable LED light strip
- Pliers, wrenches, IFIXIT screwdrivers, God Hand and tin snips
- A power drill/driver and hex screw set
- Assorted bolts, nuts, wingnuts, threaded screw rods
- Super glue (gel), zipties
- Enamel primer and gloss spray paint
- The help of a friend who works at a print shop
I started with the understanding that I wanted to be able to drop any old piece of tech into the cab to play the games, and have most of the functionality I needed work via USB. That also meant the video could be any monitor that supported HDMI, which is much better these days with upscalers being readily available. I didn't want to worry about supporting JAMMA or other old arcade hardware.
Design
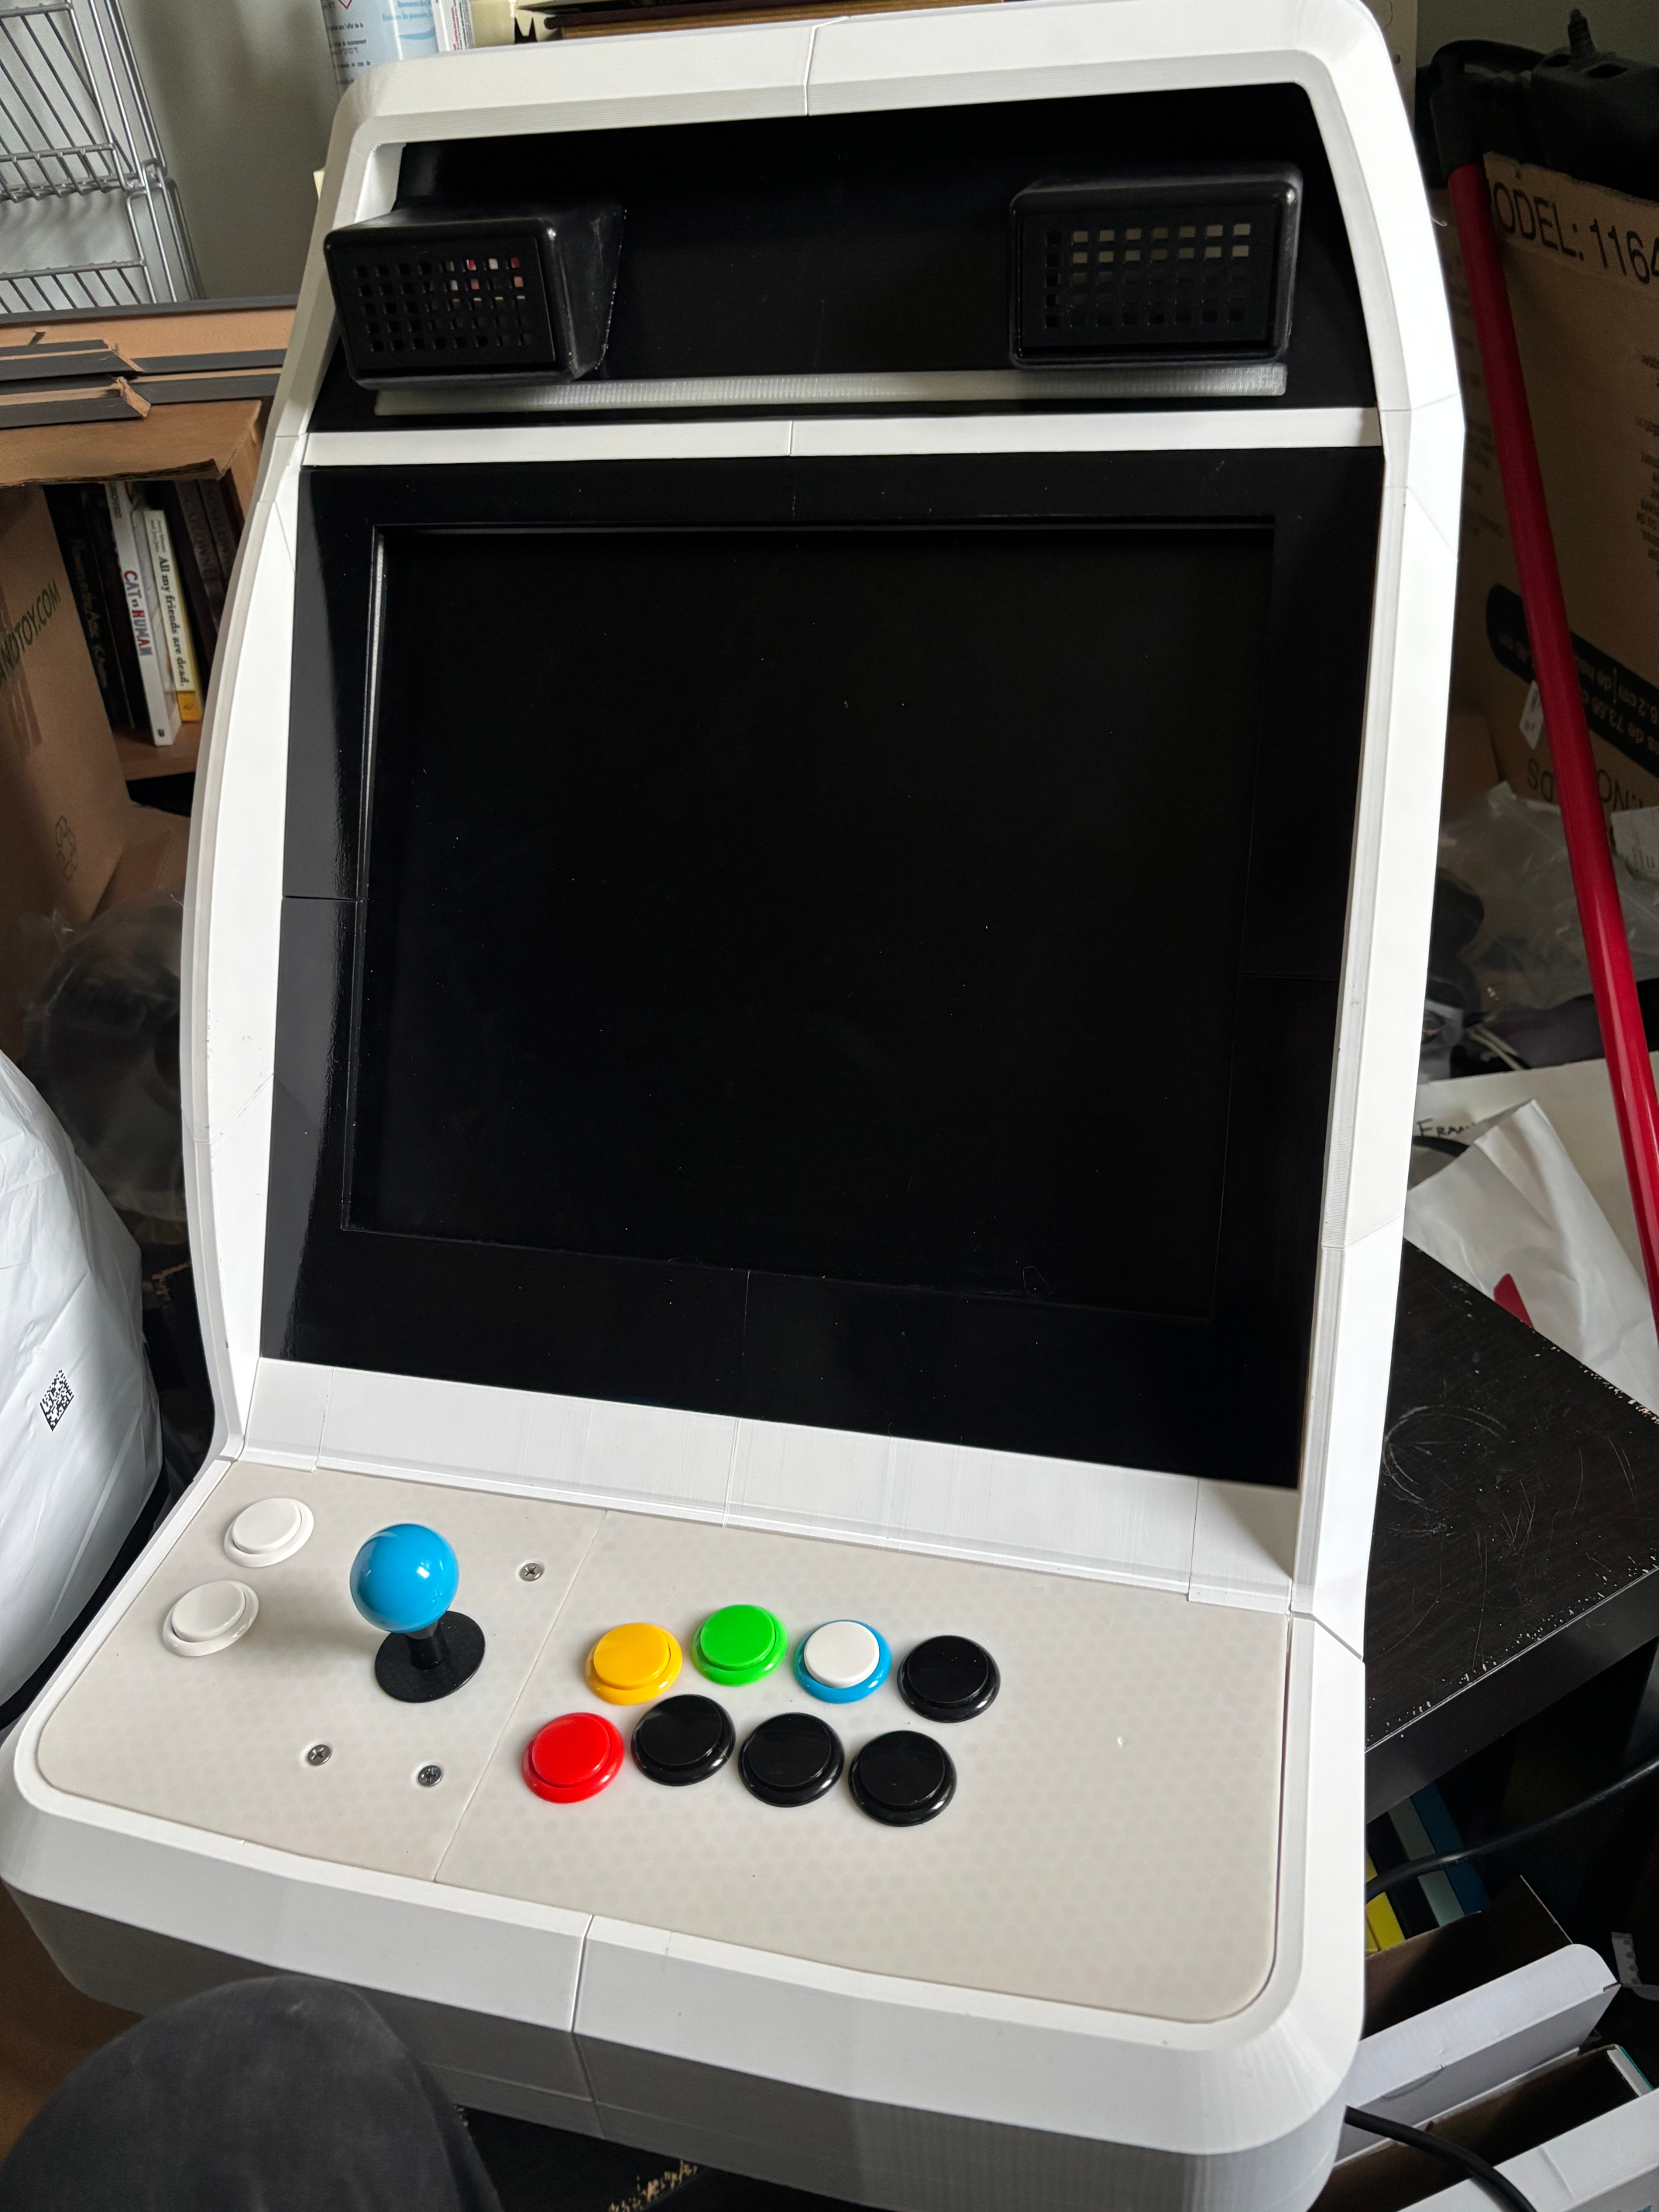
I started out with one premise: tiny tabletop arcade cabinets (like the Astro City Mini) are very neat little pieces of tech, but they are too small to use comfortably, especially for adults. So I wasn't going to build one unless it was scaled properly for sustained use by adults.
While considering how to go about printing a cabinet, I came across the excellent "Mini New Astro City" free 3D-printable model STL files made by Game-Makers. The MNAC design was very well-made, and importantly, was not pre-separated into many small parts since it was intended to be printed as larger pieces on a larger print bed (300mm³ vs my printer's 256mm³).
I imported the MNAC files into Bambu Studio and arranged them as in the real unit to get a sense of the print size. I also measured the dimensions of the potential 4:3 and 16:9 LCD displays I had, to get an idea of how wide the scaled-up cabinet would have to be to accommodate them, which came to exactly 400mm wide (measuring across the monitor enclosure, between the two sides).
In Bambu Studio you can use the Measure tool to measure between any two points on a model, get an accurate measurement, and then edit that measurement, causing everything selected to scale up by the same factor as the measured item. So I scaled up the entire arrangement to make that enclosure 400mm wide, and I had my base to work from.
There were some immediate issues I had to address.
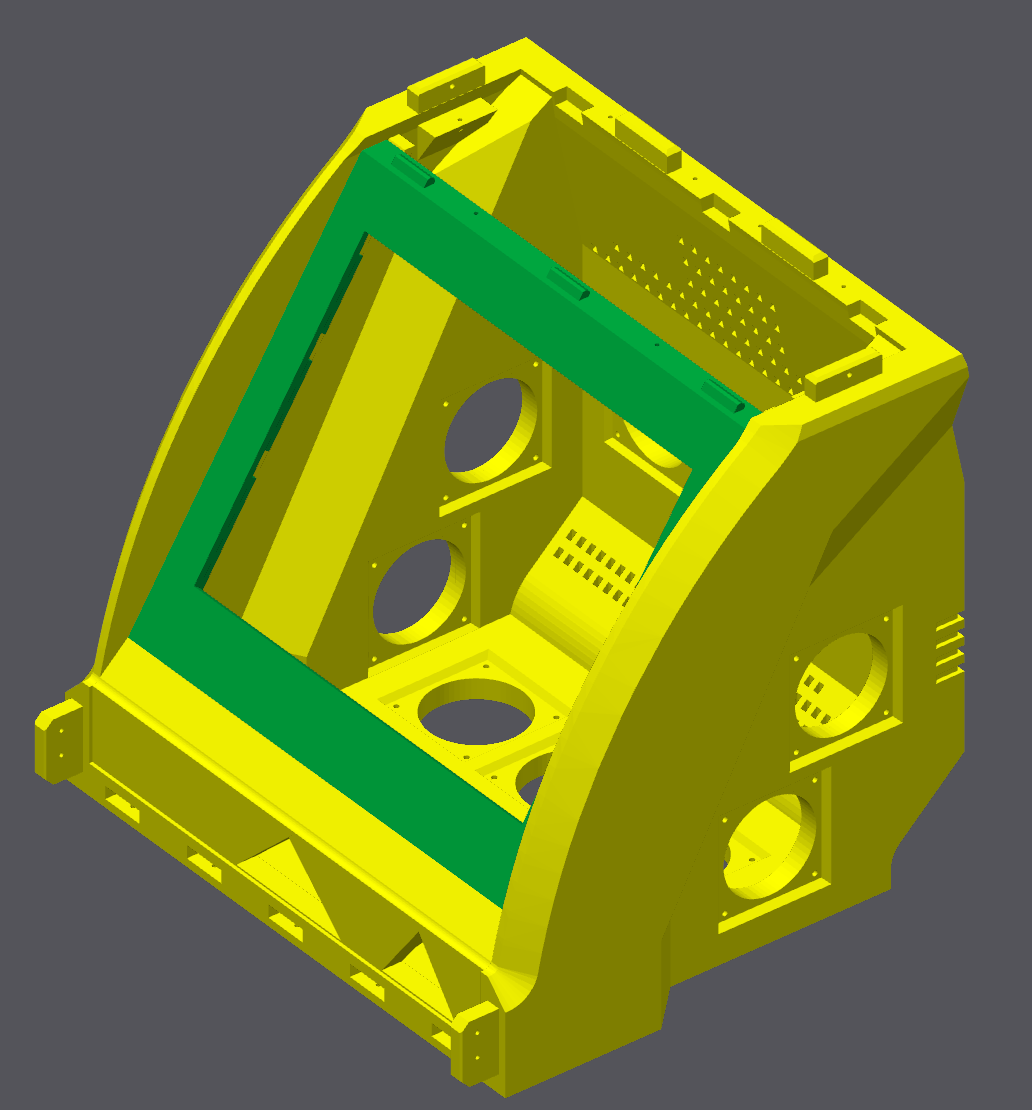
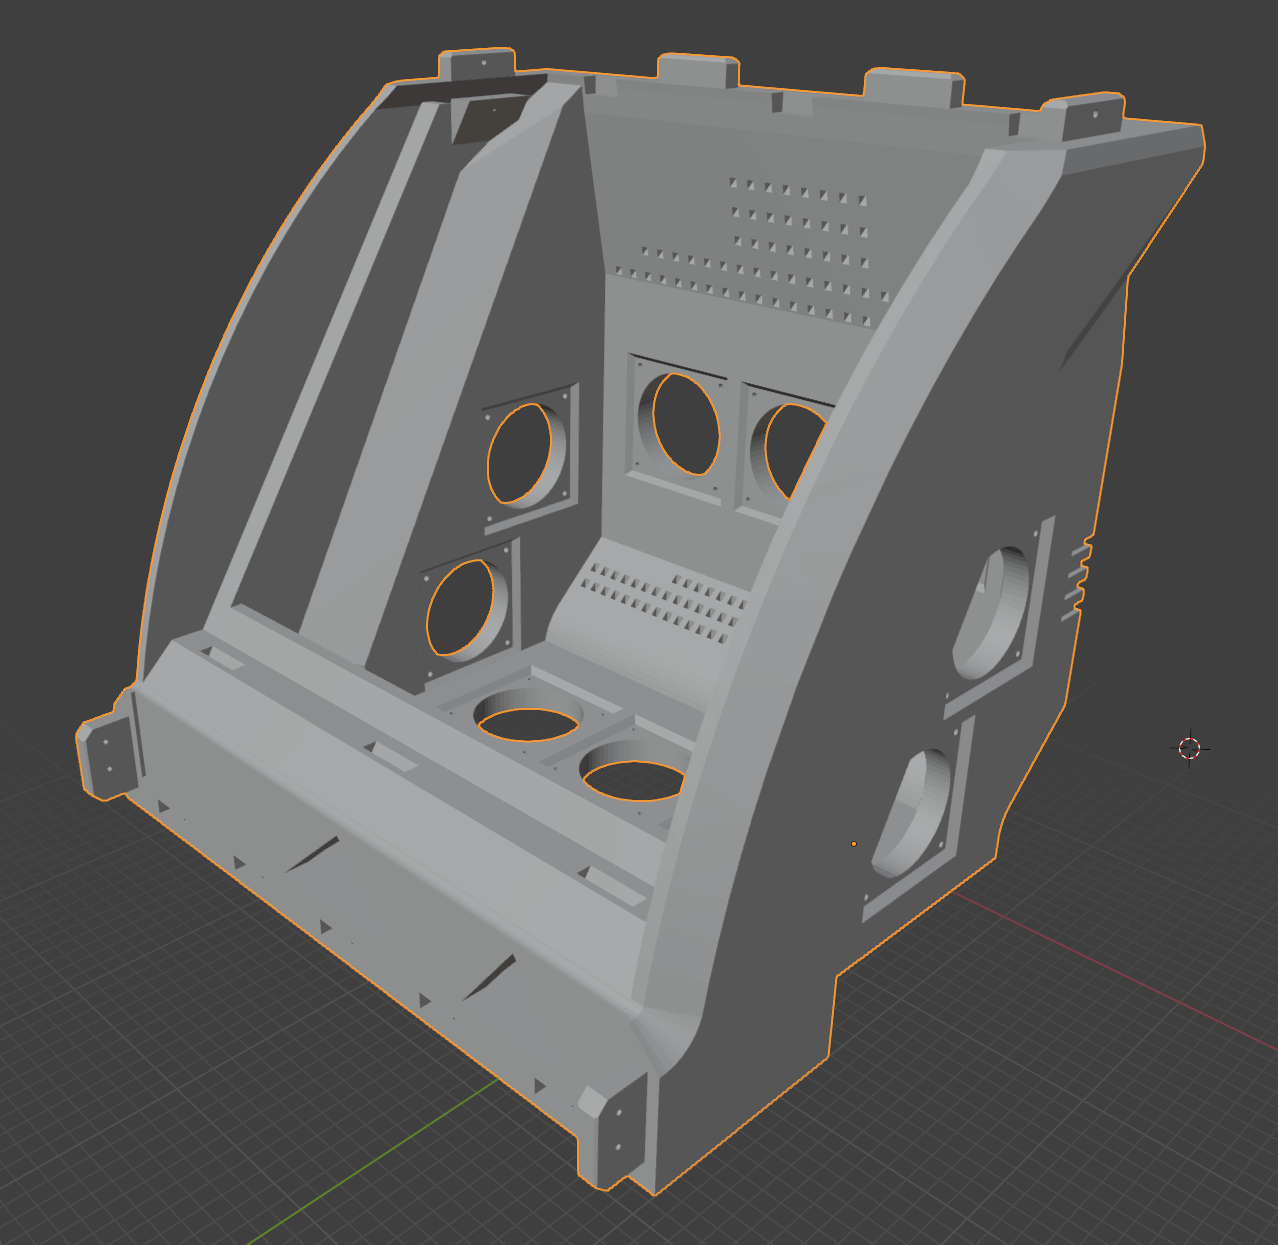
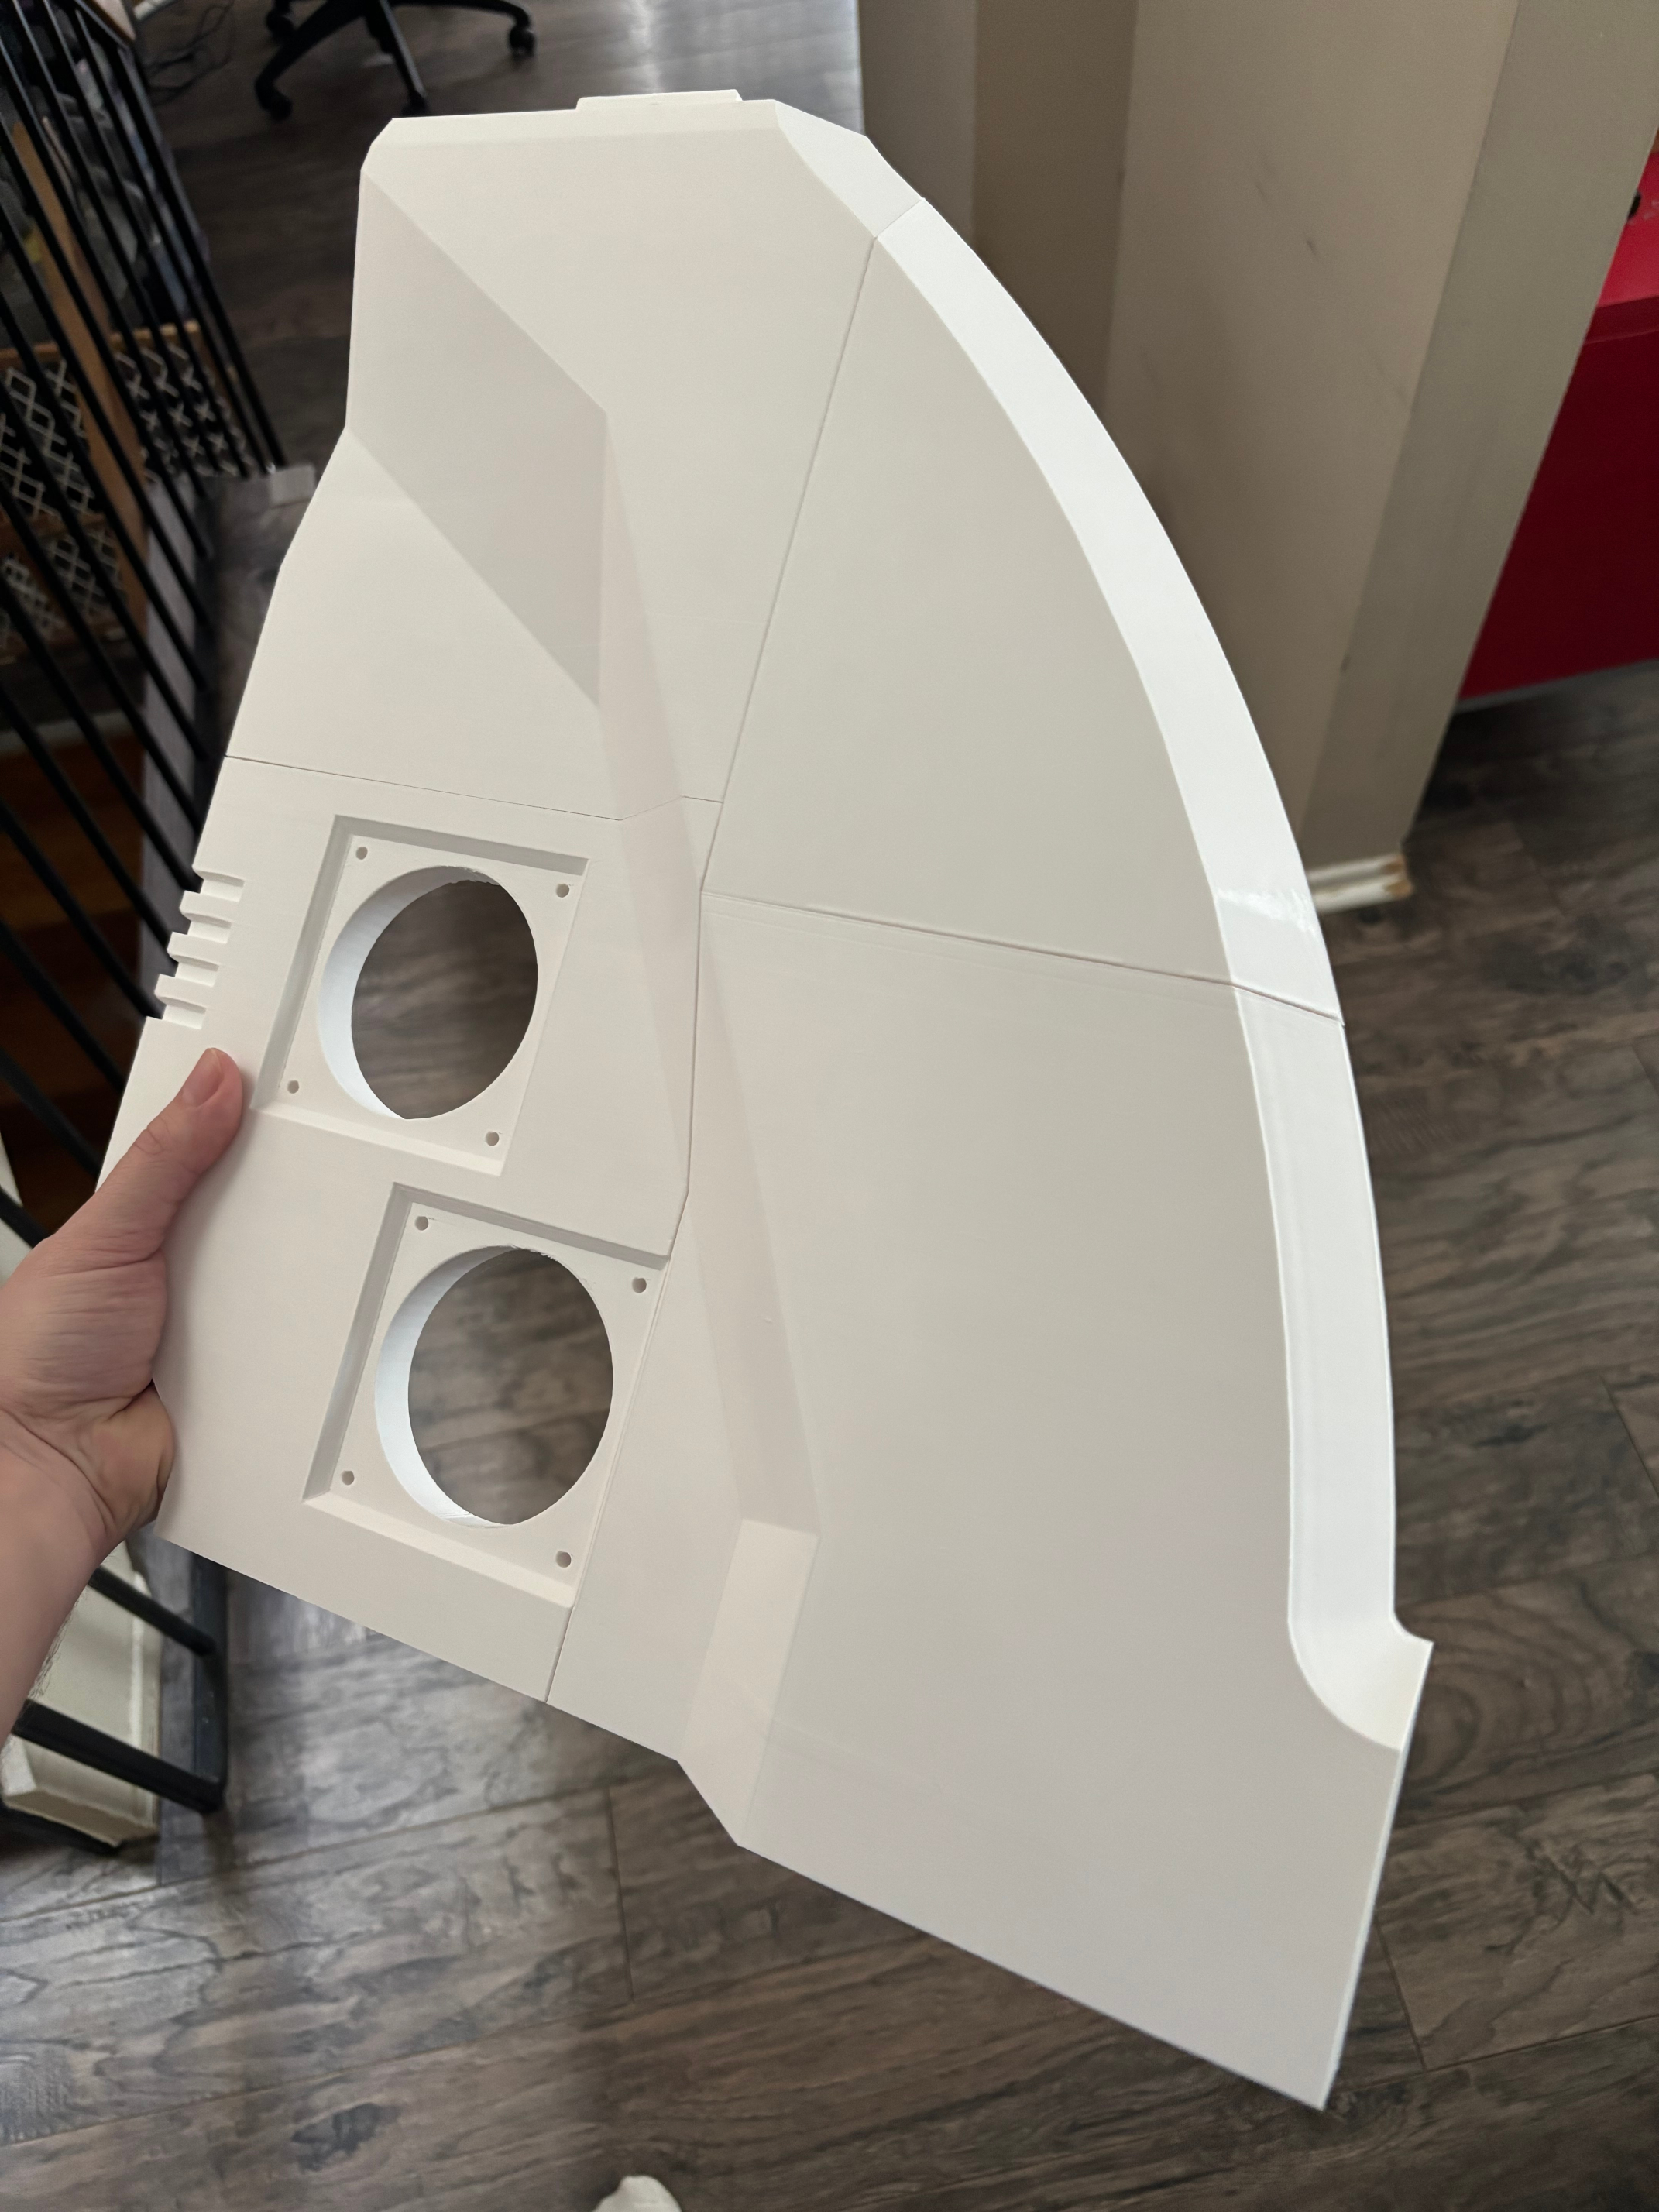
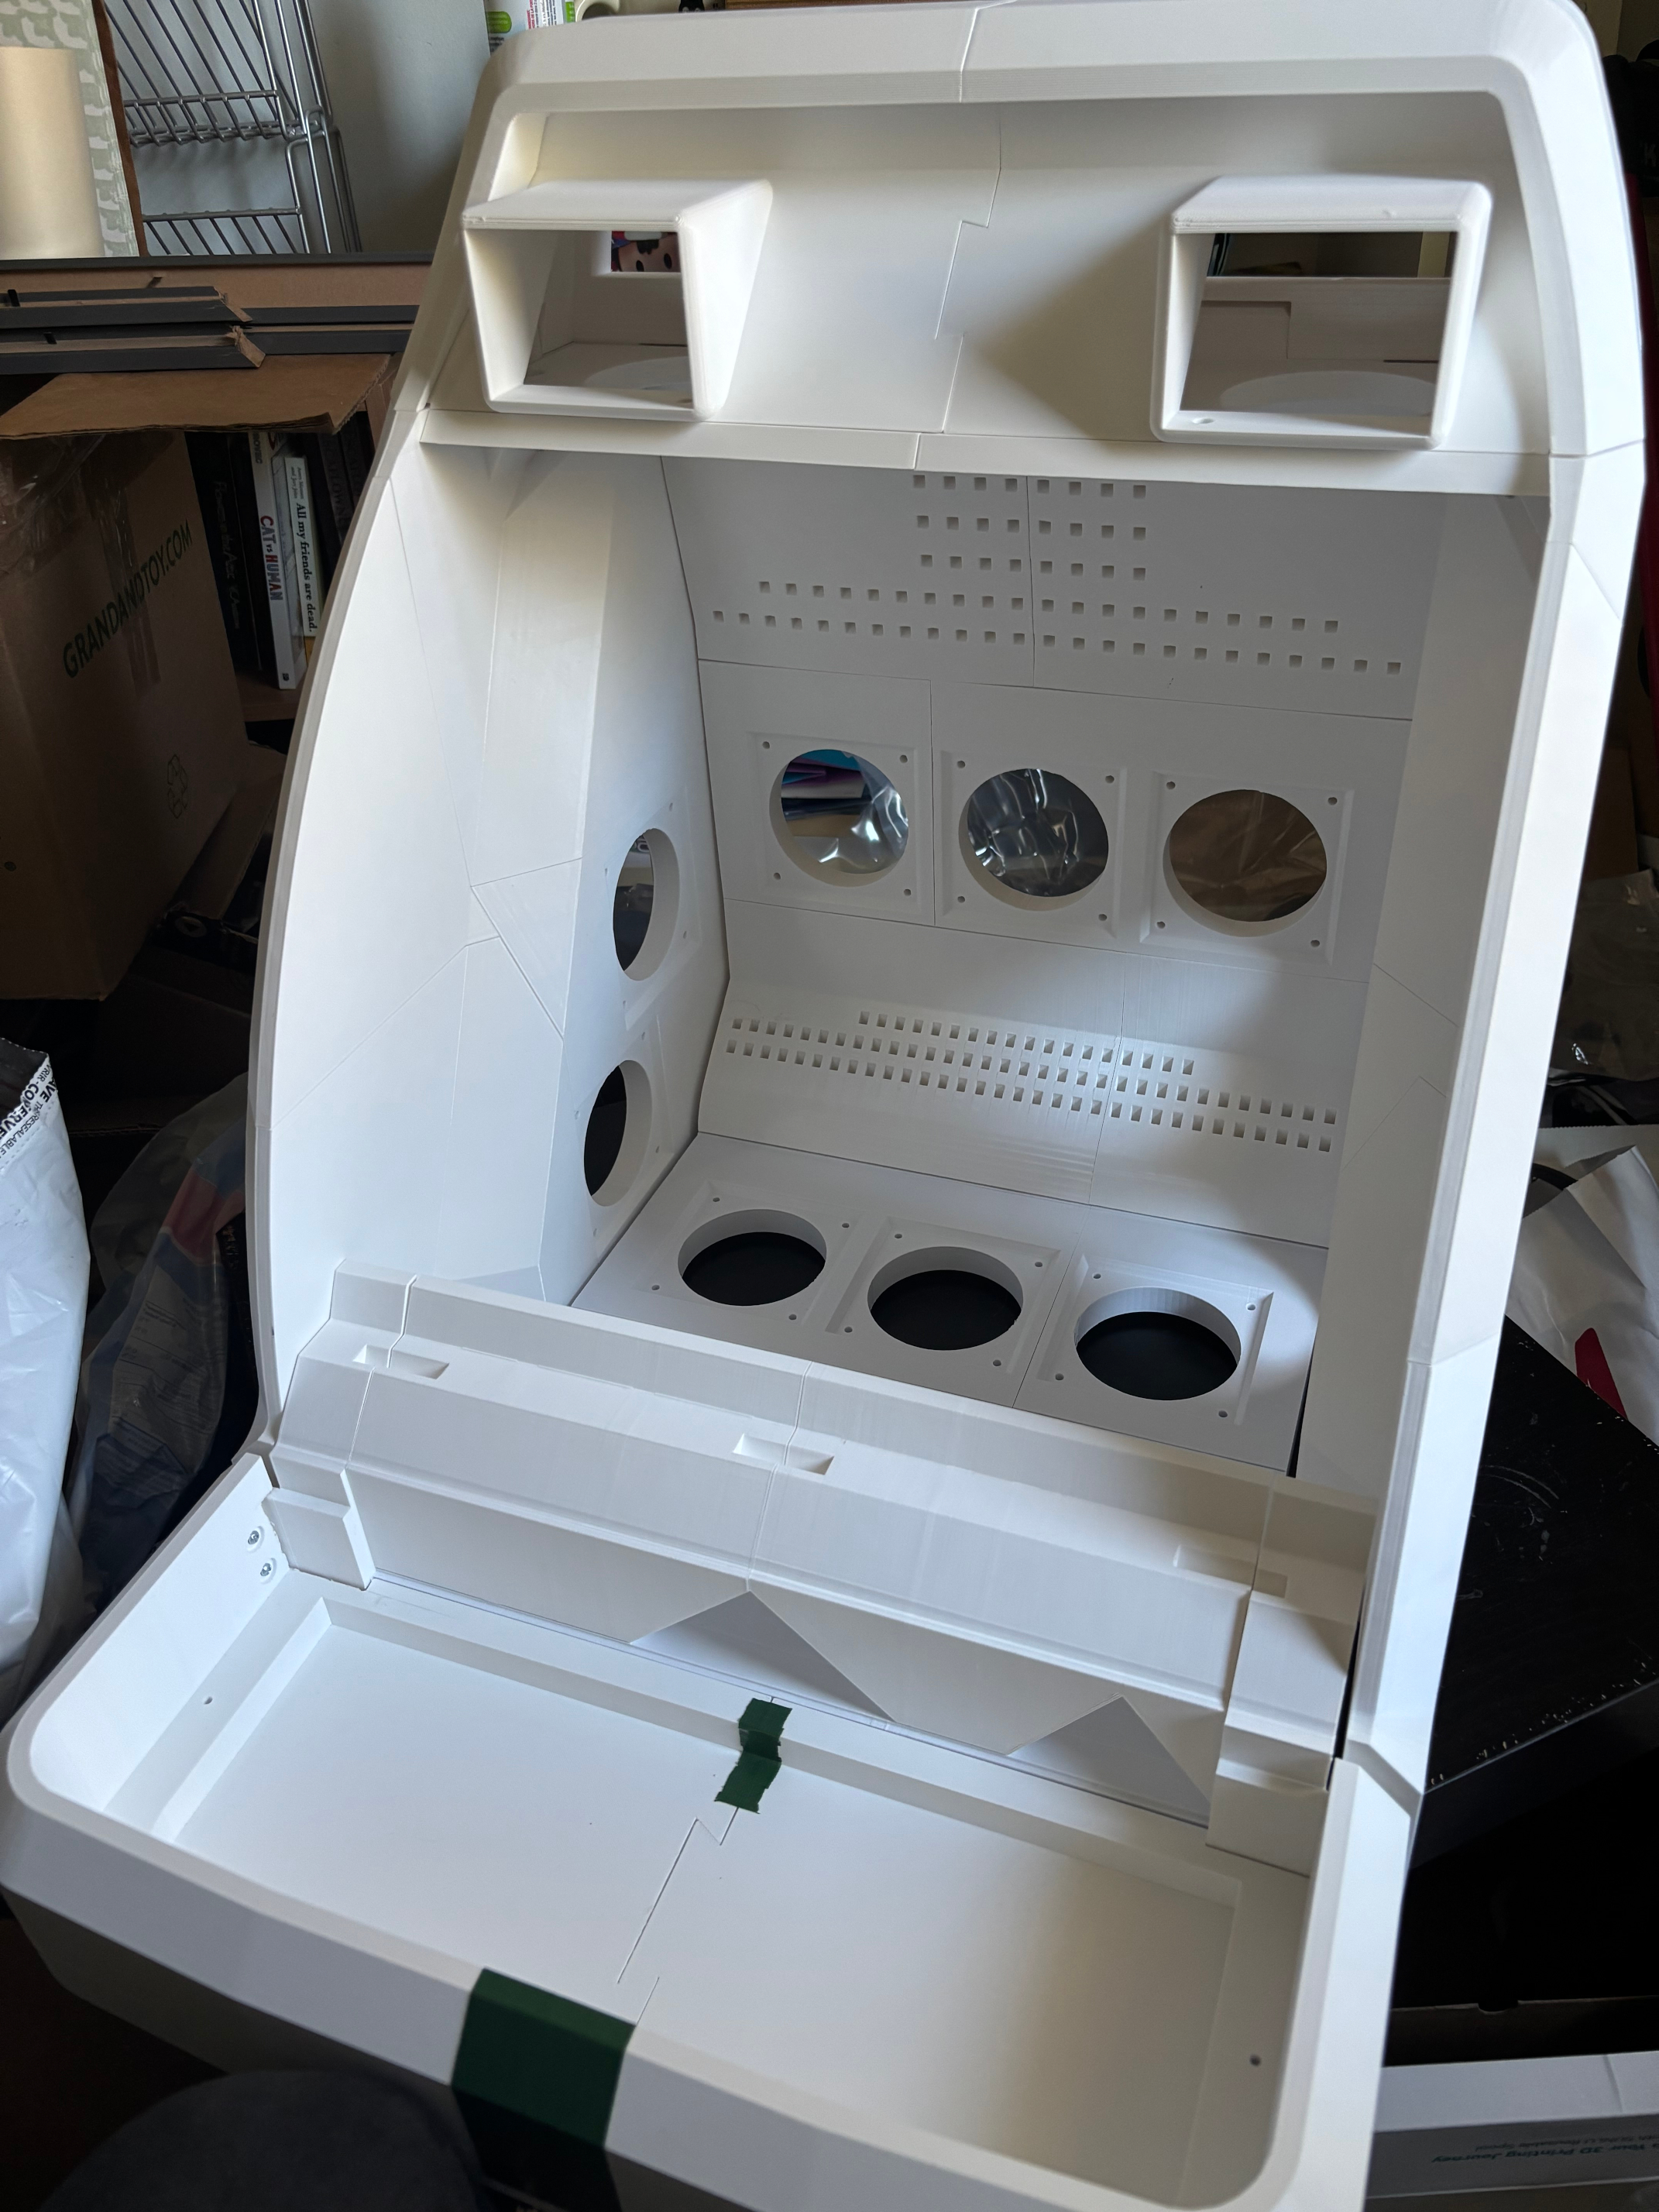
The MNAC design was intended to use a Raspberry Pi microcomputer, and still had the specific ports for attaching one, now scaled up to no longer fit a Pi. Similarly, the controller box top and front both now had holes that were larger than arcade buttons, and laid out incorrectly. To resolve these, I exported the main body as an OBJ 3D model, and imported it into Blender to edit it manually. I started by cleaning up and removing all the ports, replacing them with flat geometry.
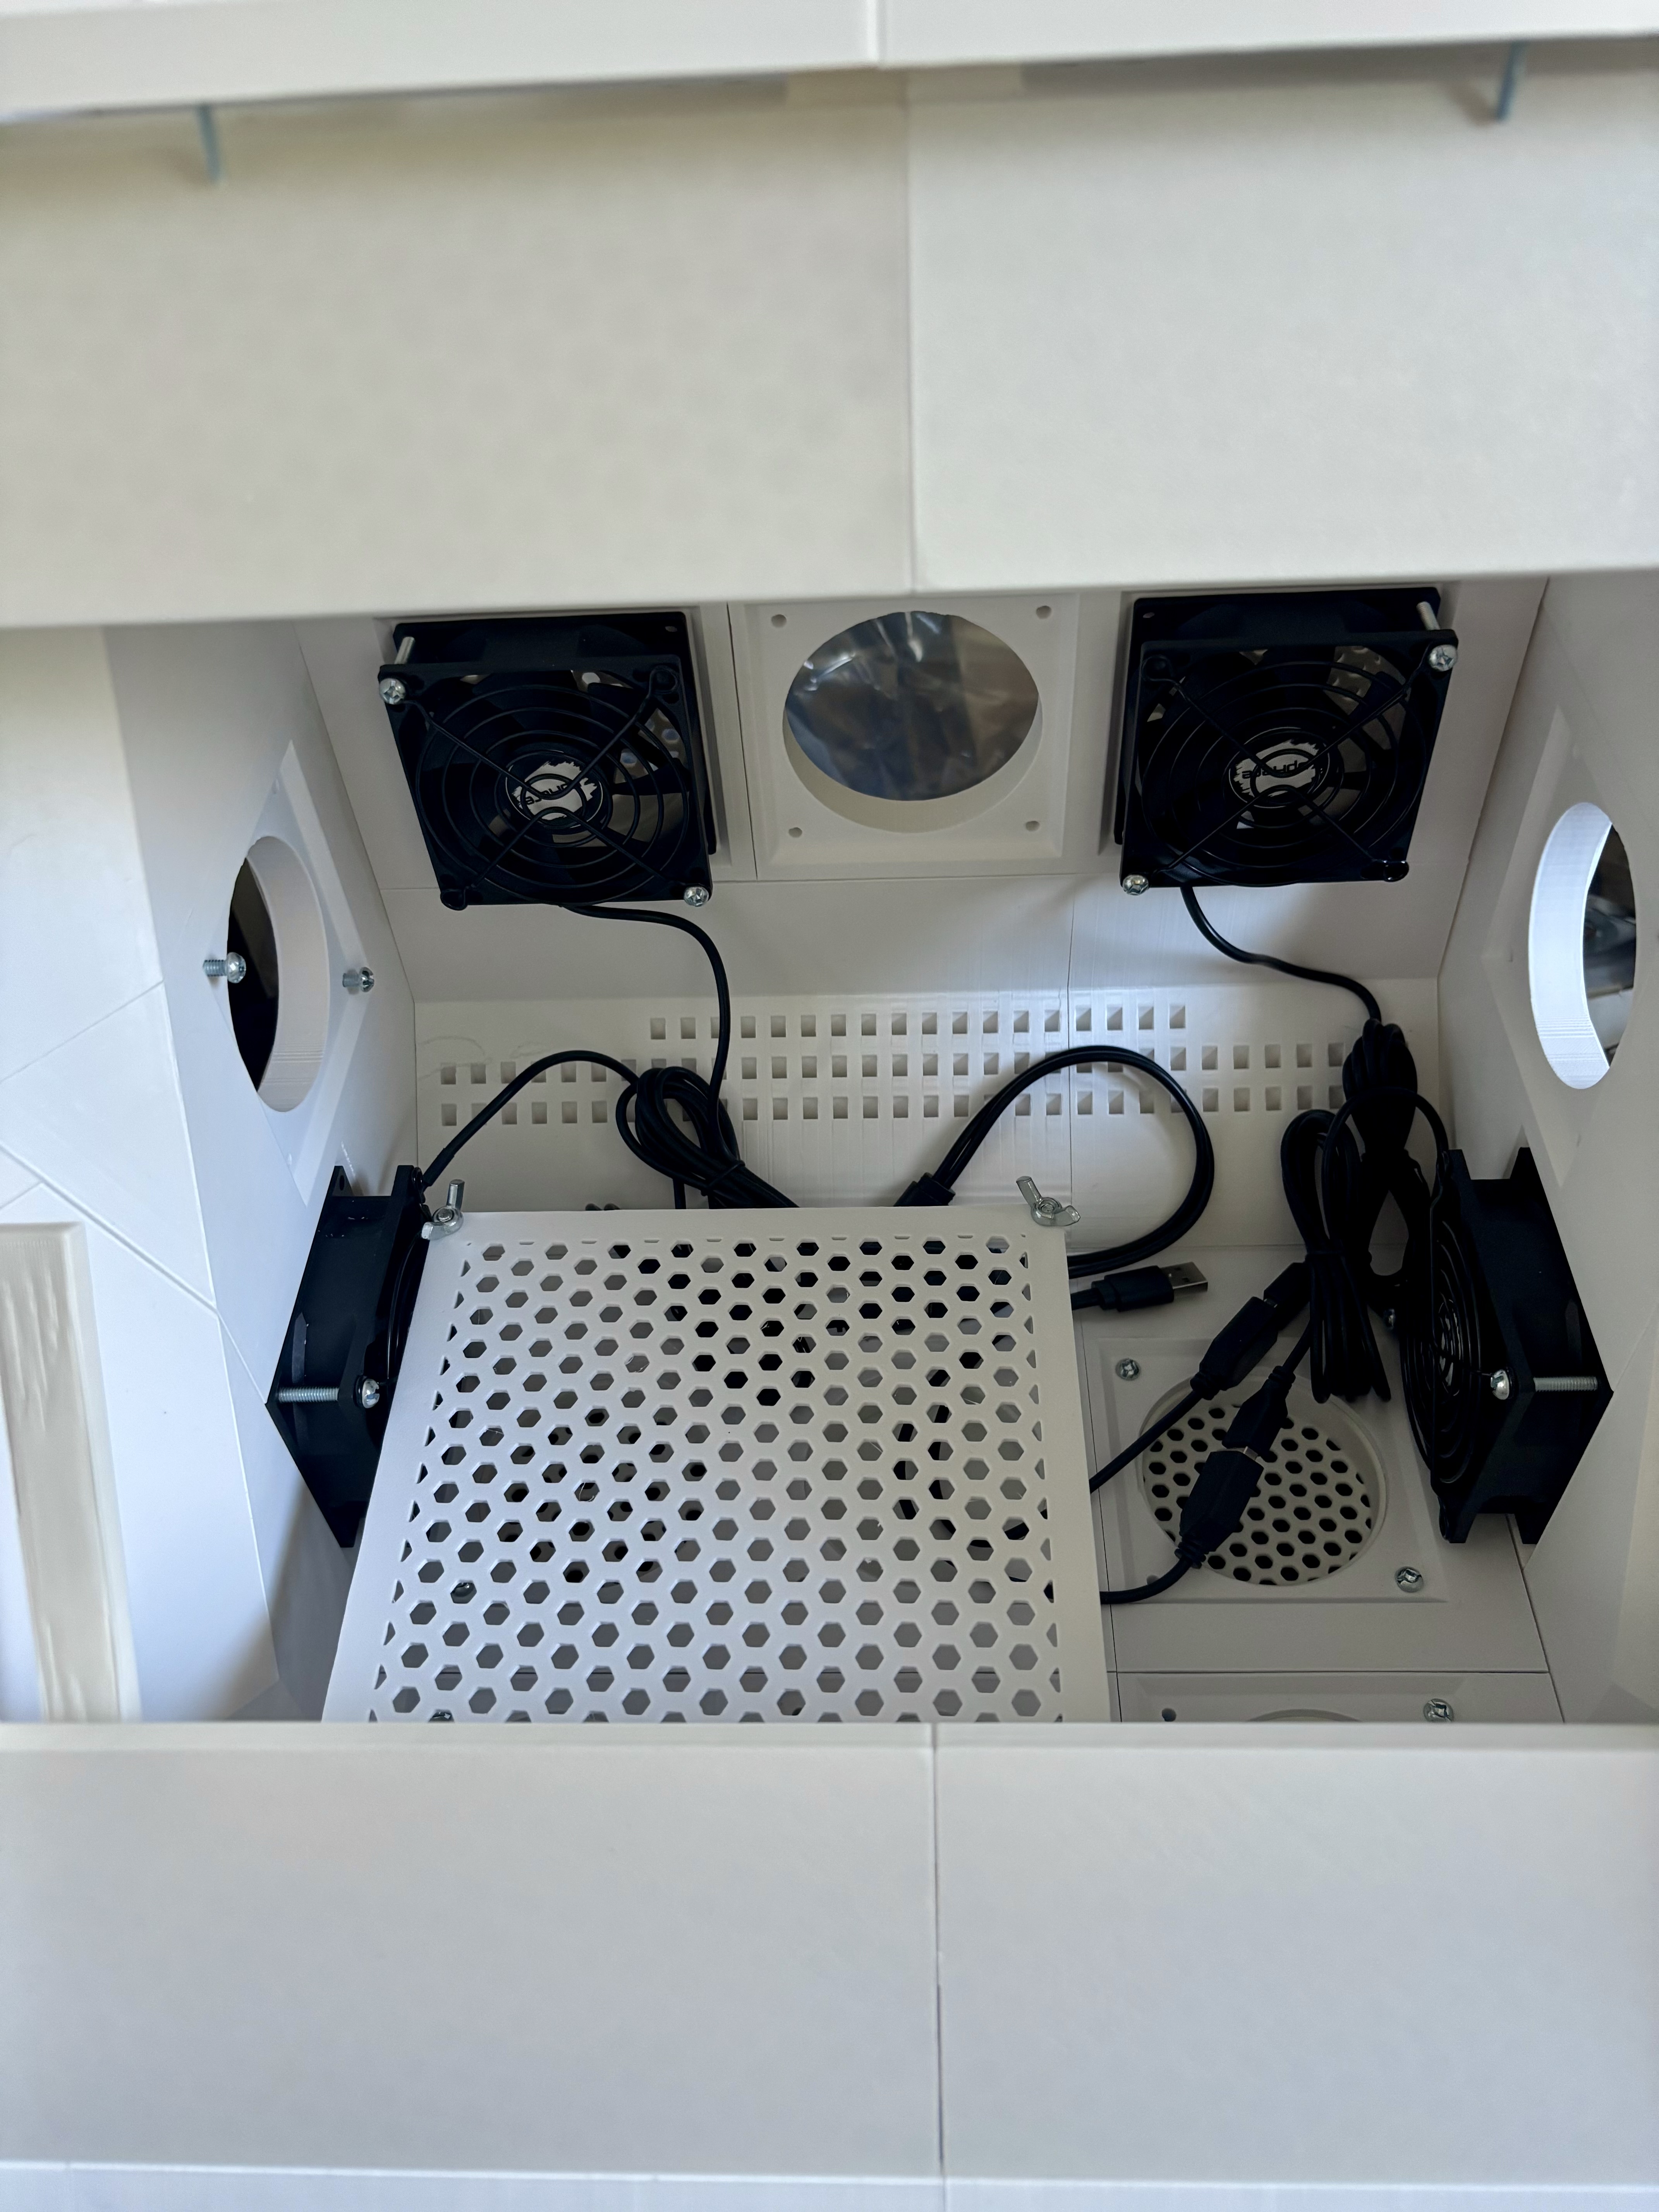
It had occurred to me that if I used a standard port for all the openings, I could easily design attachments, covers, plugs, etc. And I knew I needed to incorporate fans into the design, so I designed a "negative" model, a series of cylinders in the shape of an opening for an 80mm stock computer case fan and its screws. I arrayed copies of it on the sides/back/bottom of the model, and used the Boolean modifier to "subtract" those models from the arcade body, leaving open spaces.
I also substantially simplified (or complicated) some details of the geometry and attachment points, assuming that the old screw sizing and other features wouldn't work. I was correct, although my planning wasn't ideal, and I wouldn't realize that until later.
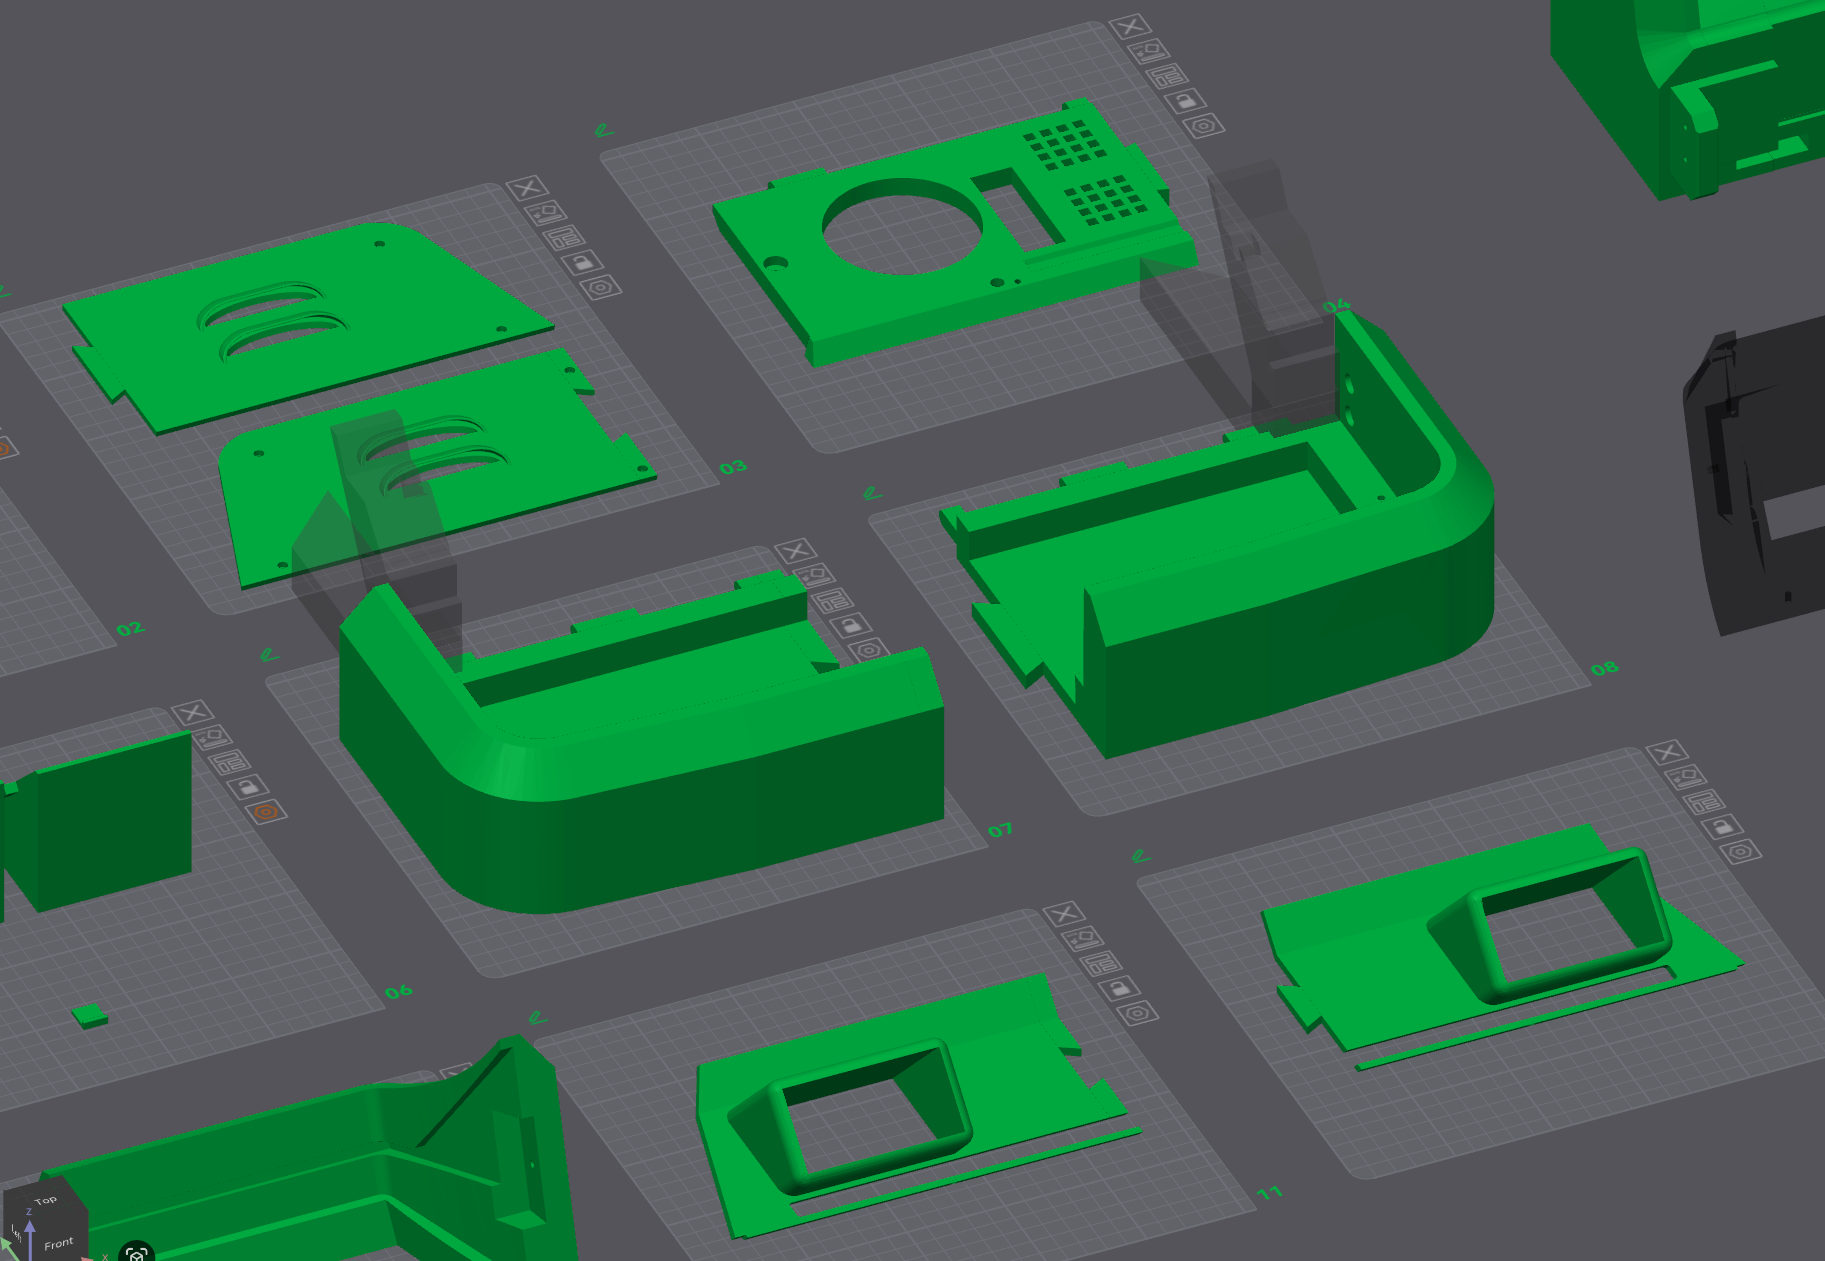
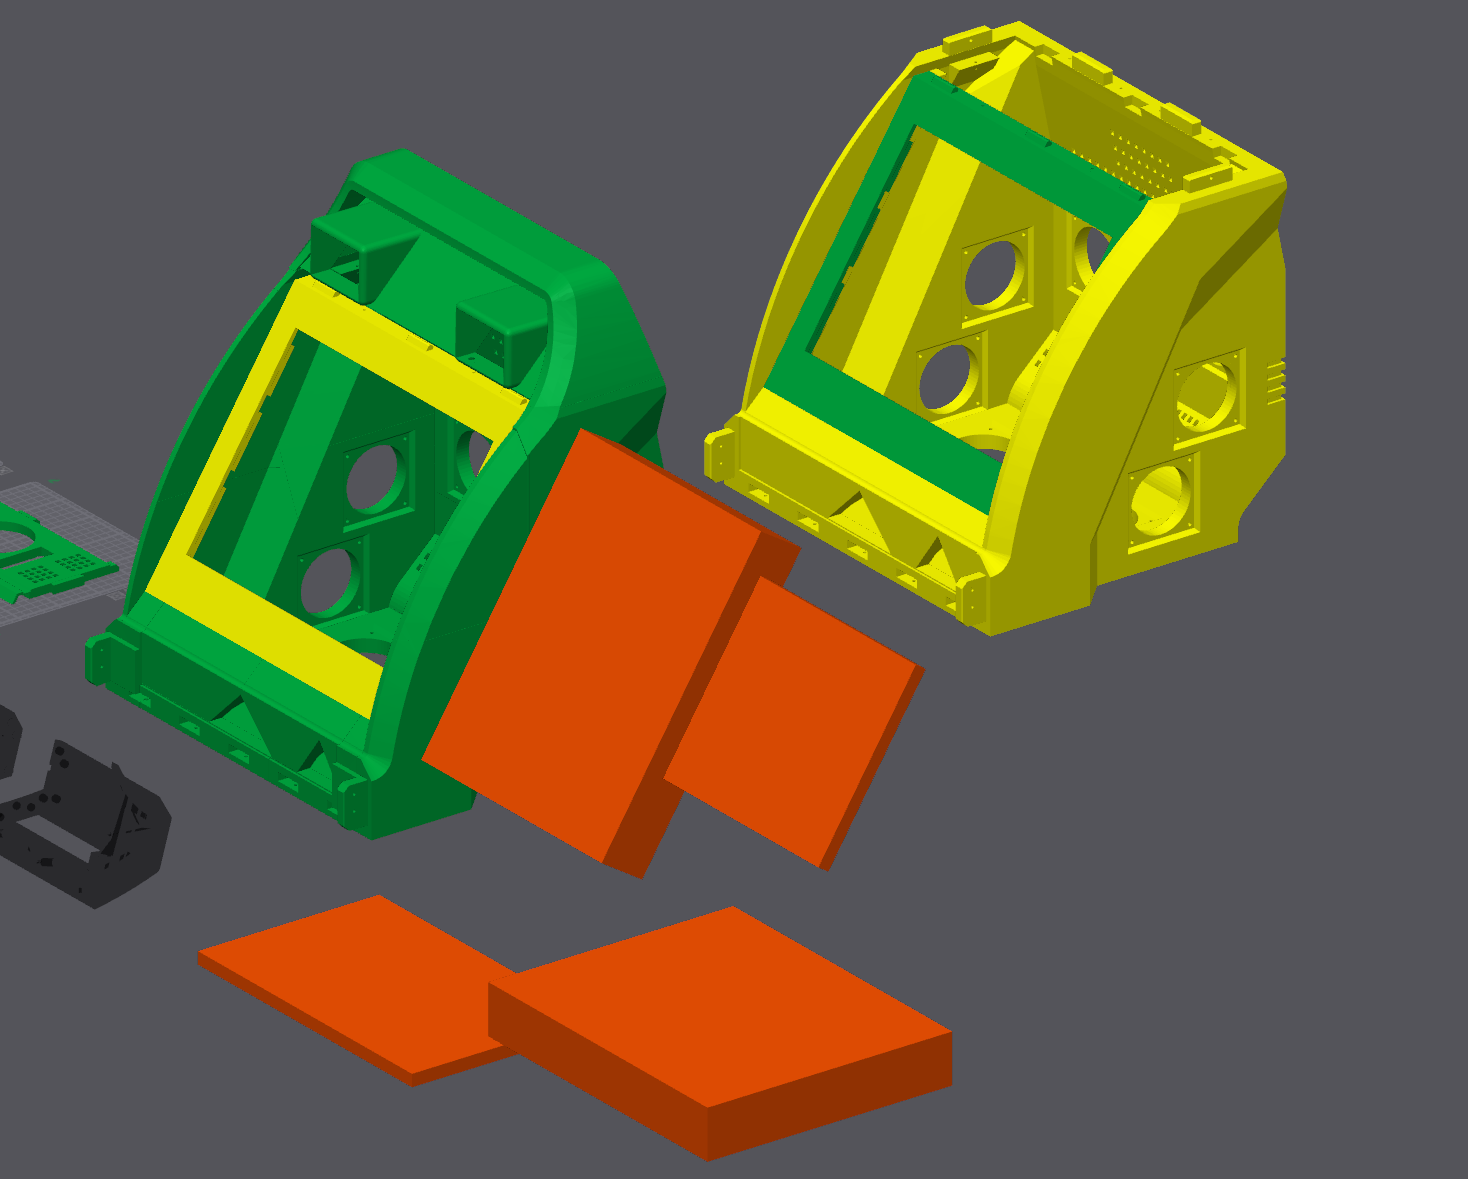
I then used Bambu Studio to cut this body model into four major pieces: two sides, upper back, and lower back with bottom, which were each then divided with further cuts into four pieces each.
When cutting those pieces, I used Bambu's ability to add connectors (posts and corresponding indents, dovetail joints, etc) in the parts, so they could snap together and be secured with nothing but glue. This had mixed results, especially in places I forgot to add posts early on during the process, but it was still very solid.
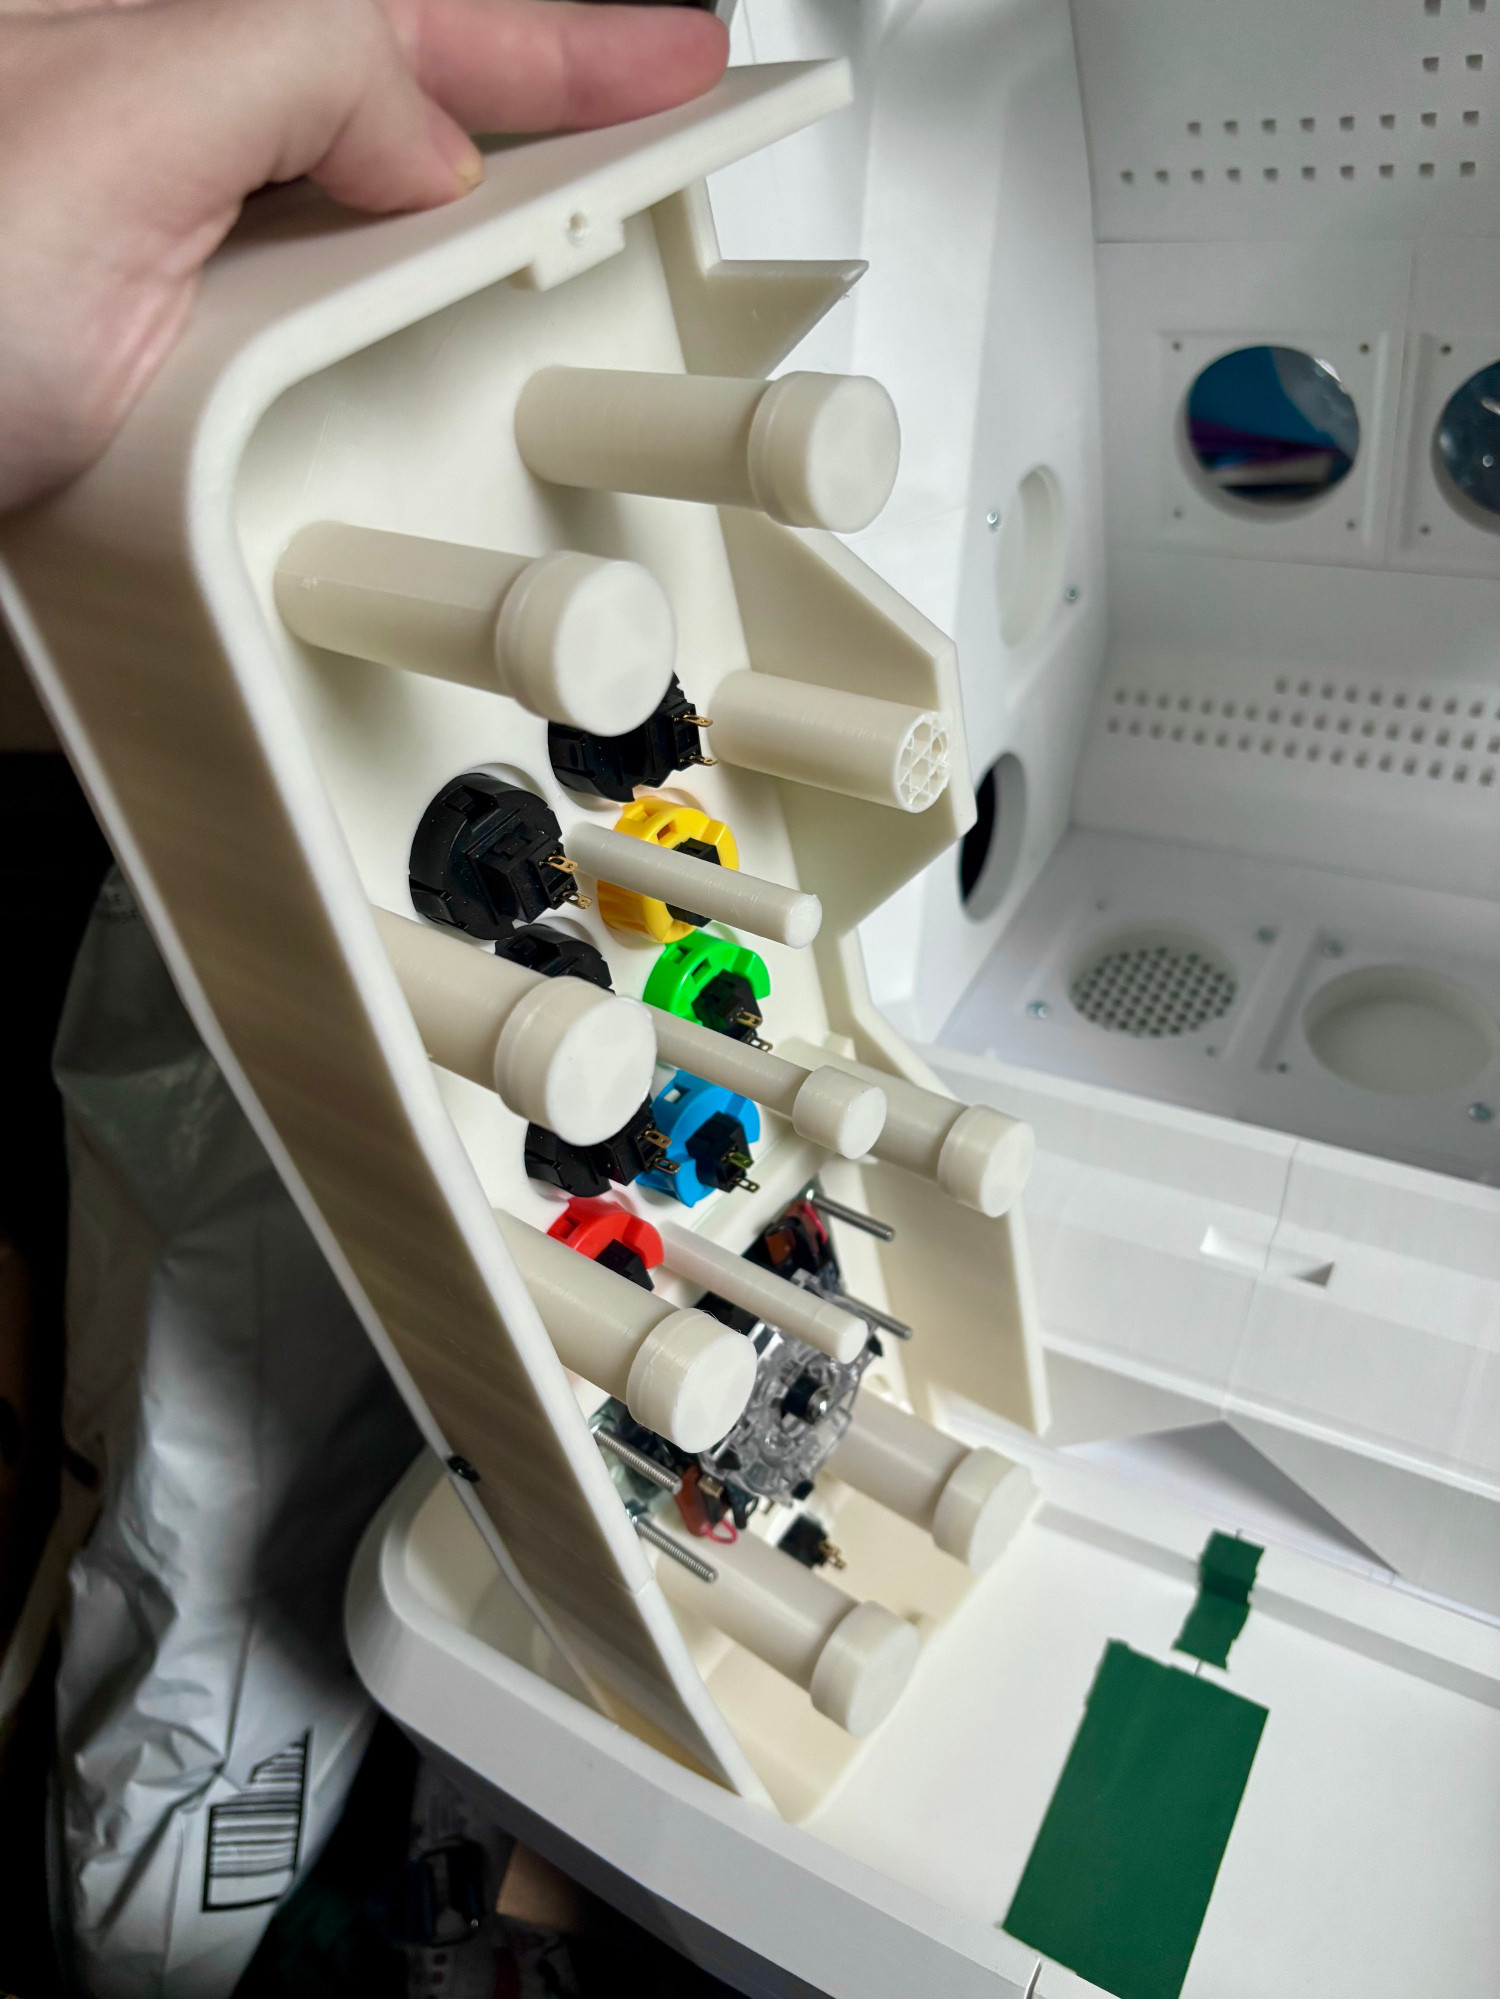
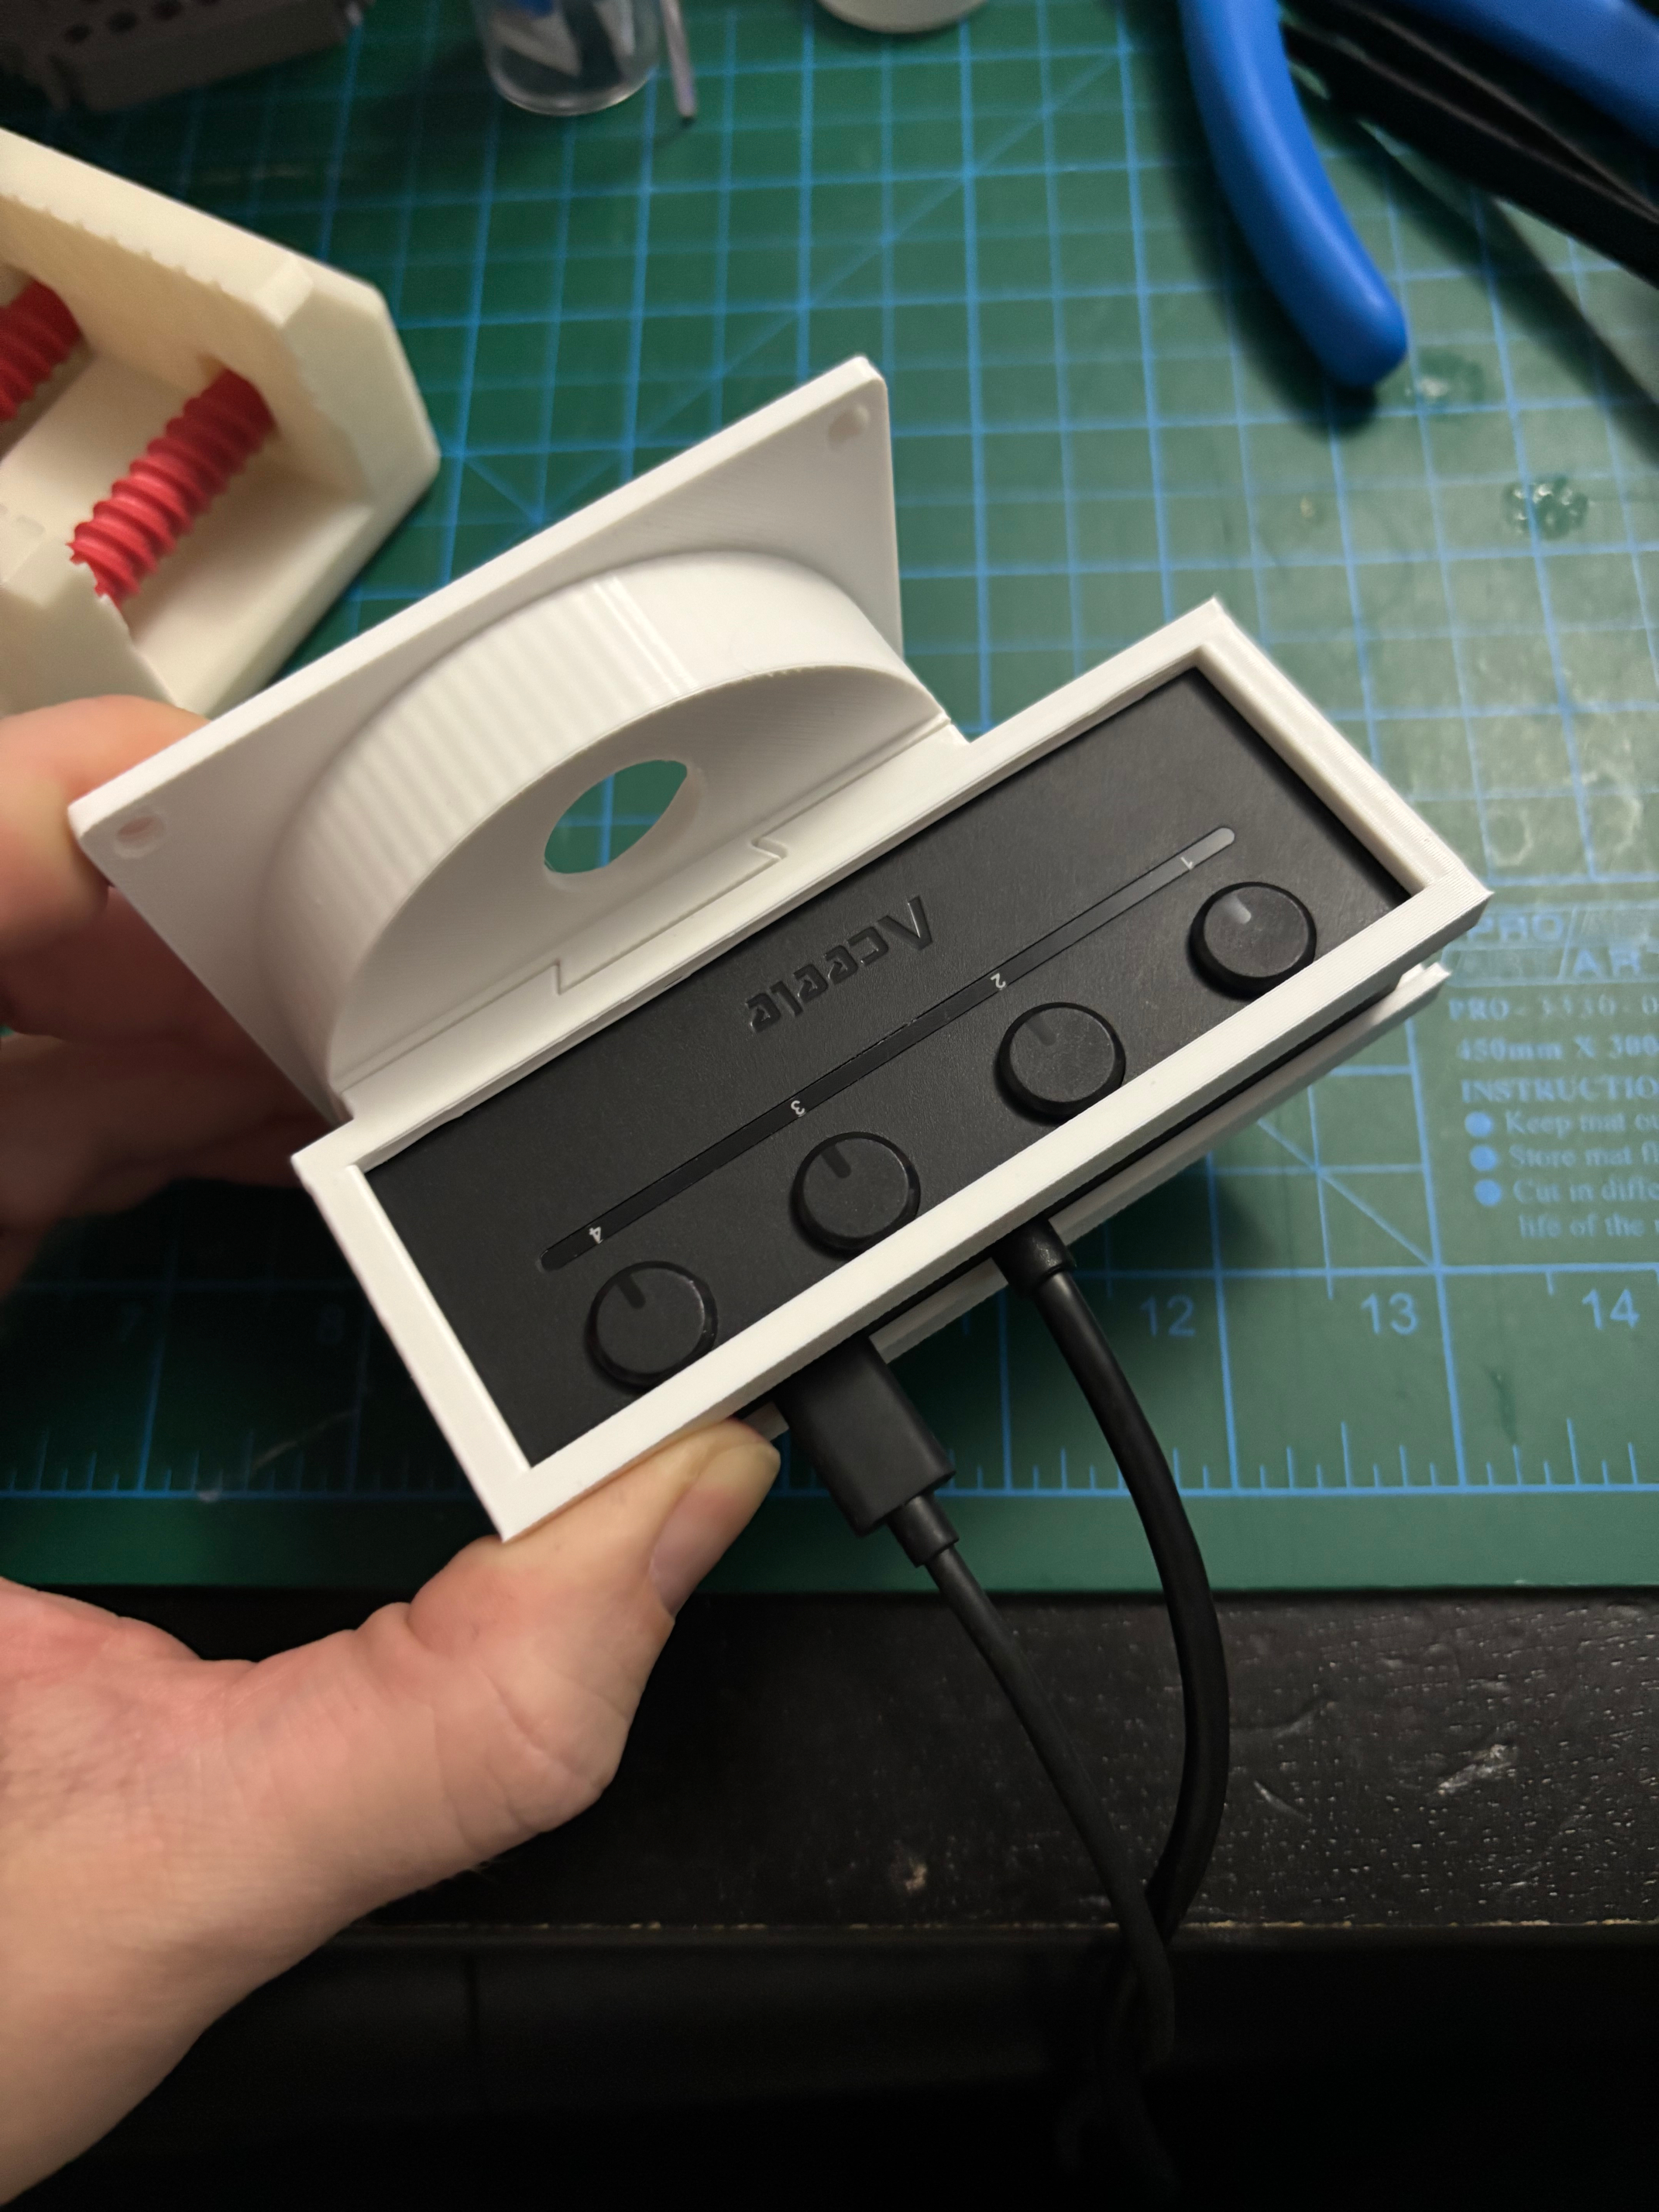
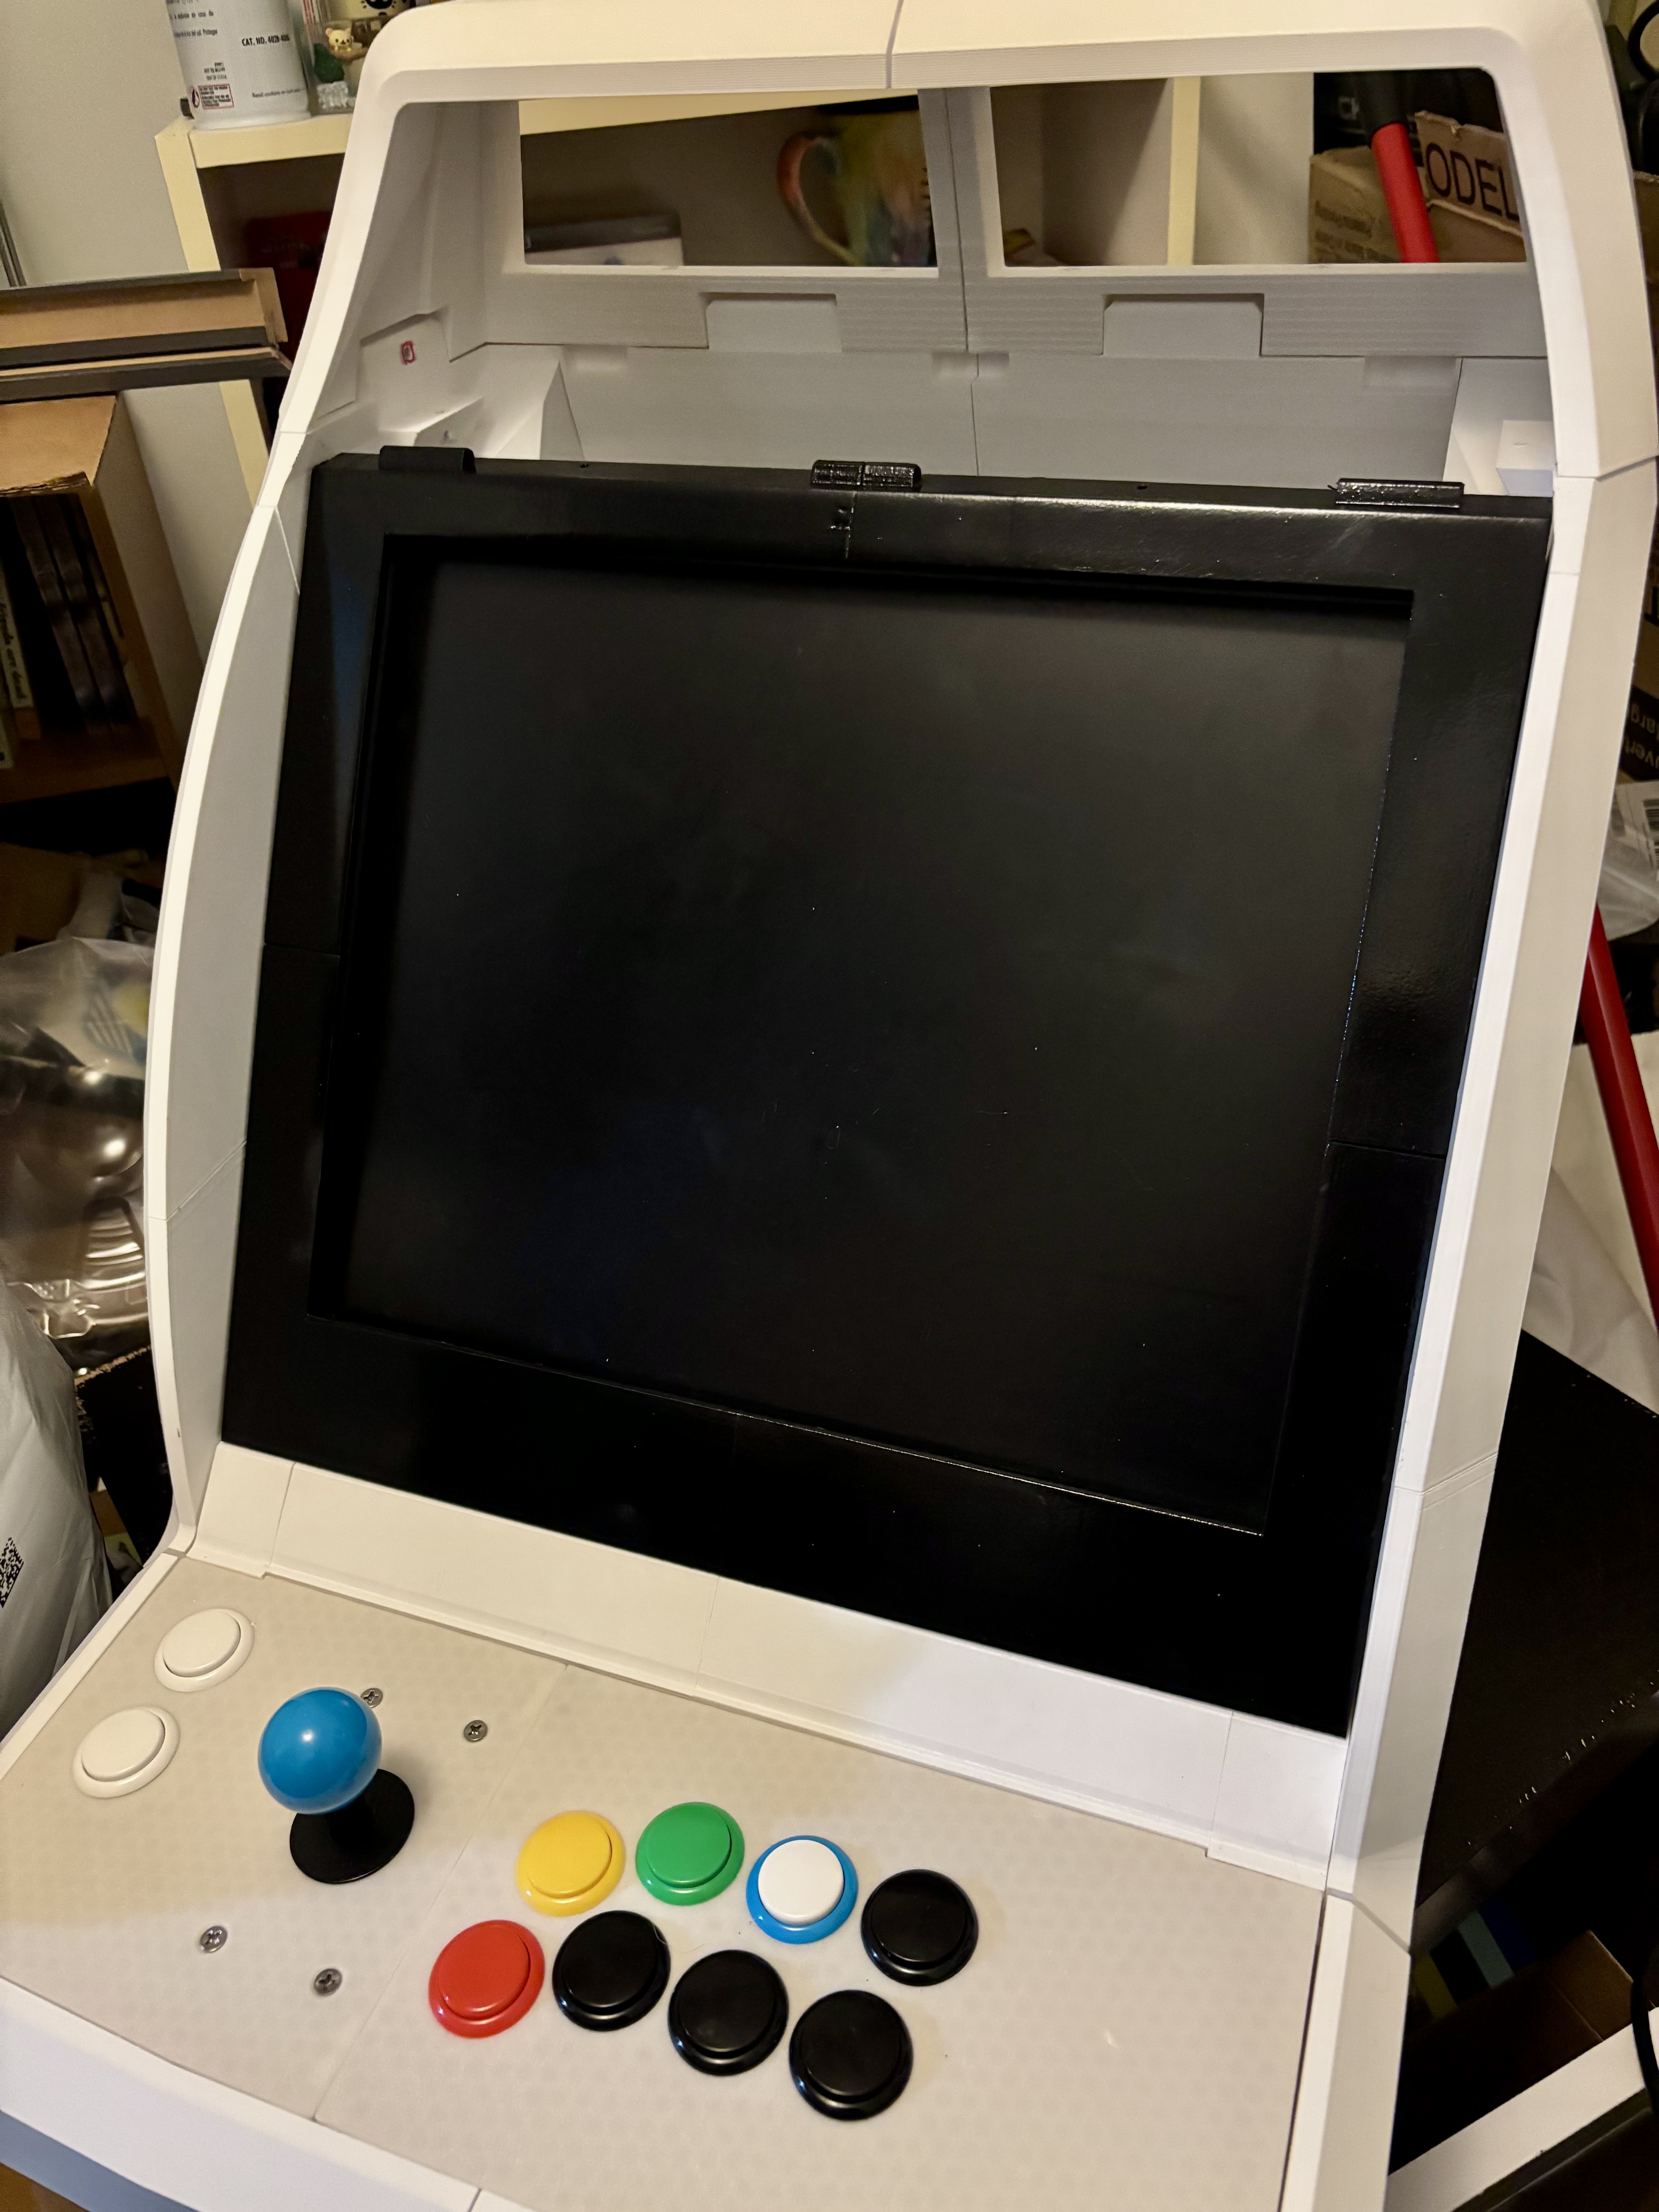
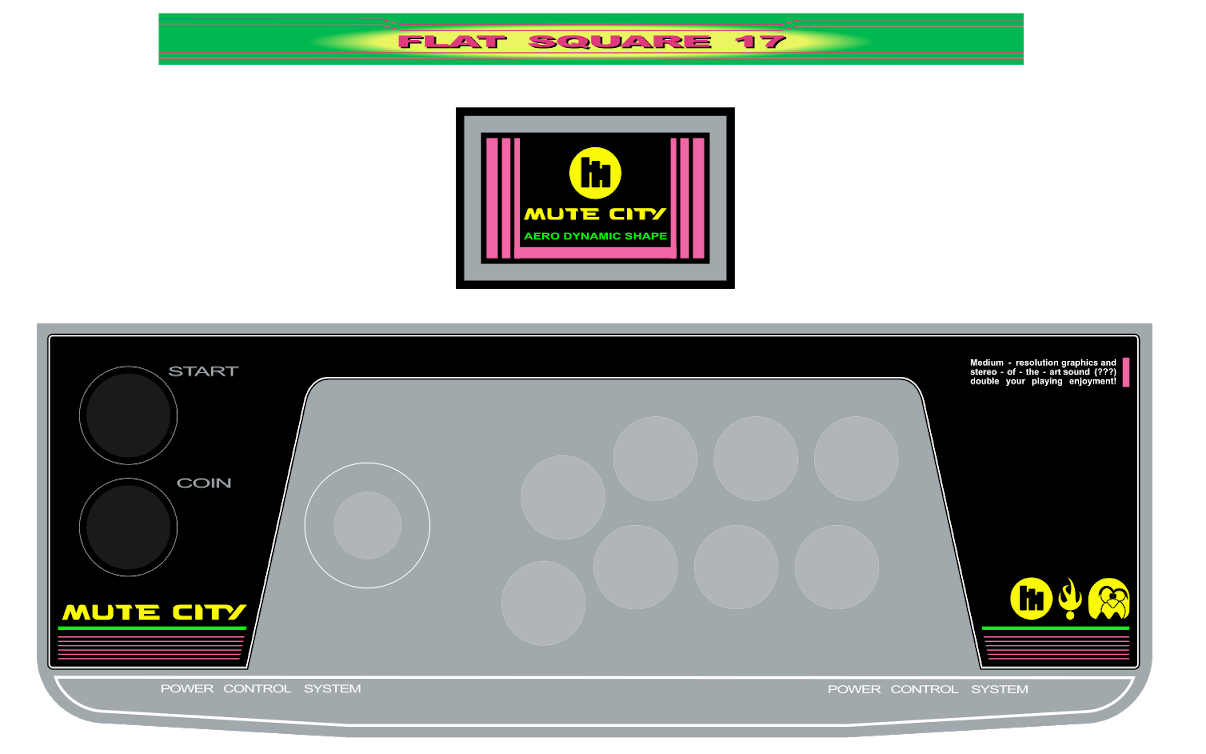
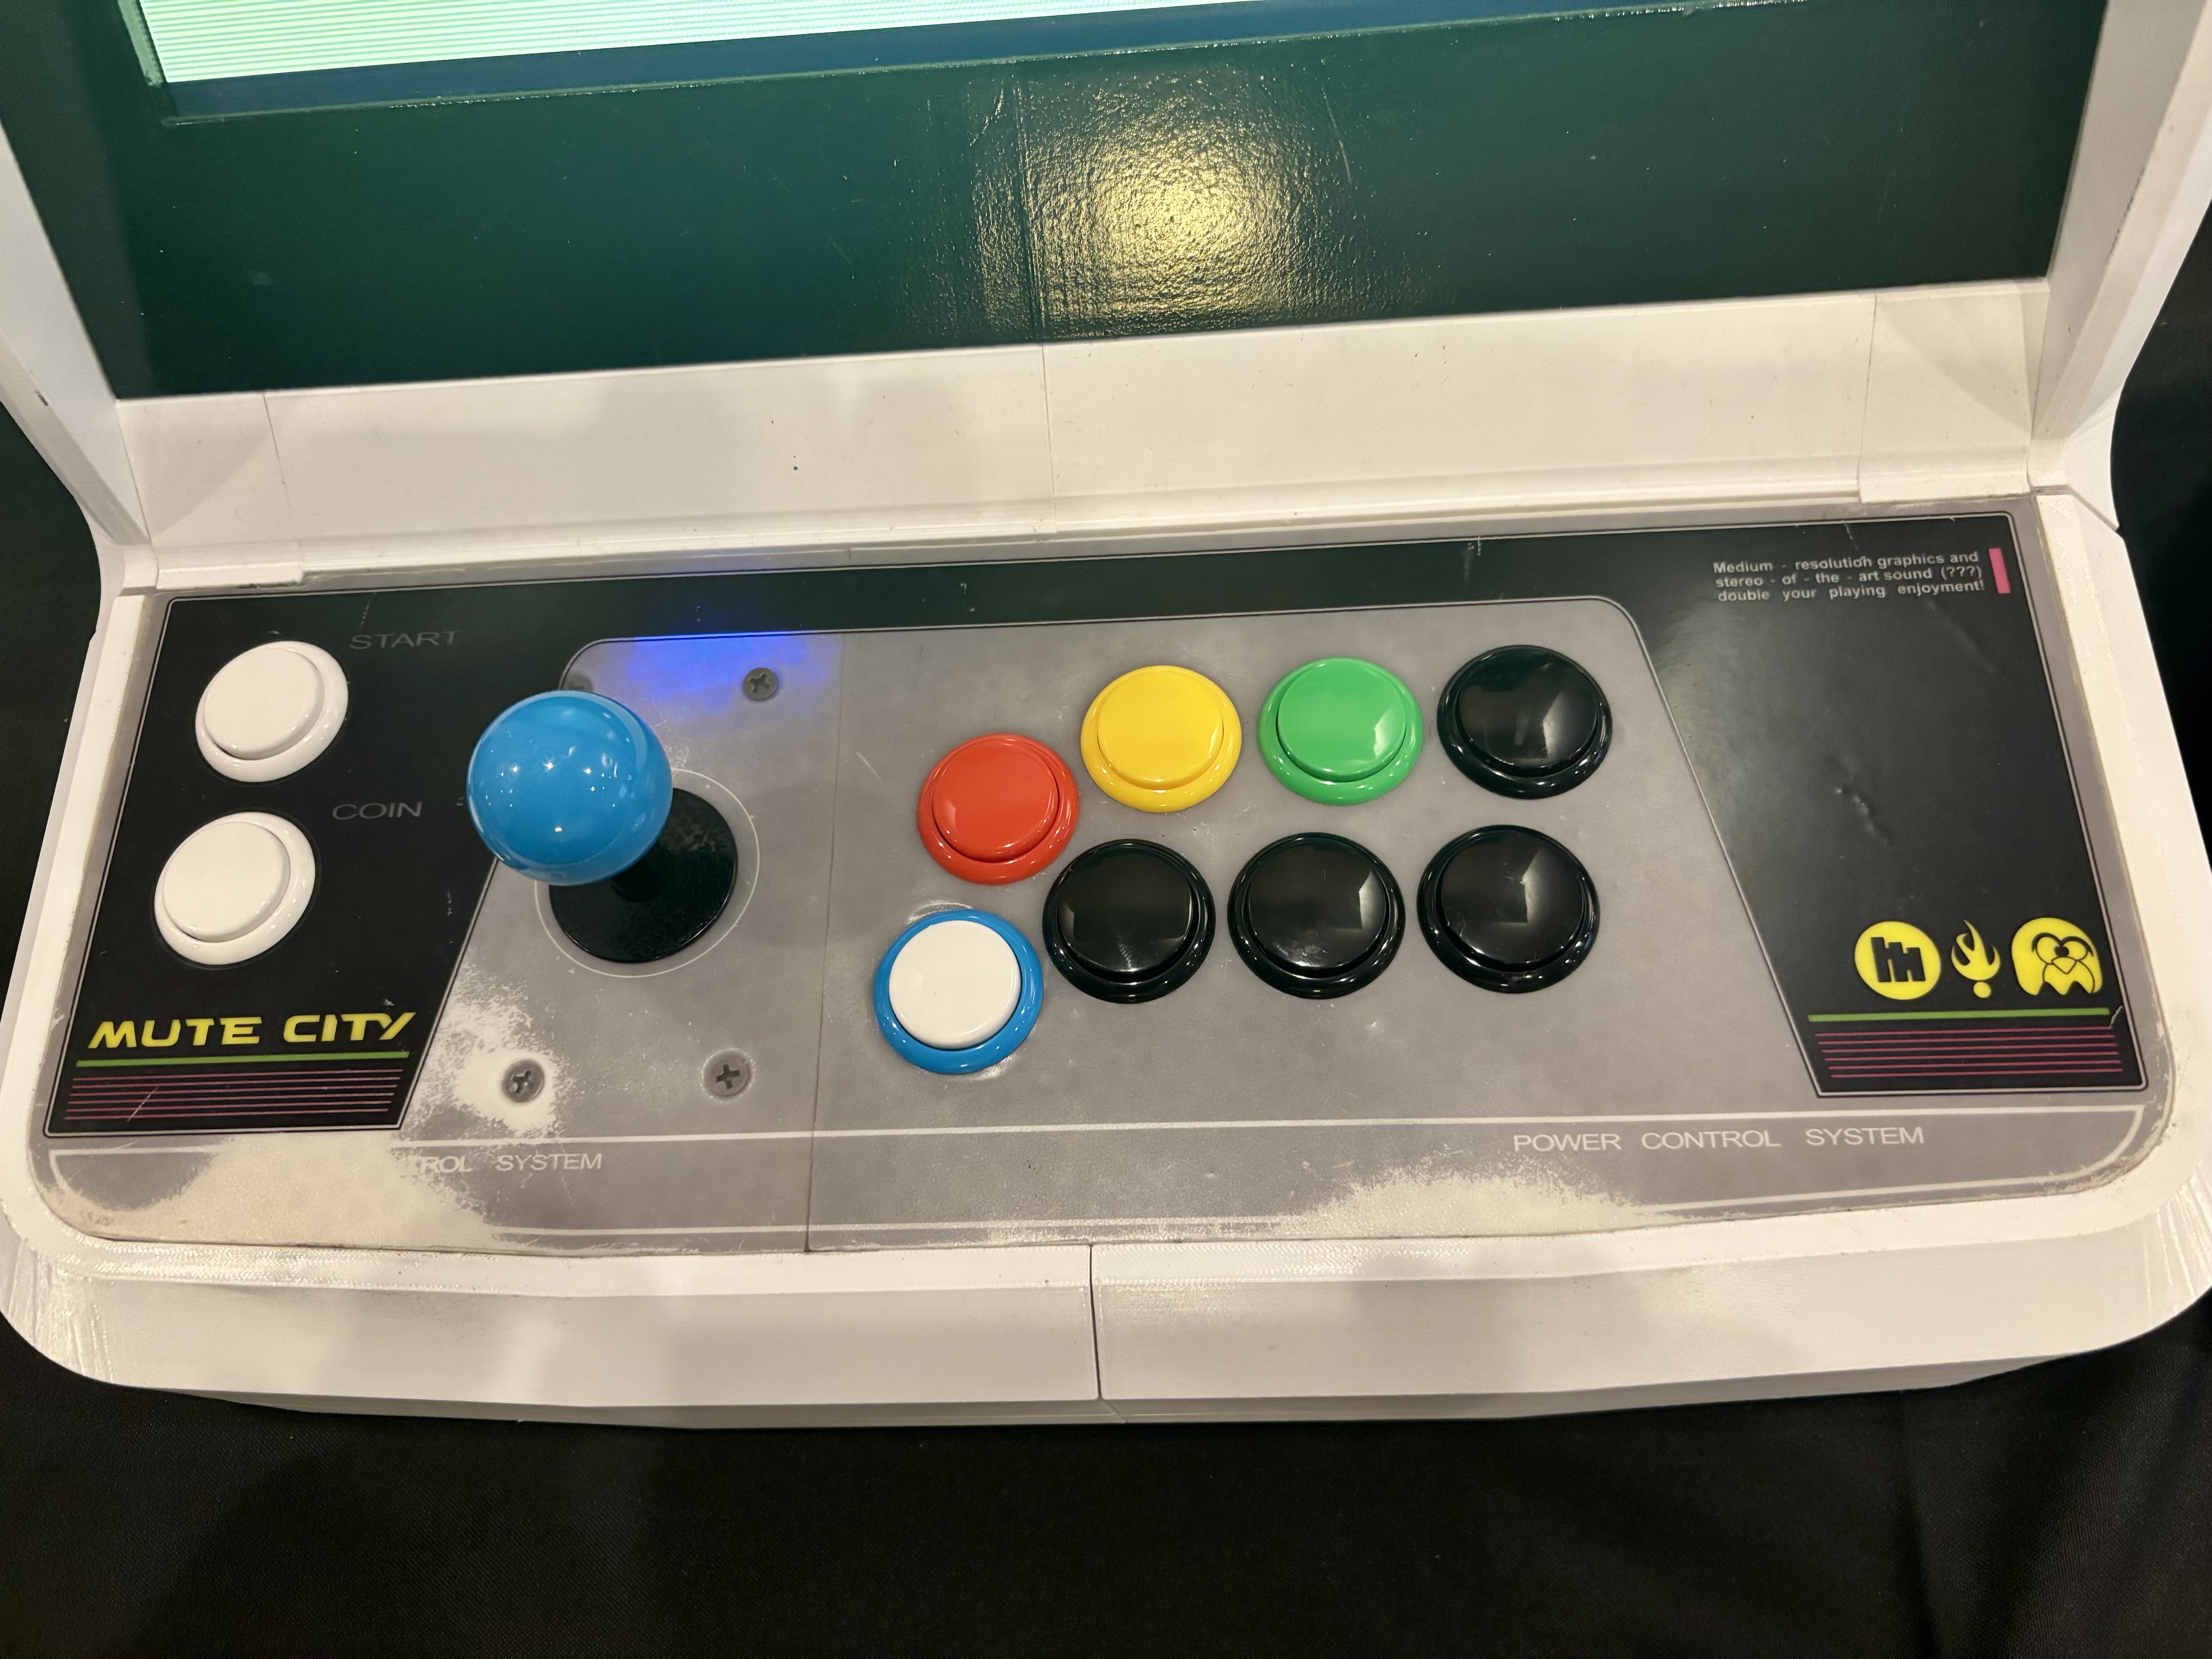
I would make similar edits and changes to the controller box and top later, once I had the main body model printed as a proof of concept. I did the same trick with Boolean modifiers, starting from a solid surface and "subtracting" the negative of a Vewlix control layout. This required some iteration as well, having to add posts to the underside of the controller box top, as the lack of supports made it worryingly flexible when buttons were pressed.
Many of the remaining MNAC model pieces, I was able to use with no changes beyond scaling up and adding supports/joints/attachments.
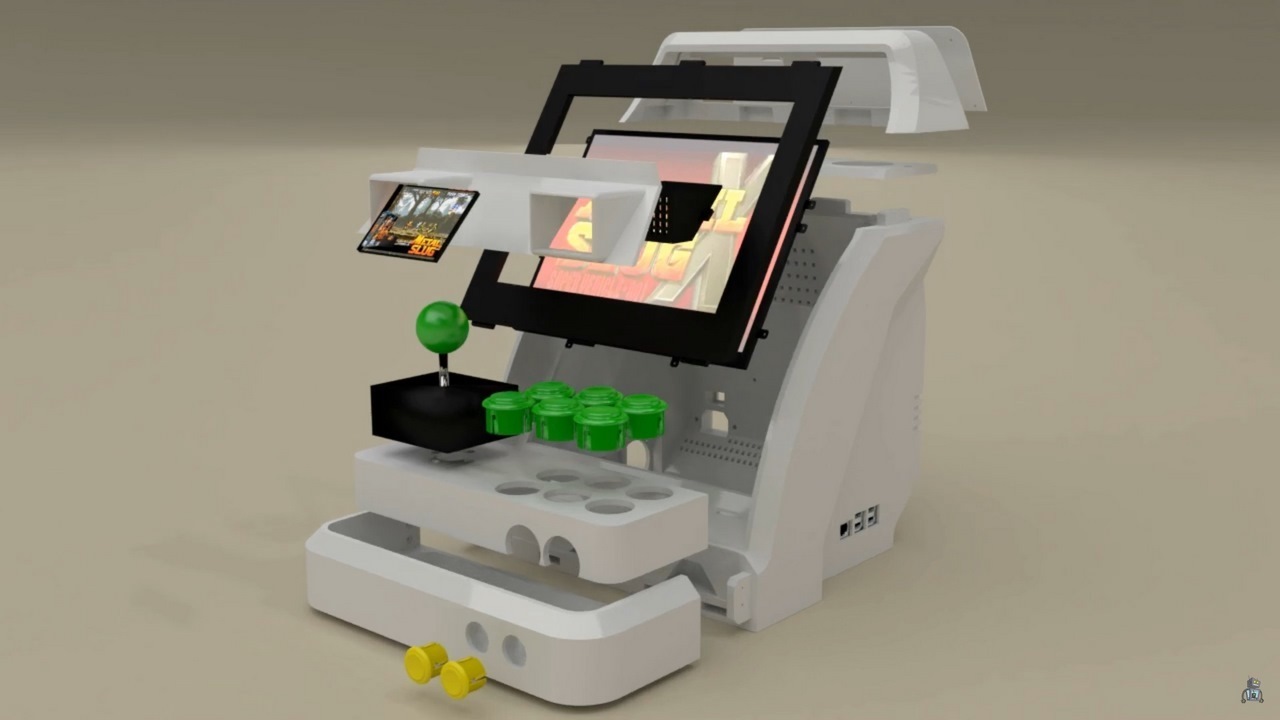
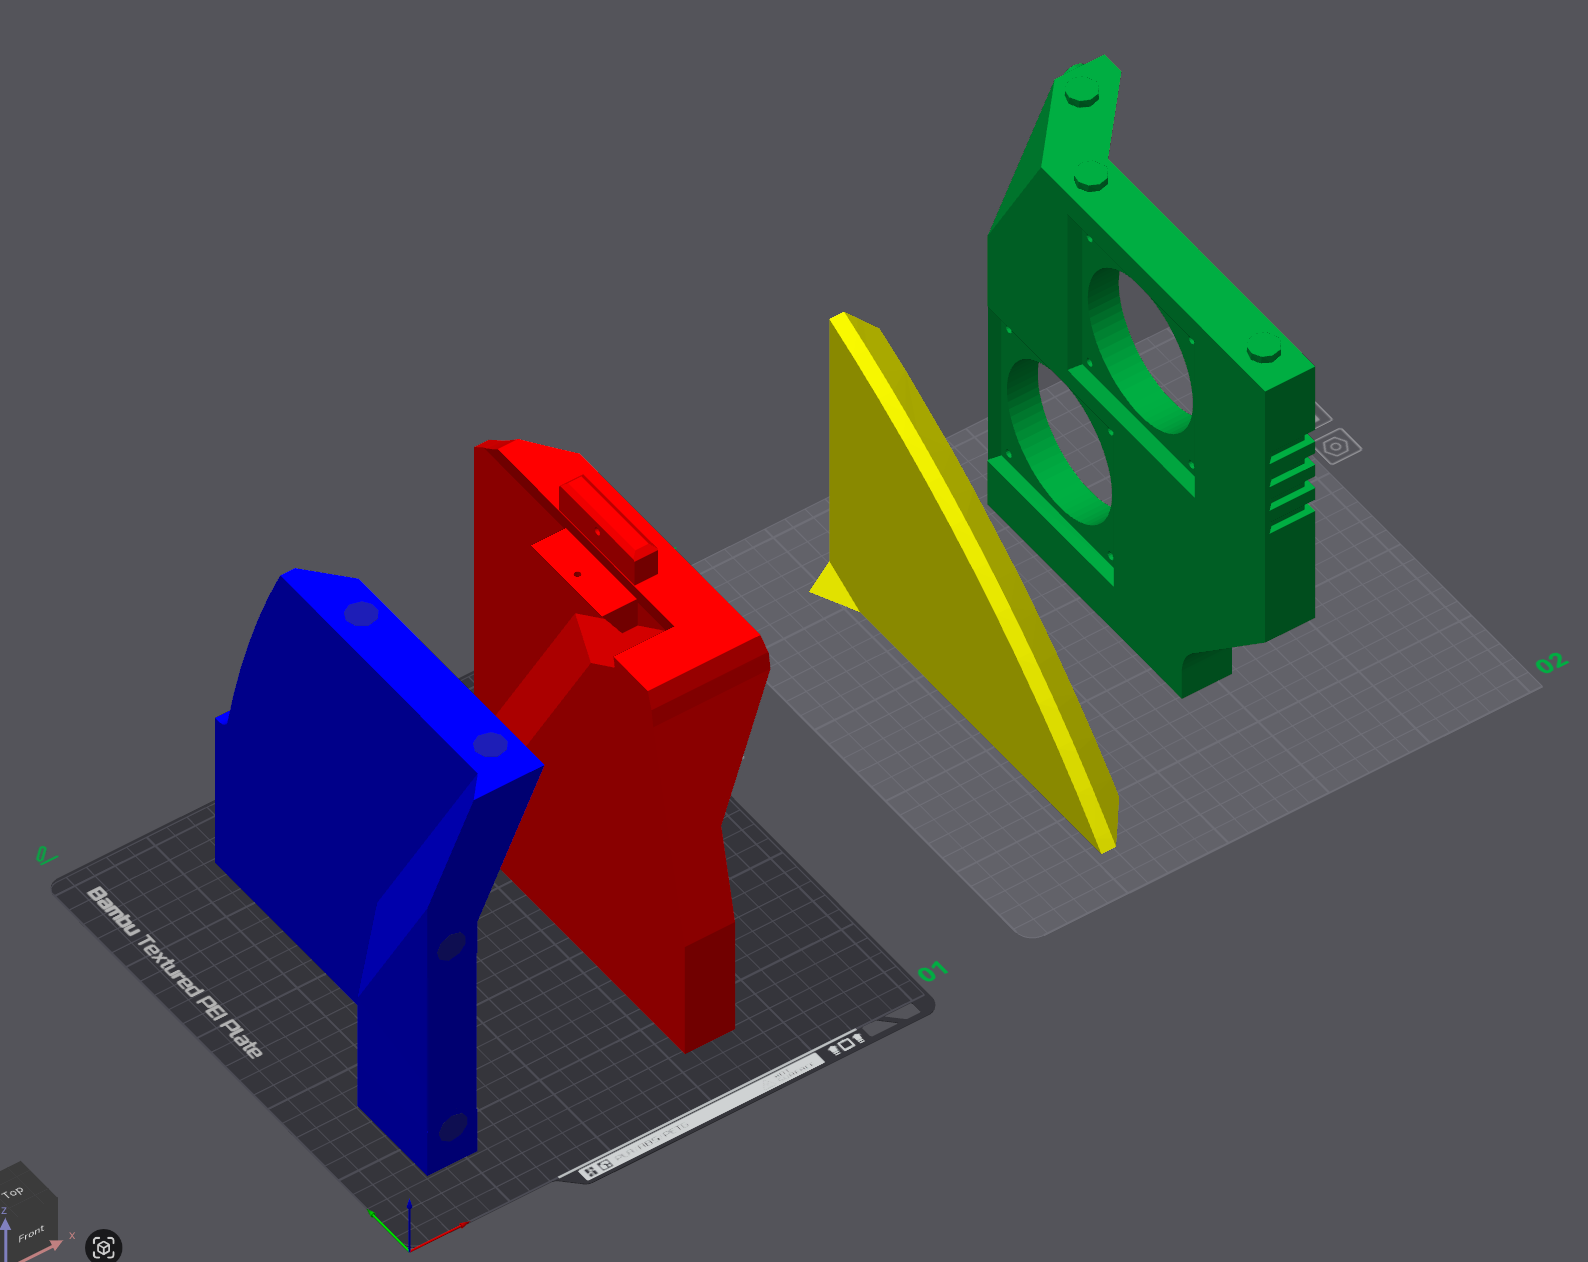
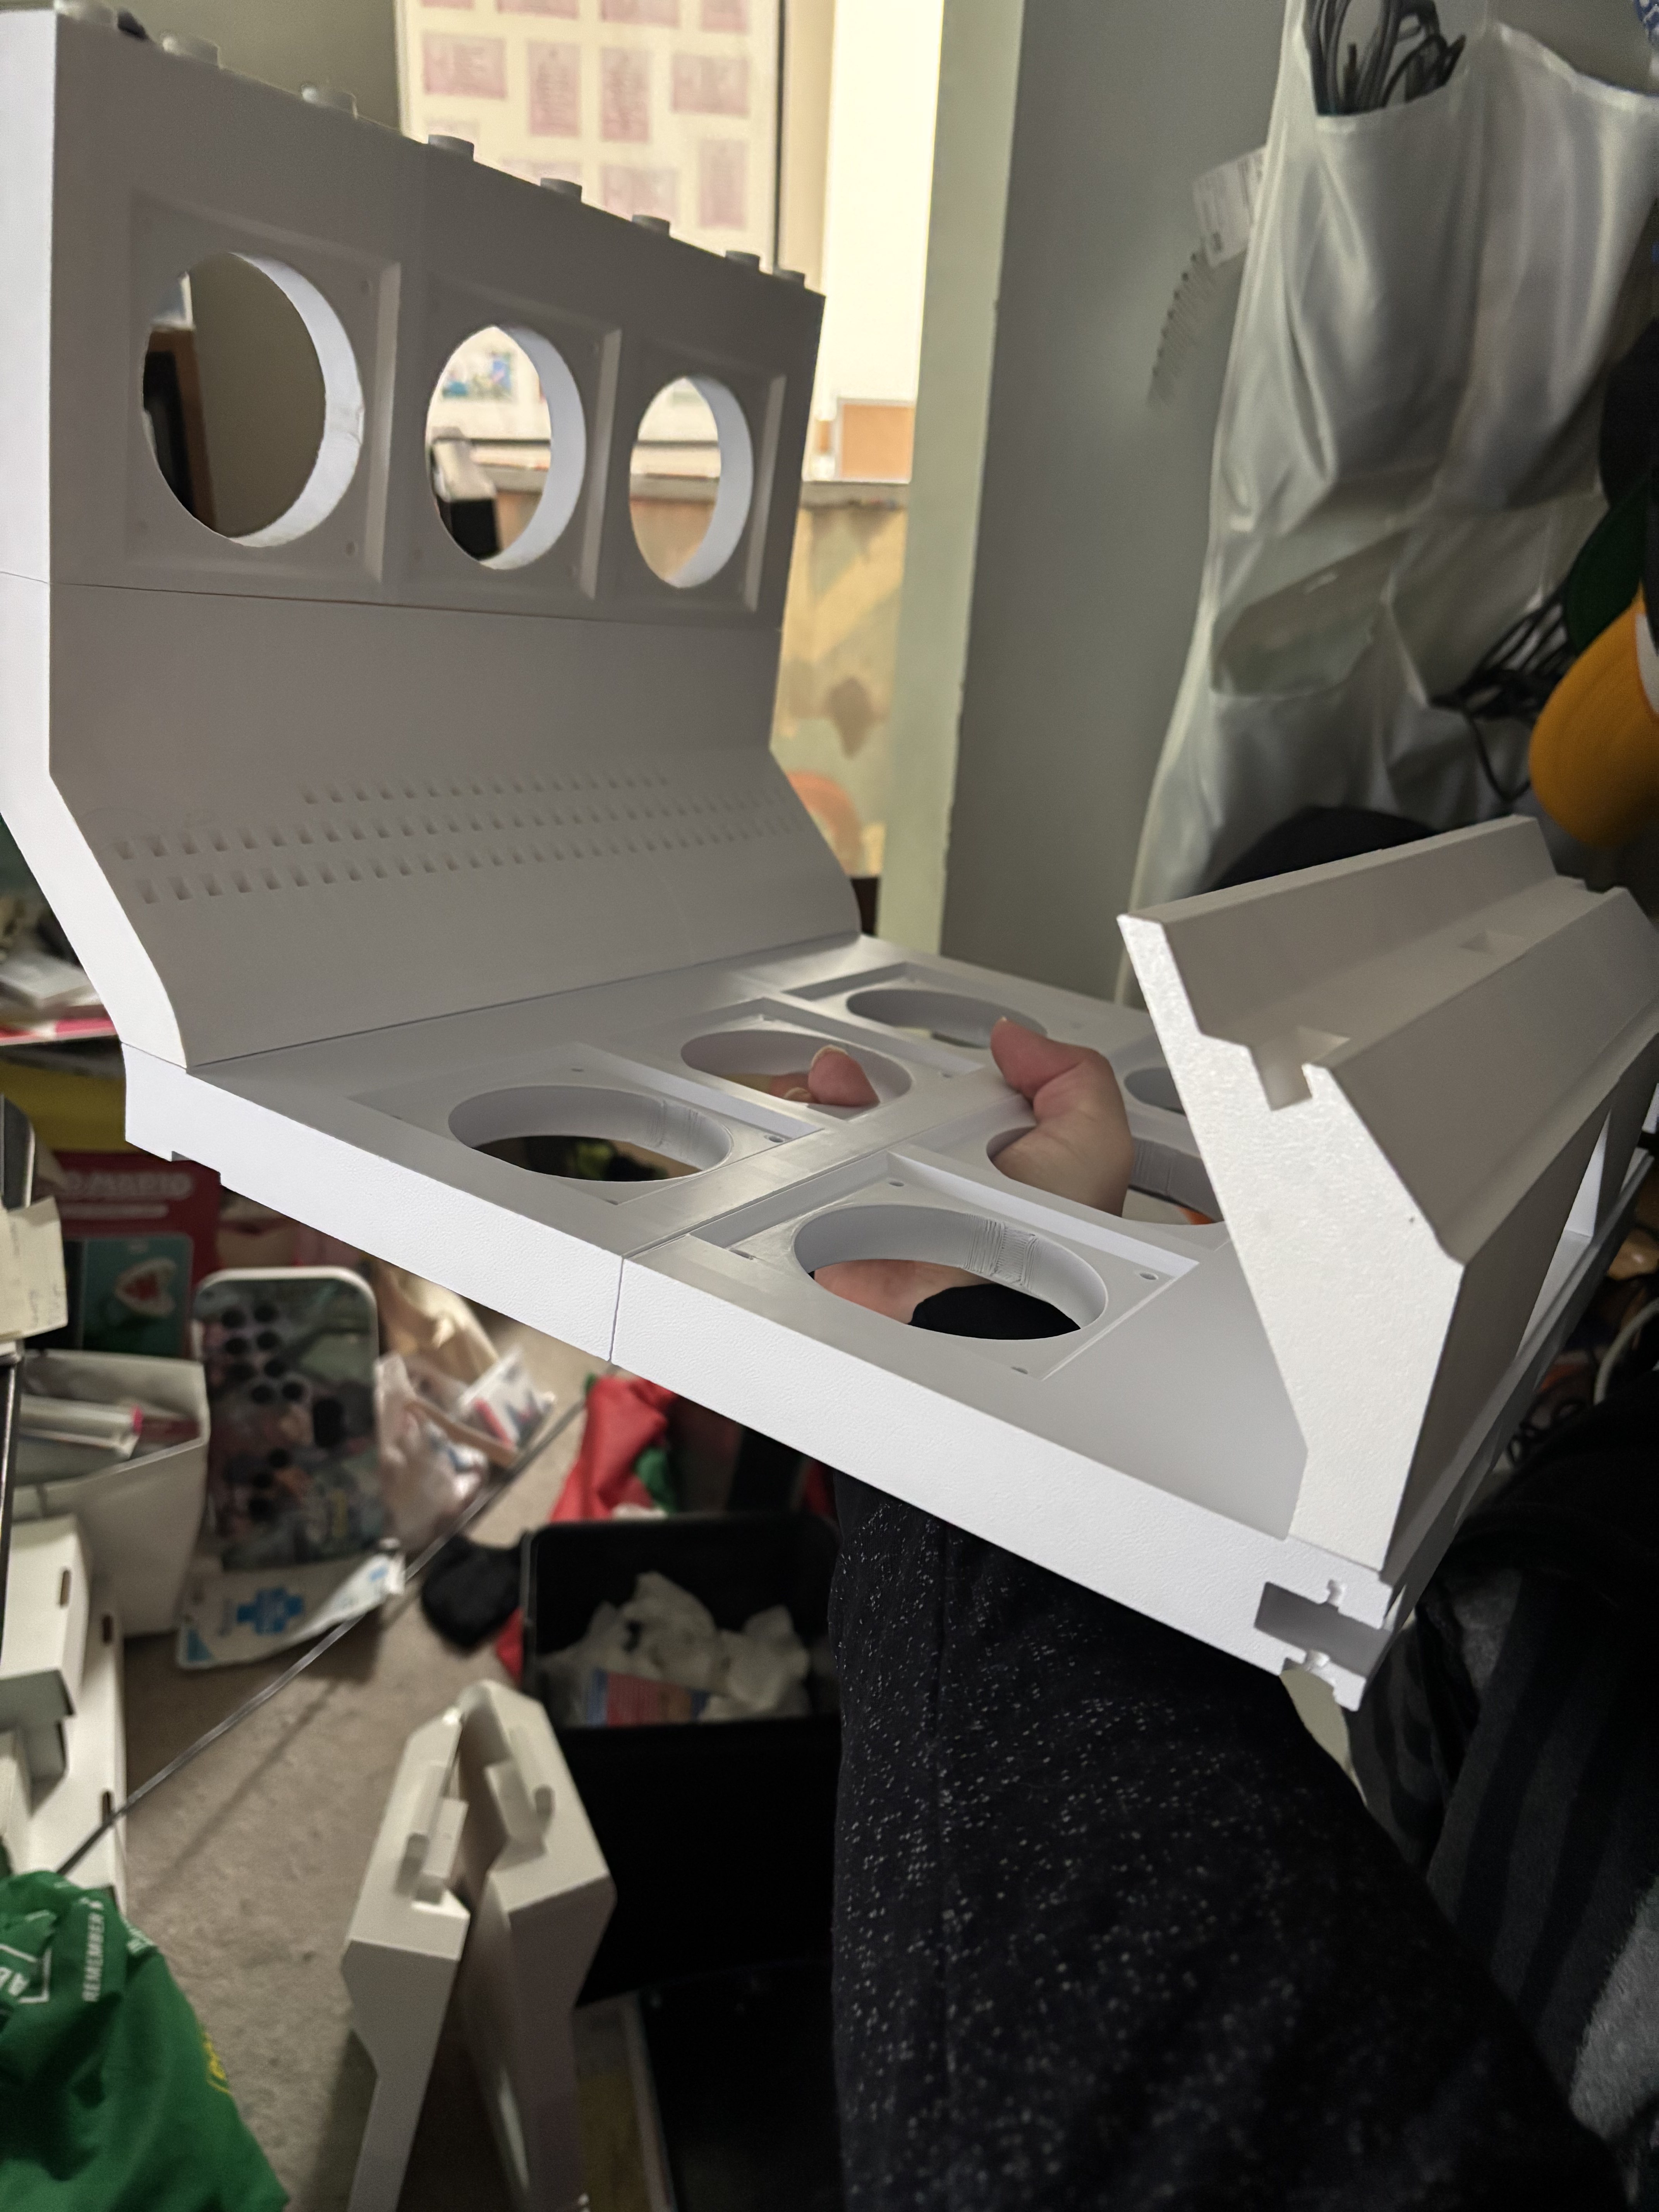
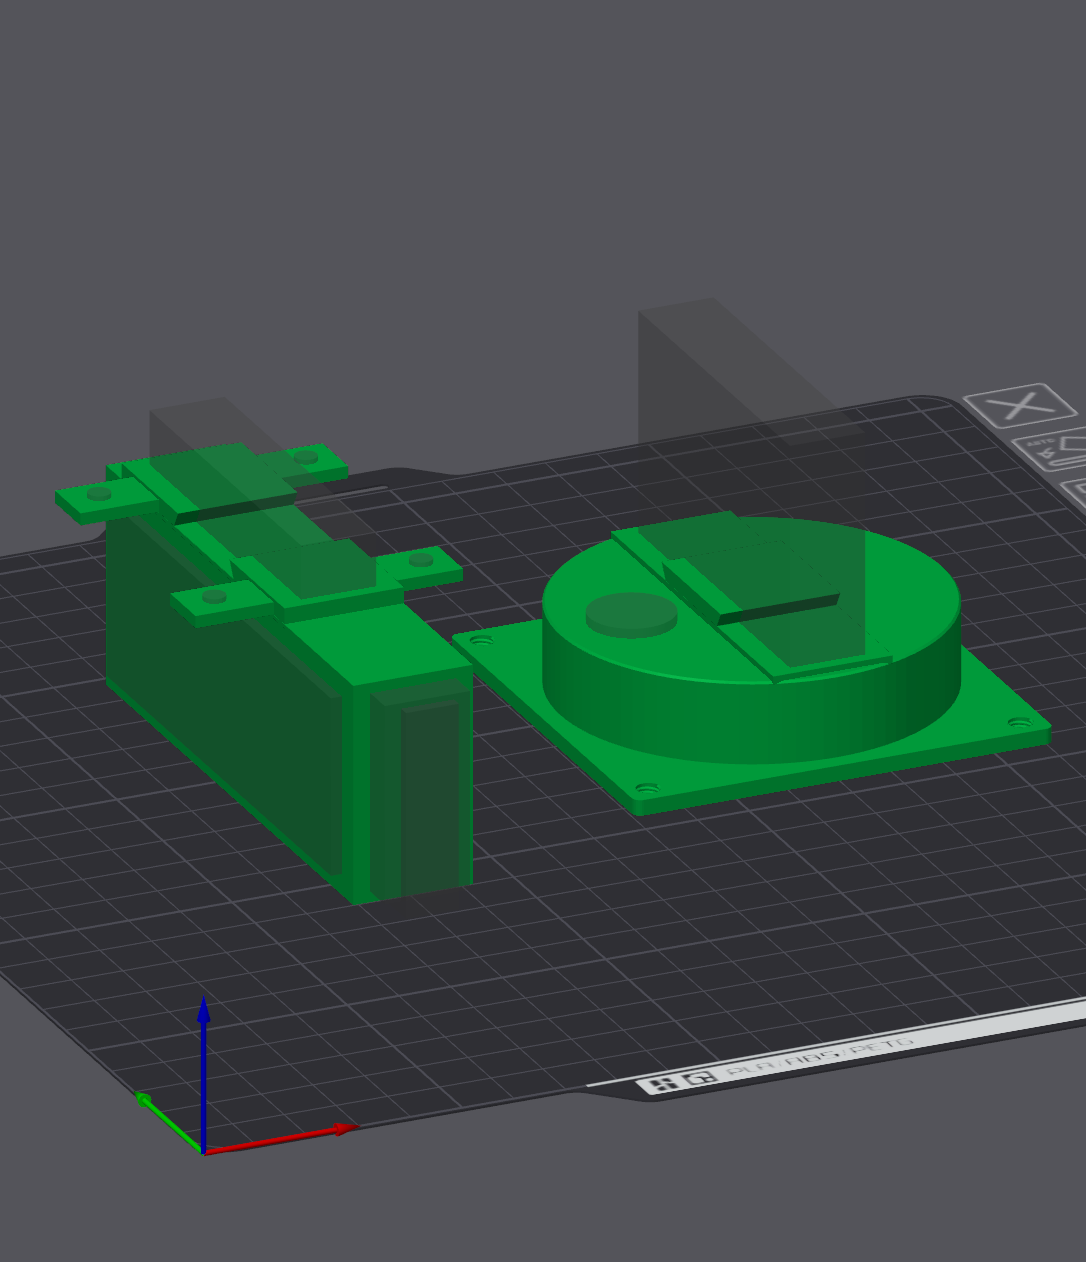
Essentially all the models had to be cut into pieces to fit on the print bed. Fortunately, most fit almost exactly as two plates, such as the controller box pictured below.
Printing and Assembly
I started with printing the sliced pieces of the main body model, and assembled them.
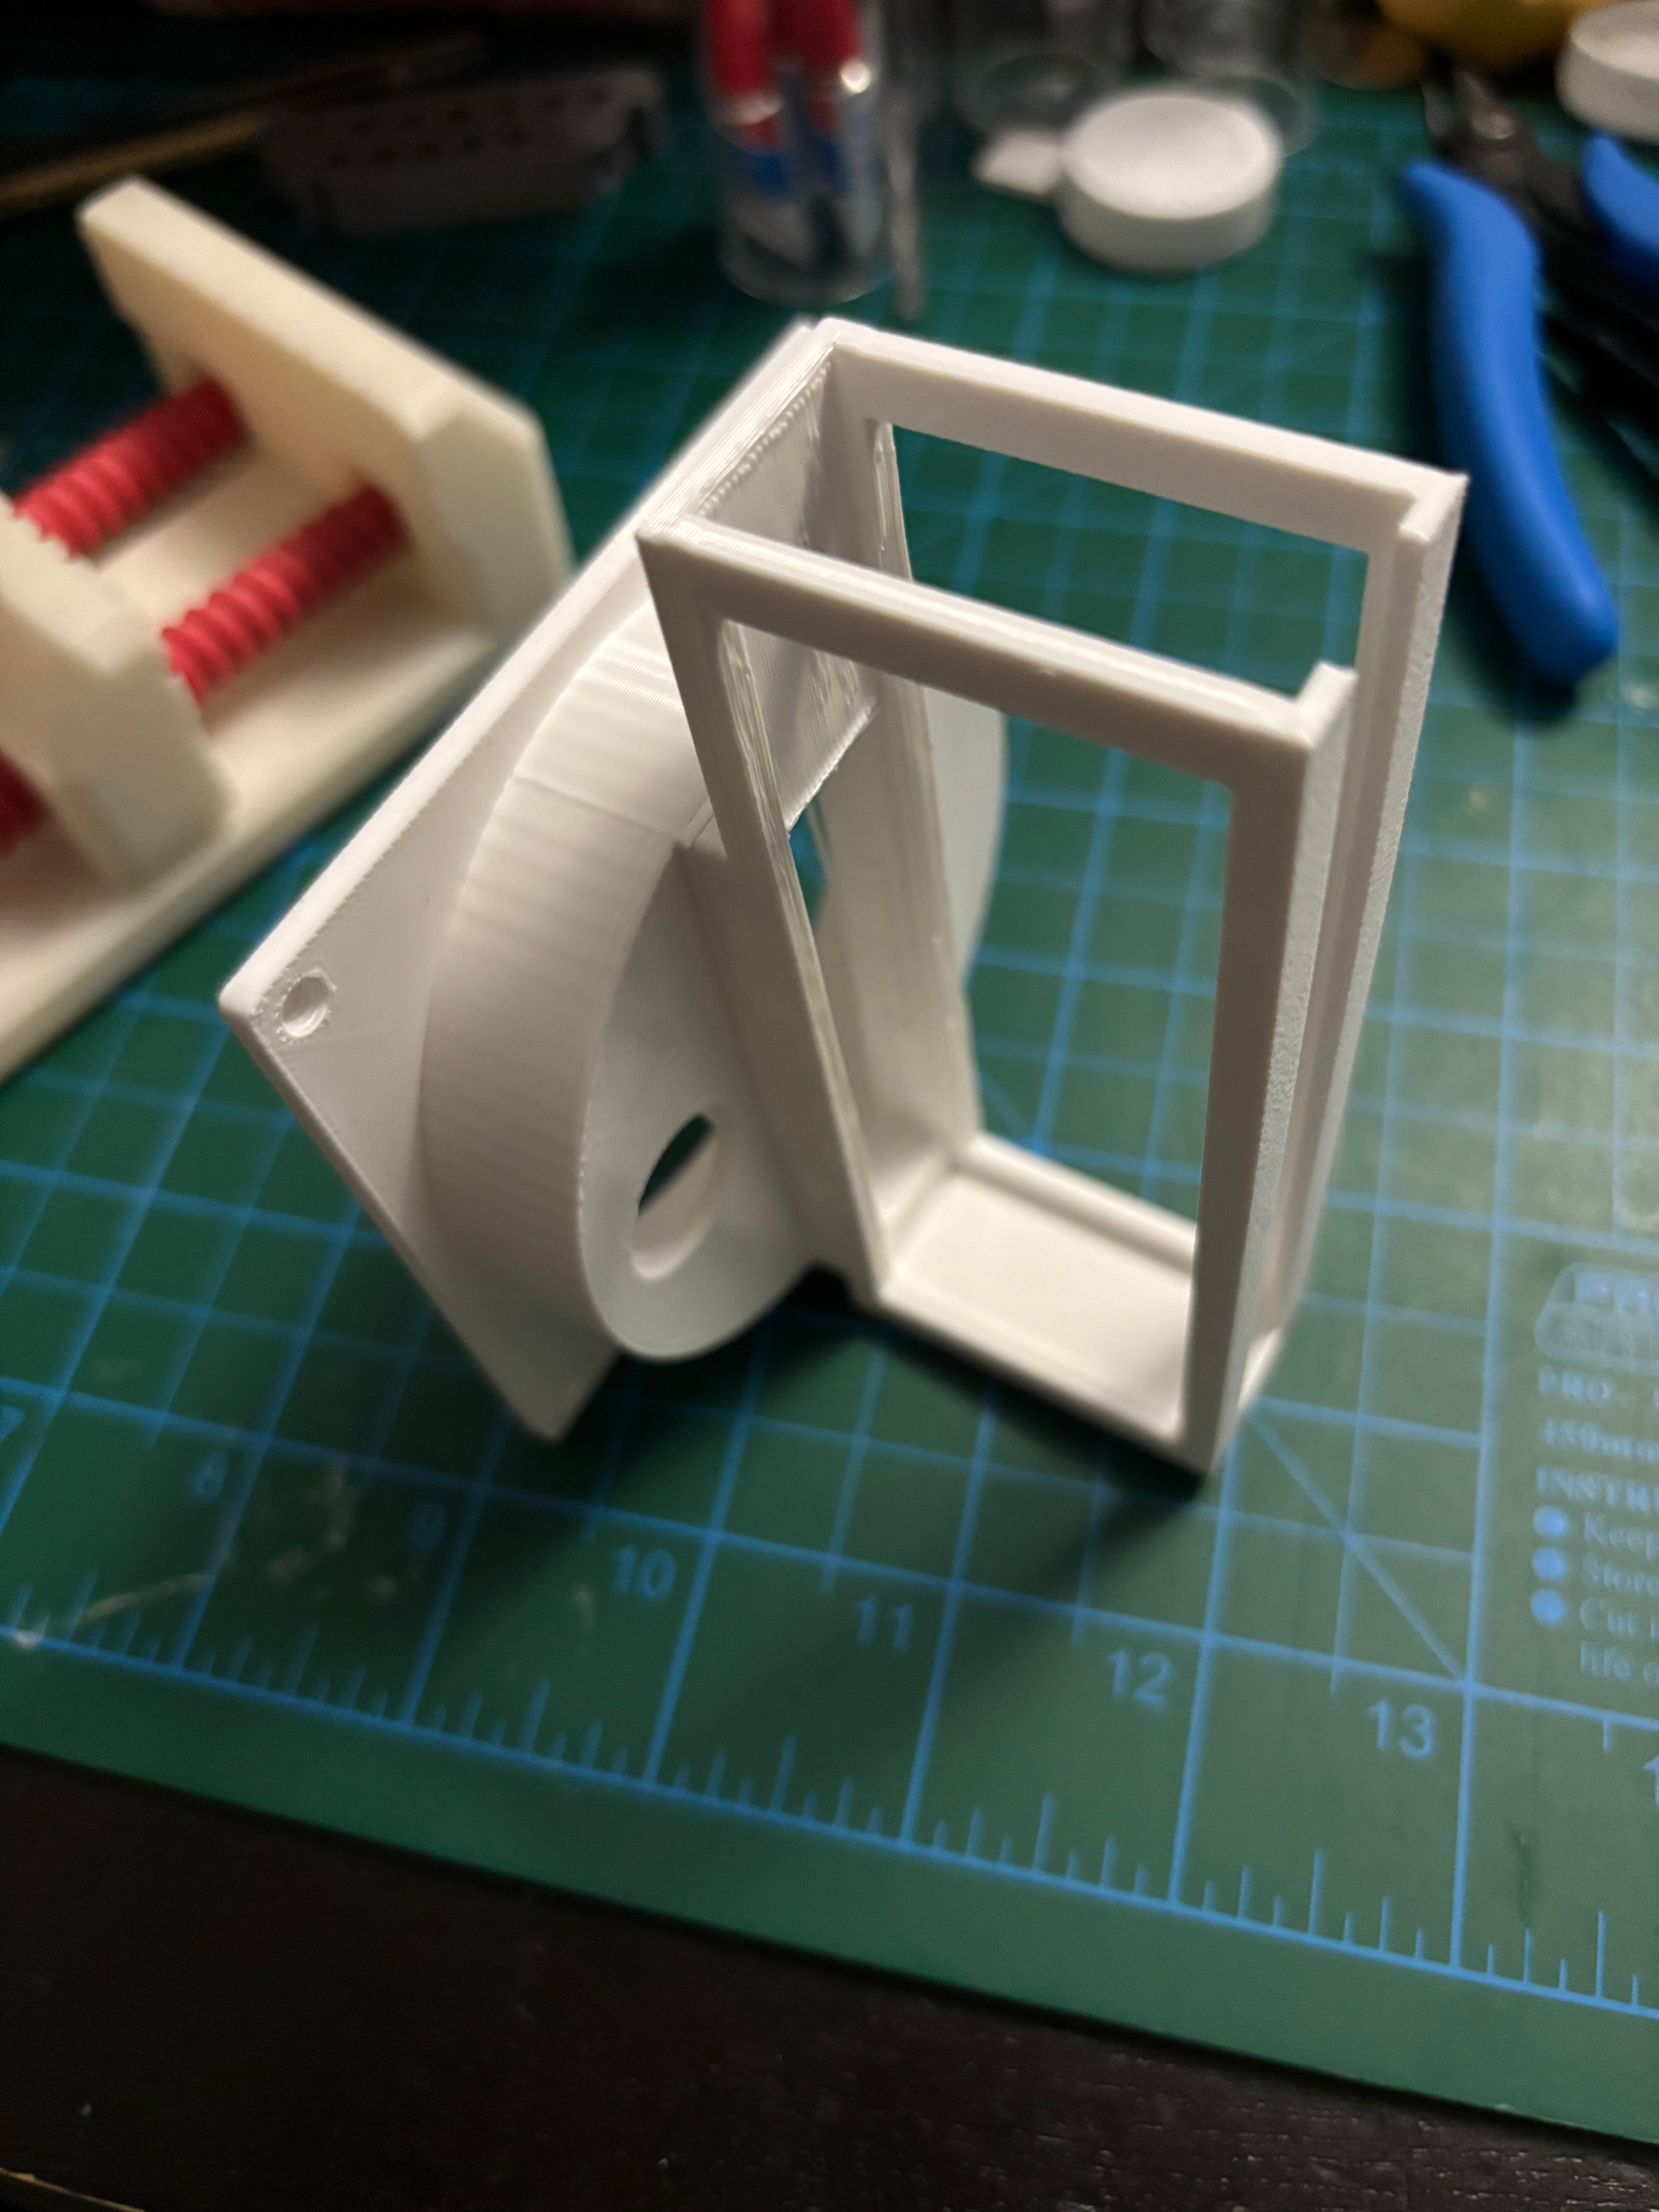
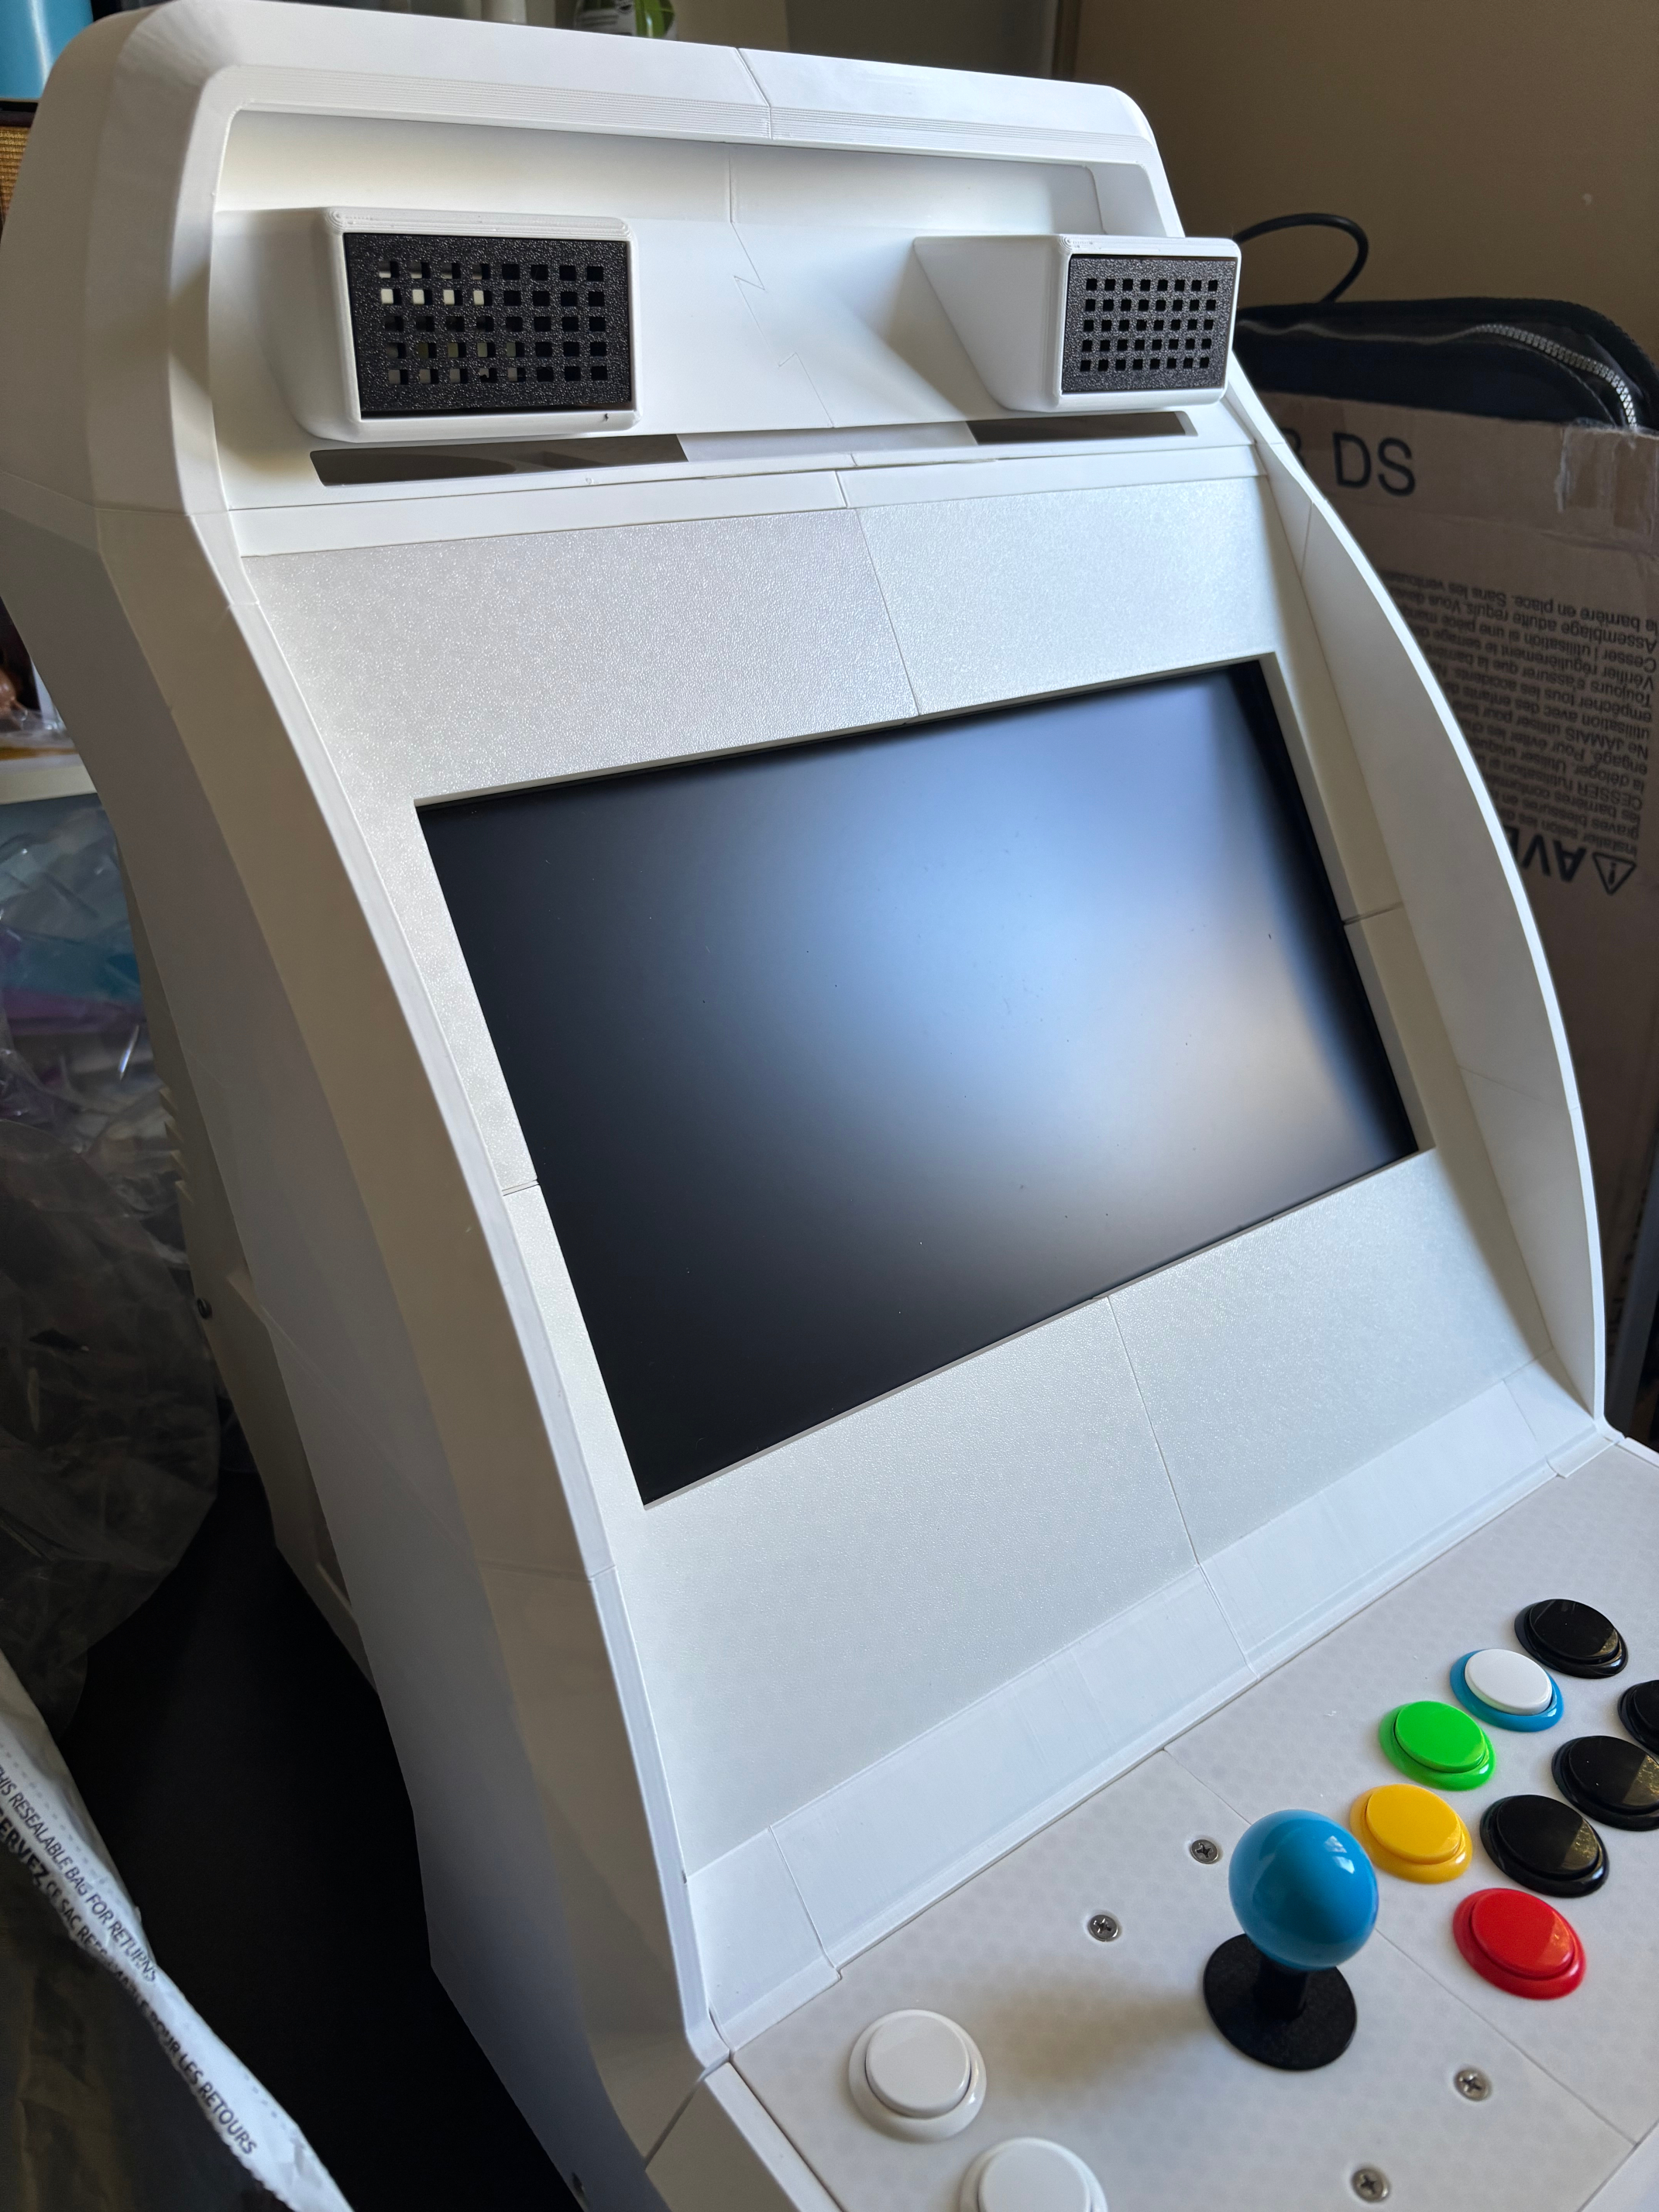
Almost immediately, poor choices of where to align my cuts and make my edits came back to haunt me, as these pieces assembled very easily but there were gaps in the body.
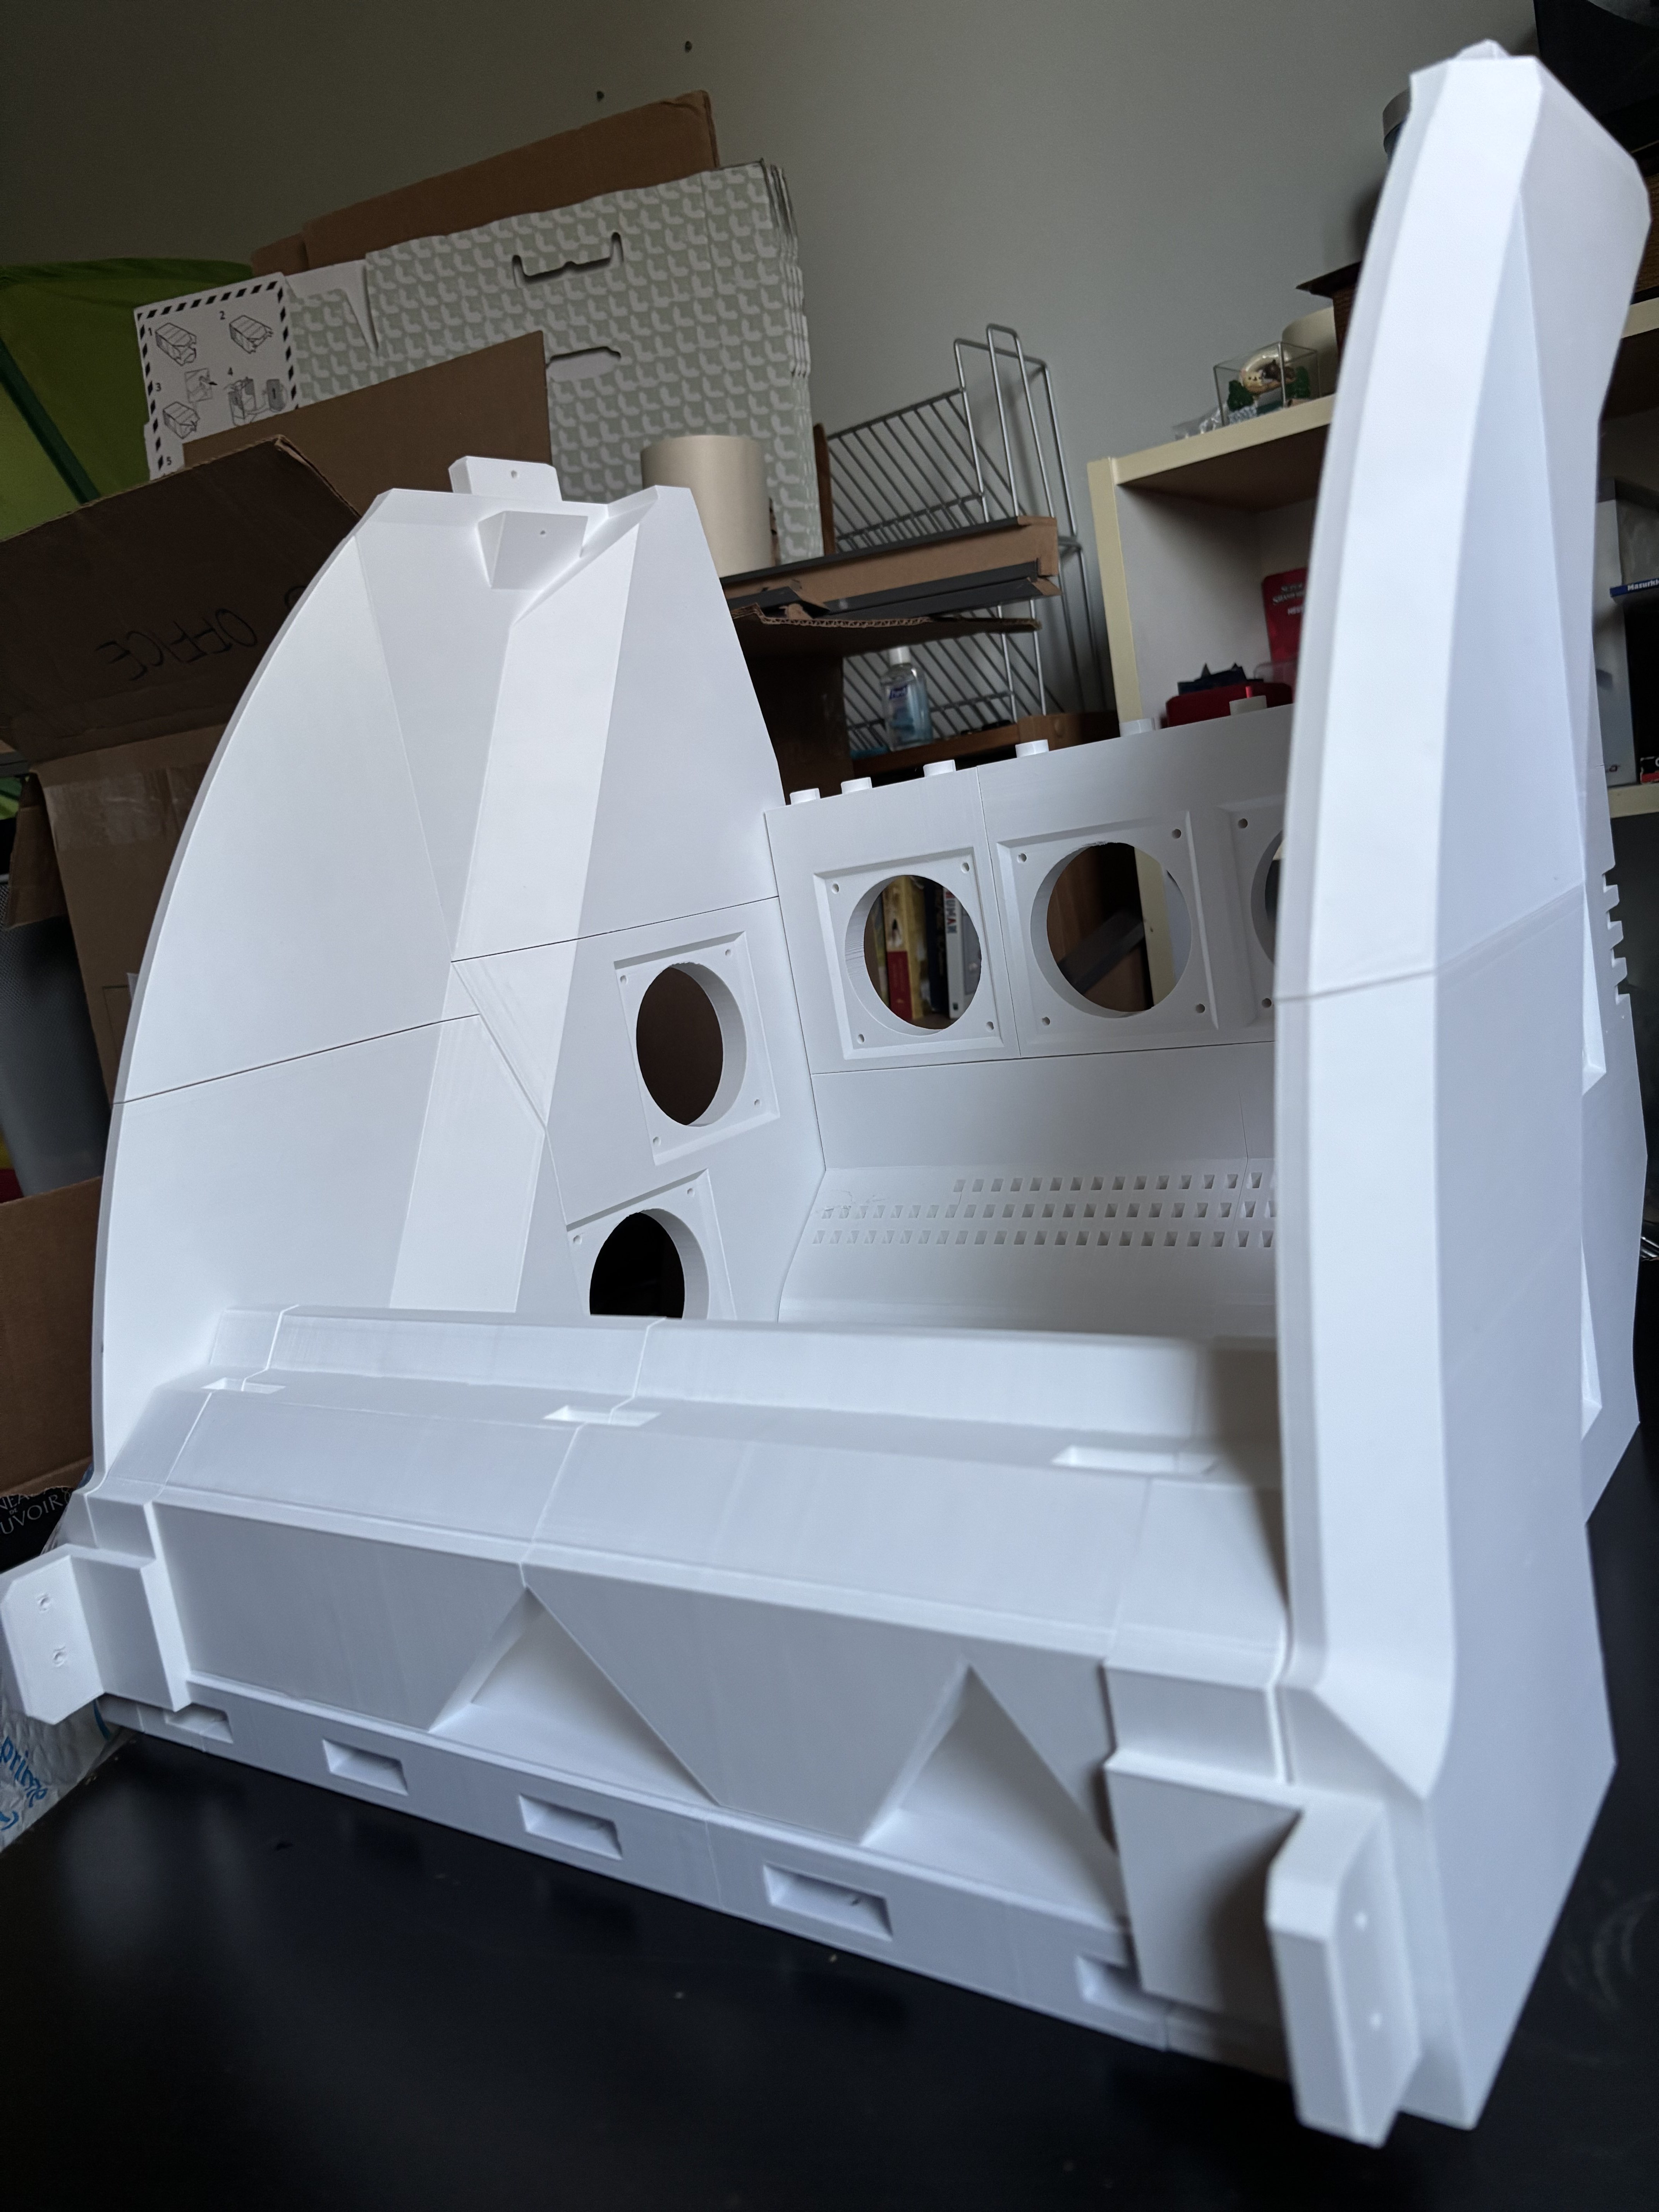
You can see in the third image above that there are two front brackets that jut out slightly, which are where the controller box joins with the main body. I'd removed them while doing initial cutting, so I needed to cut and design replacements.
Luckily, I had kept copies of most iterations of the file, and in one or two cases where I hadn't I was able to go back and make the same cuts I'd made previously. Make copies, take notes. Even messy ones.
Once the main body was solid, I started printing the various scaled-up additional pieces, and assembled them, making edits to some as I went.
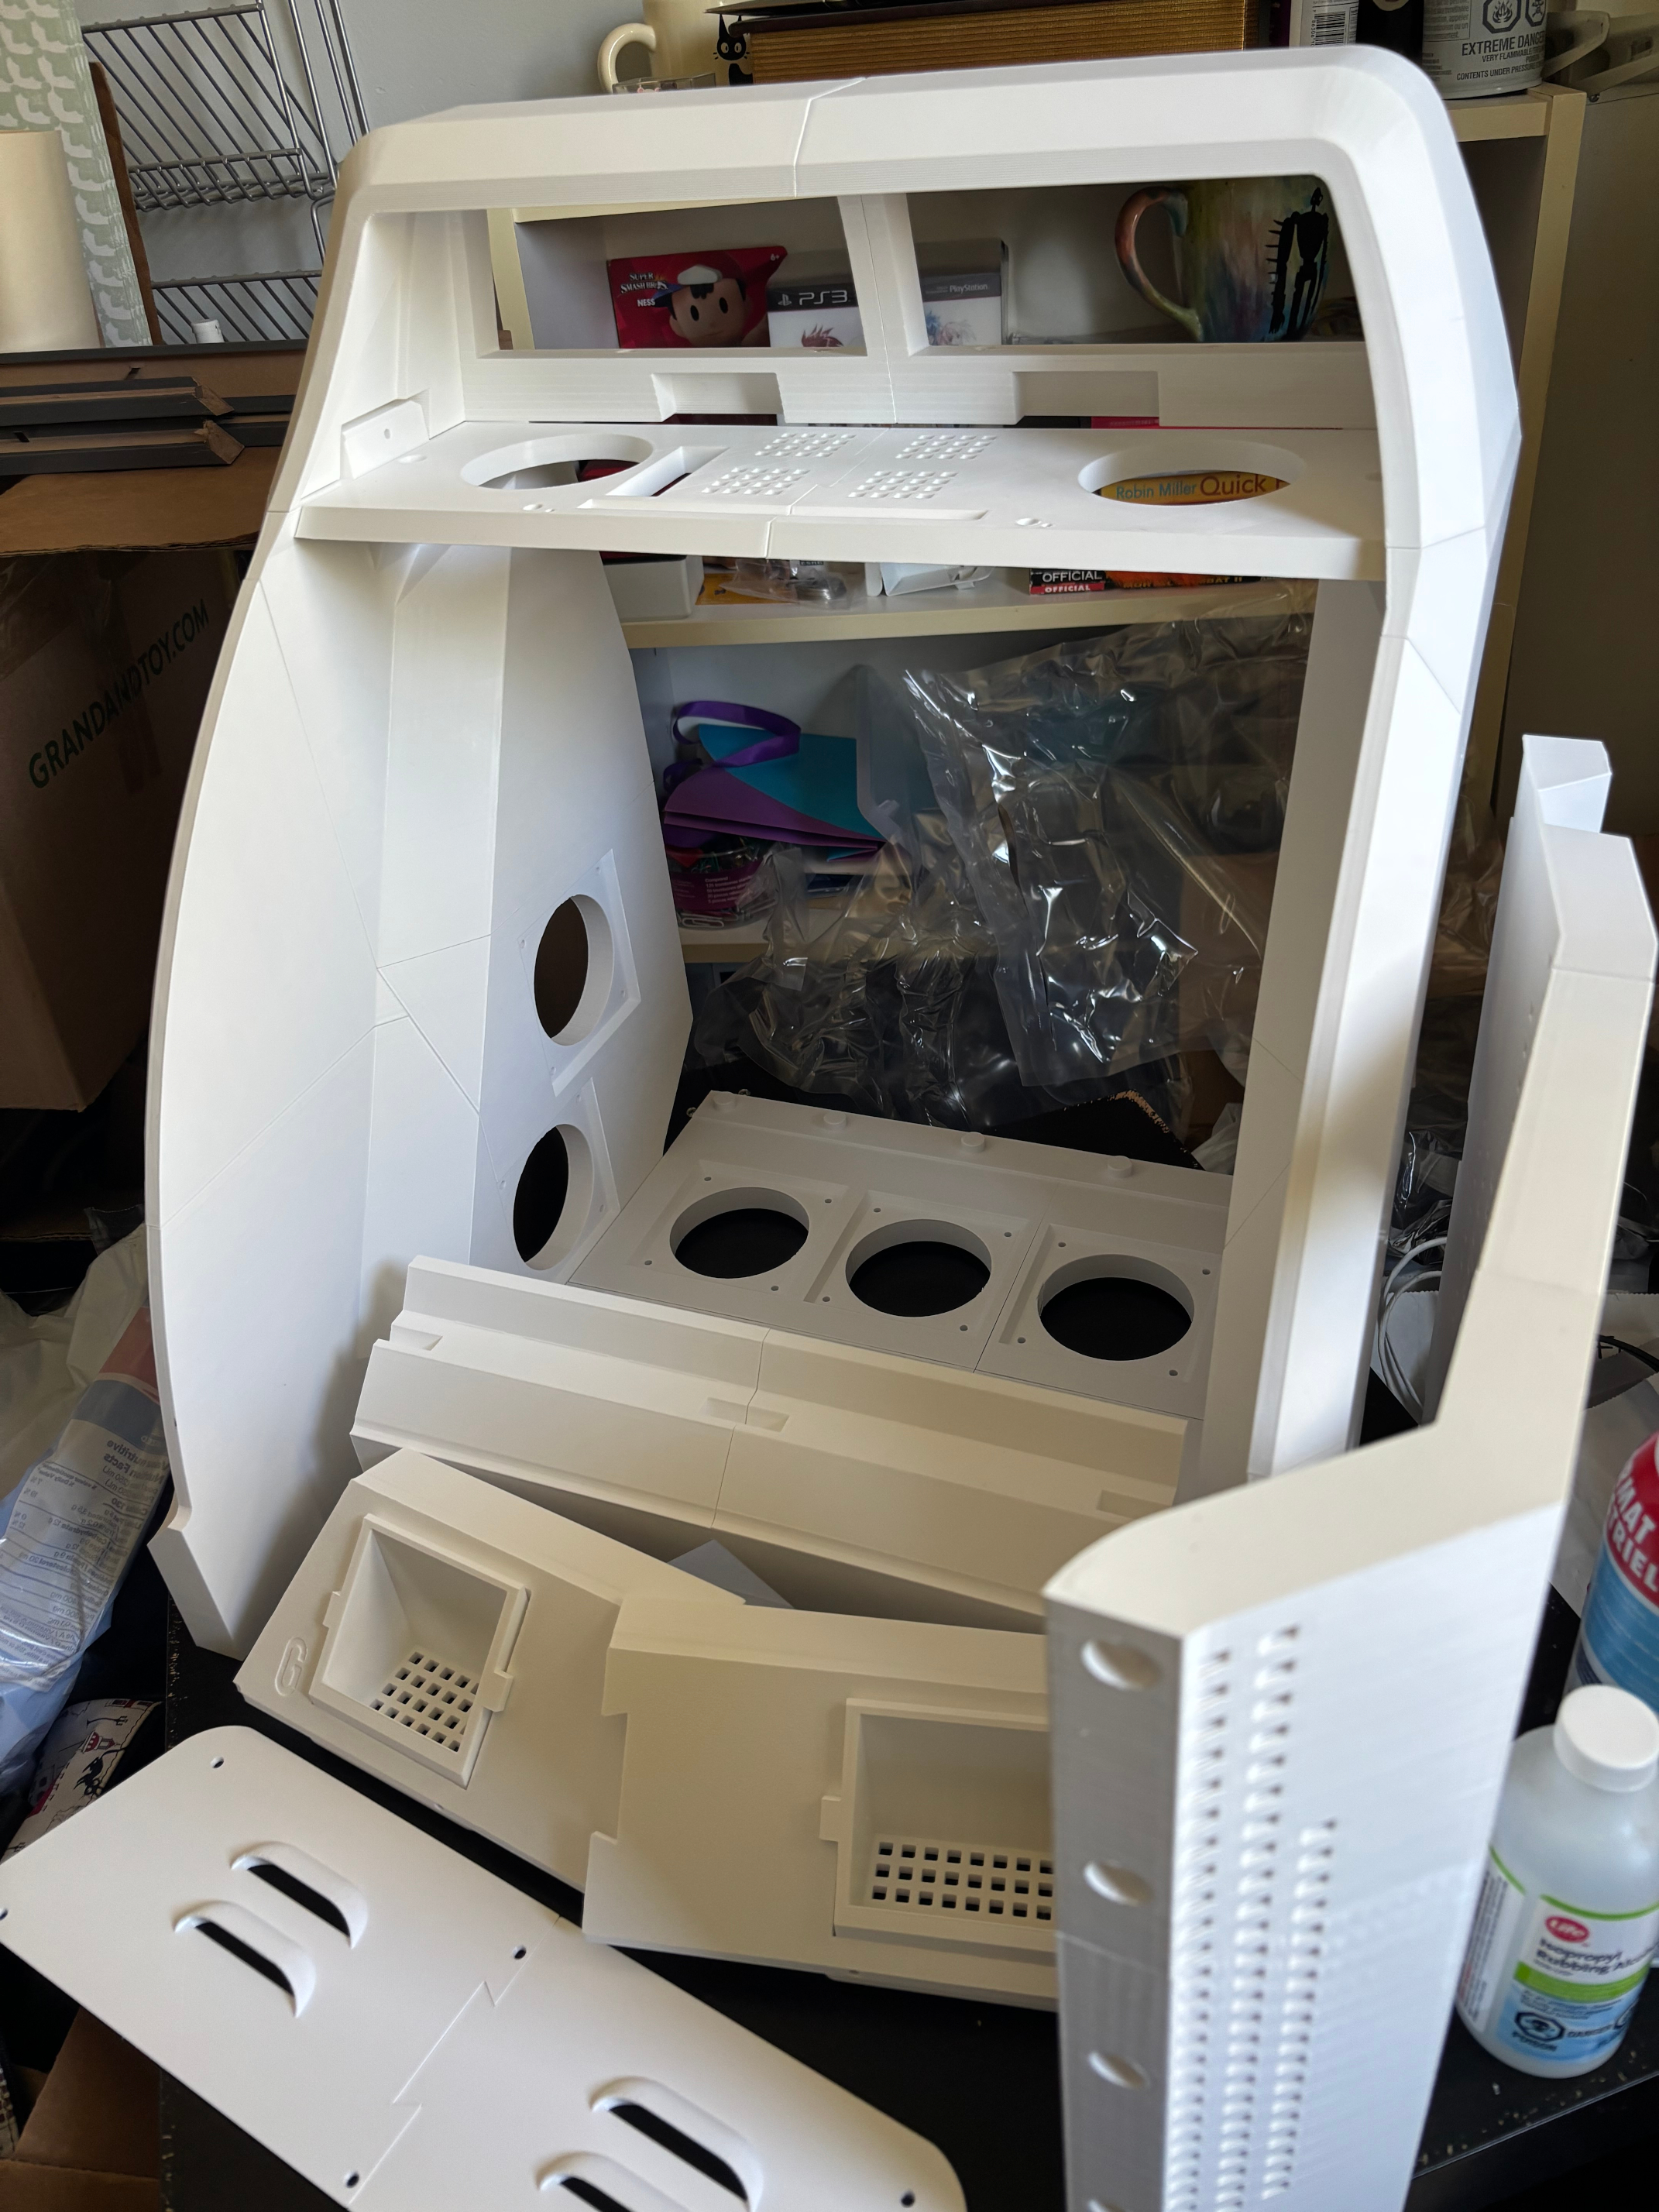
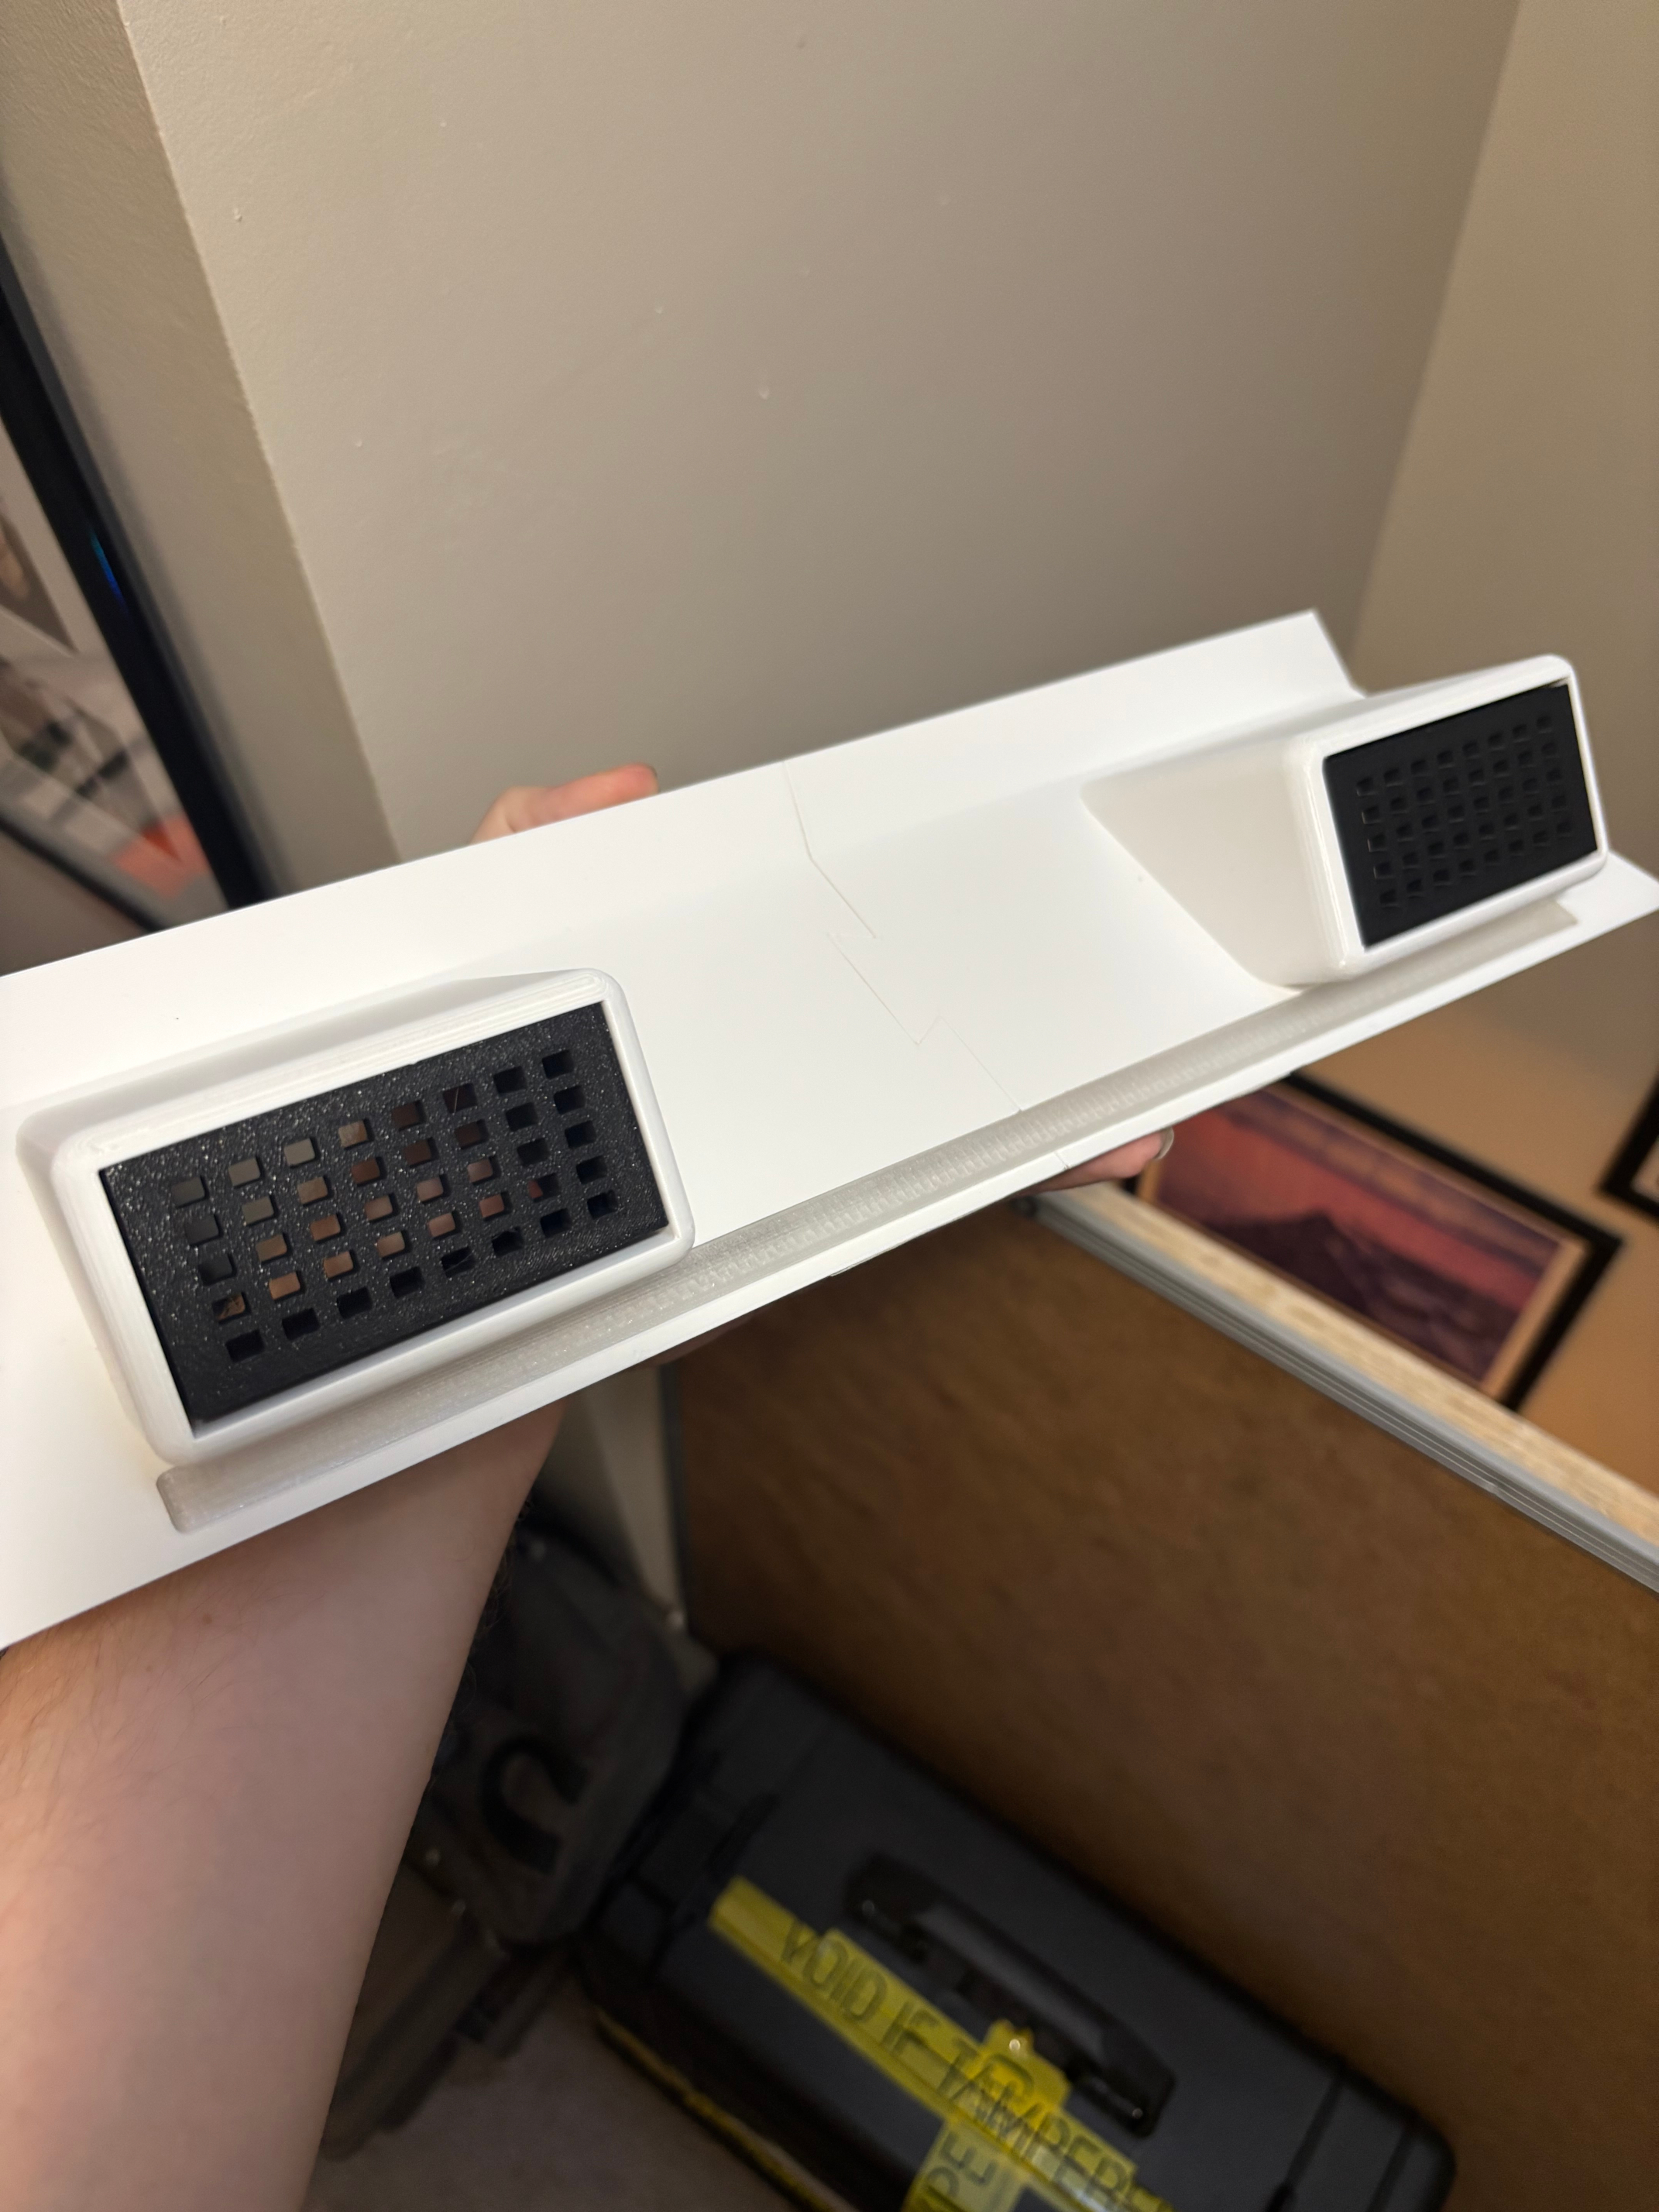
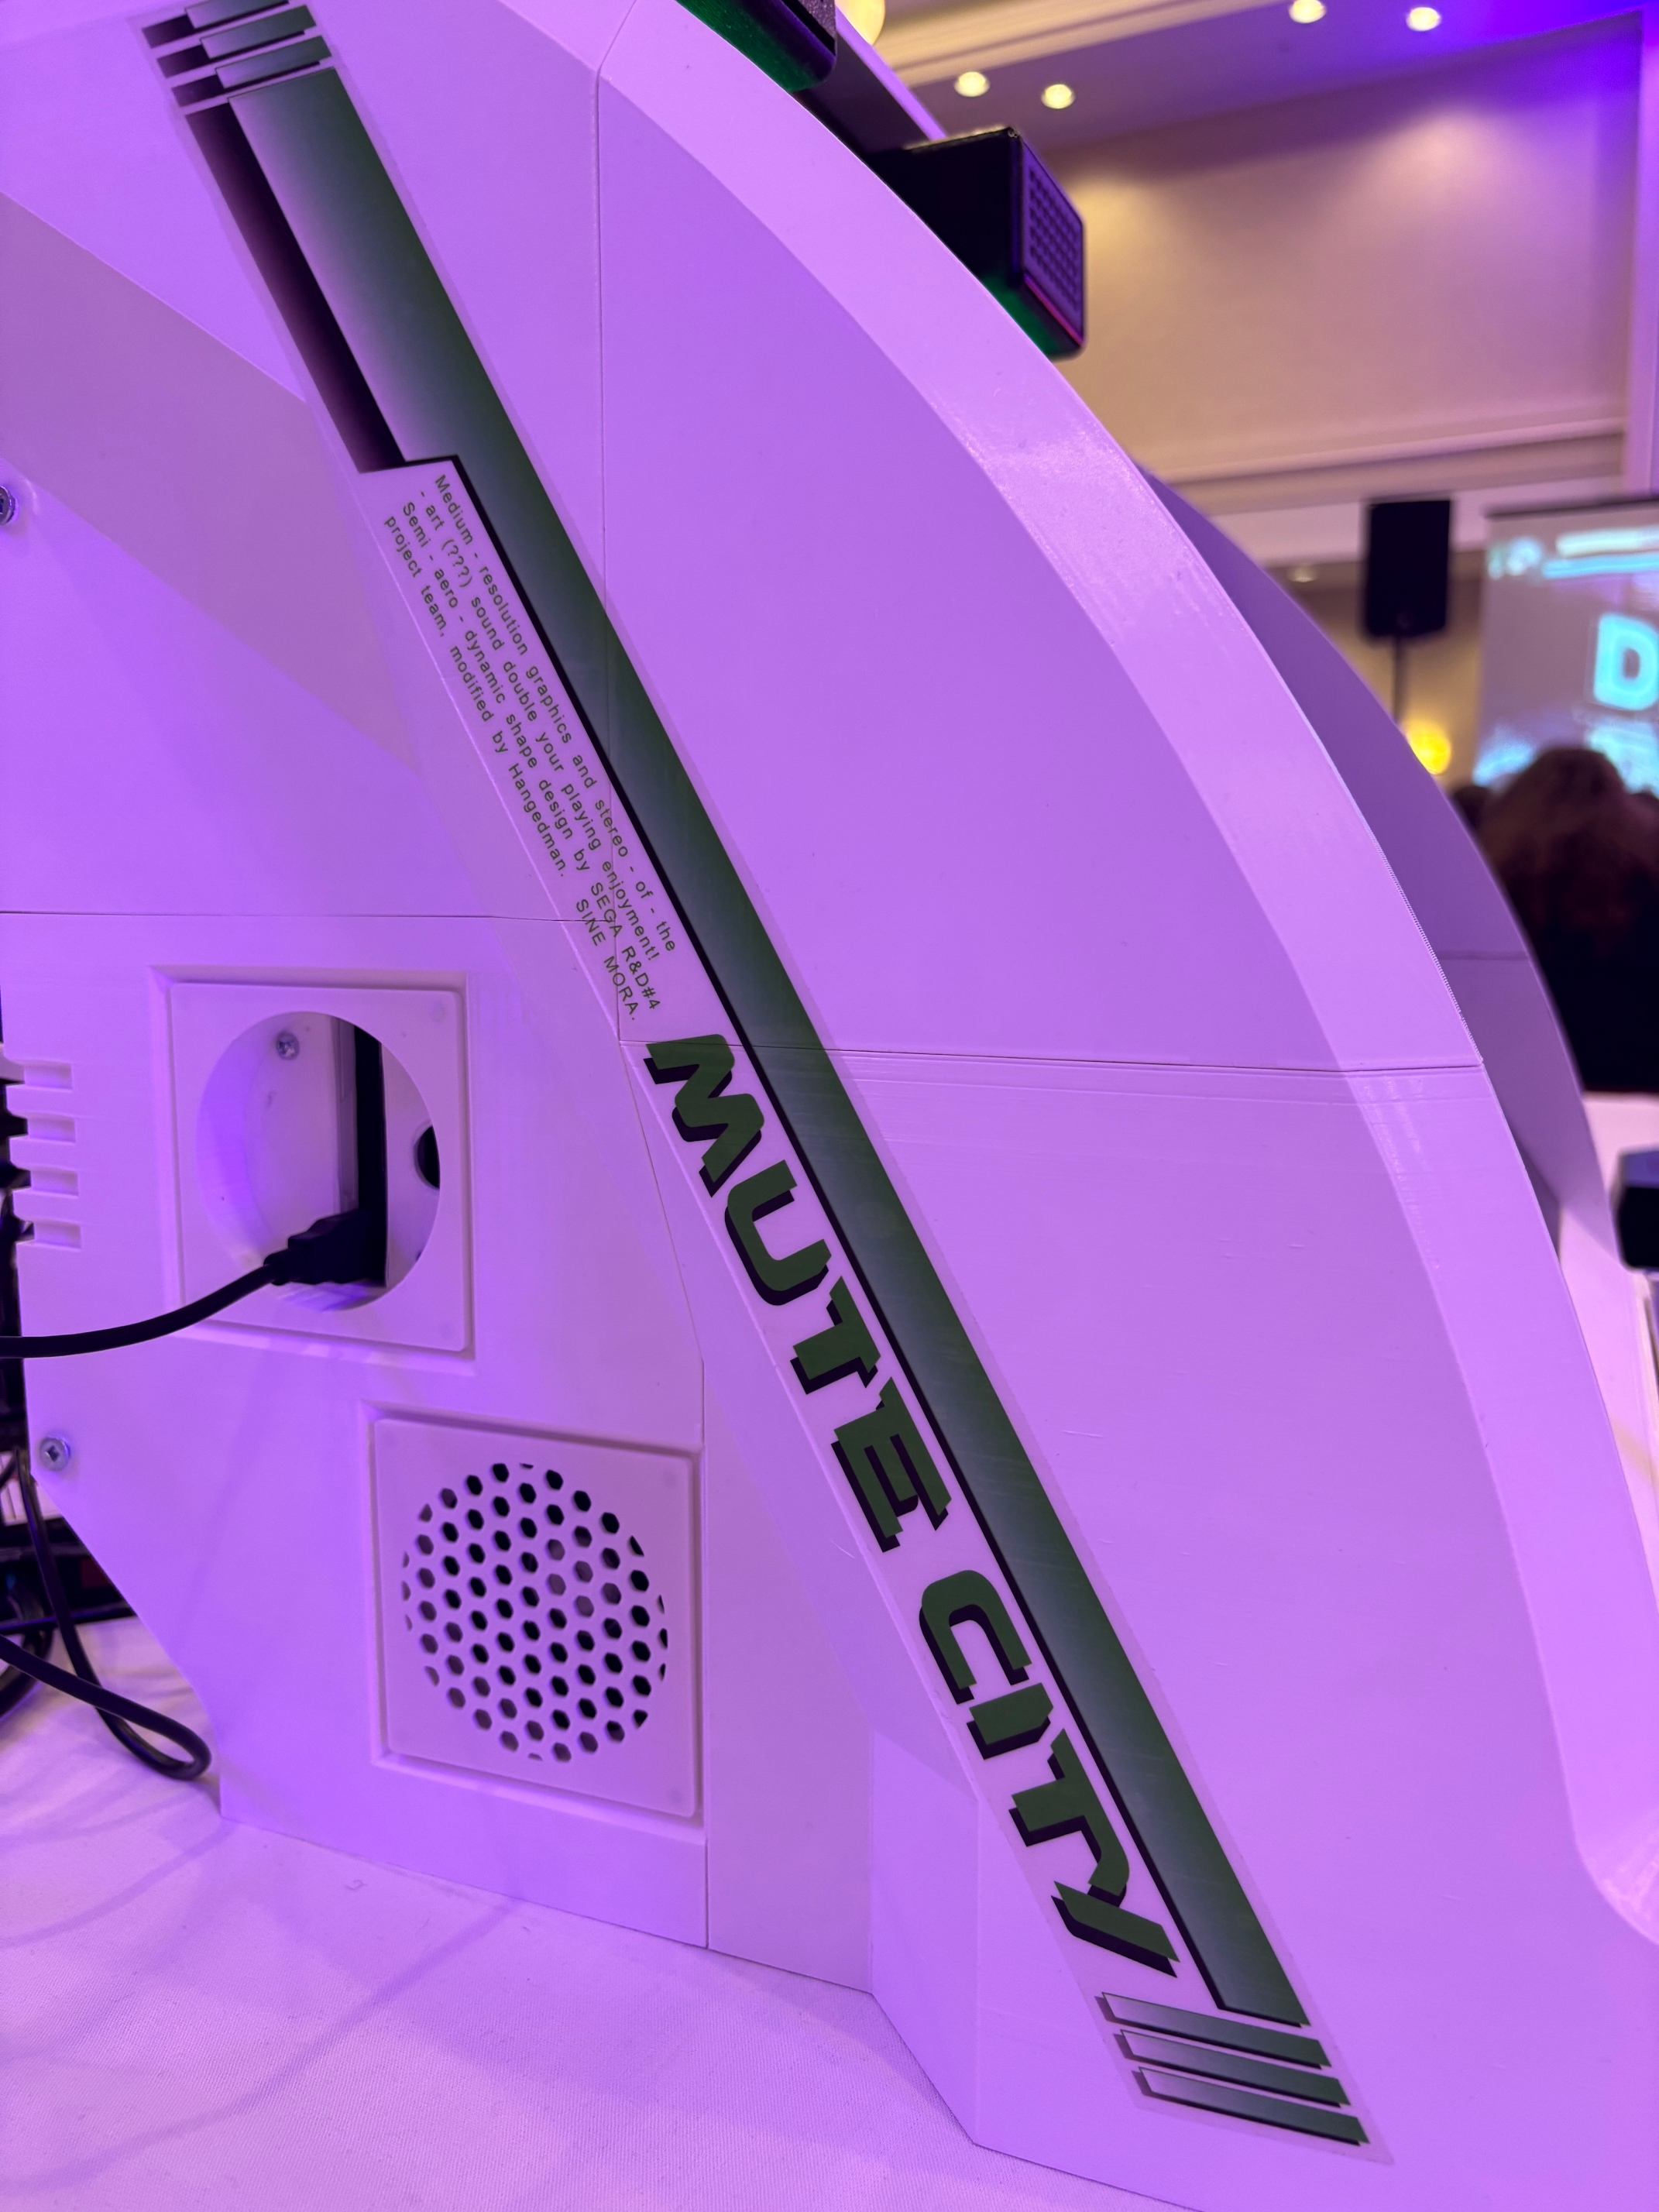
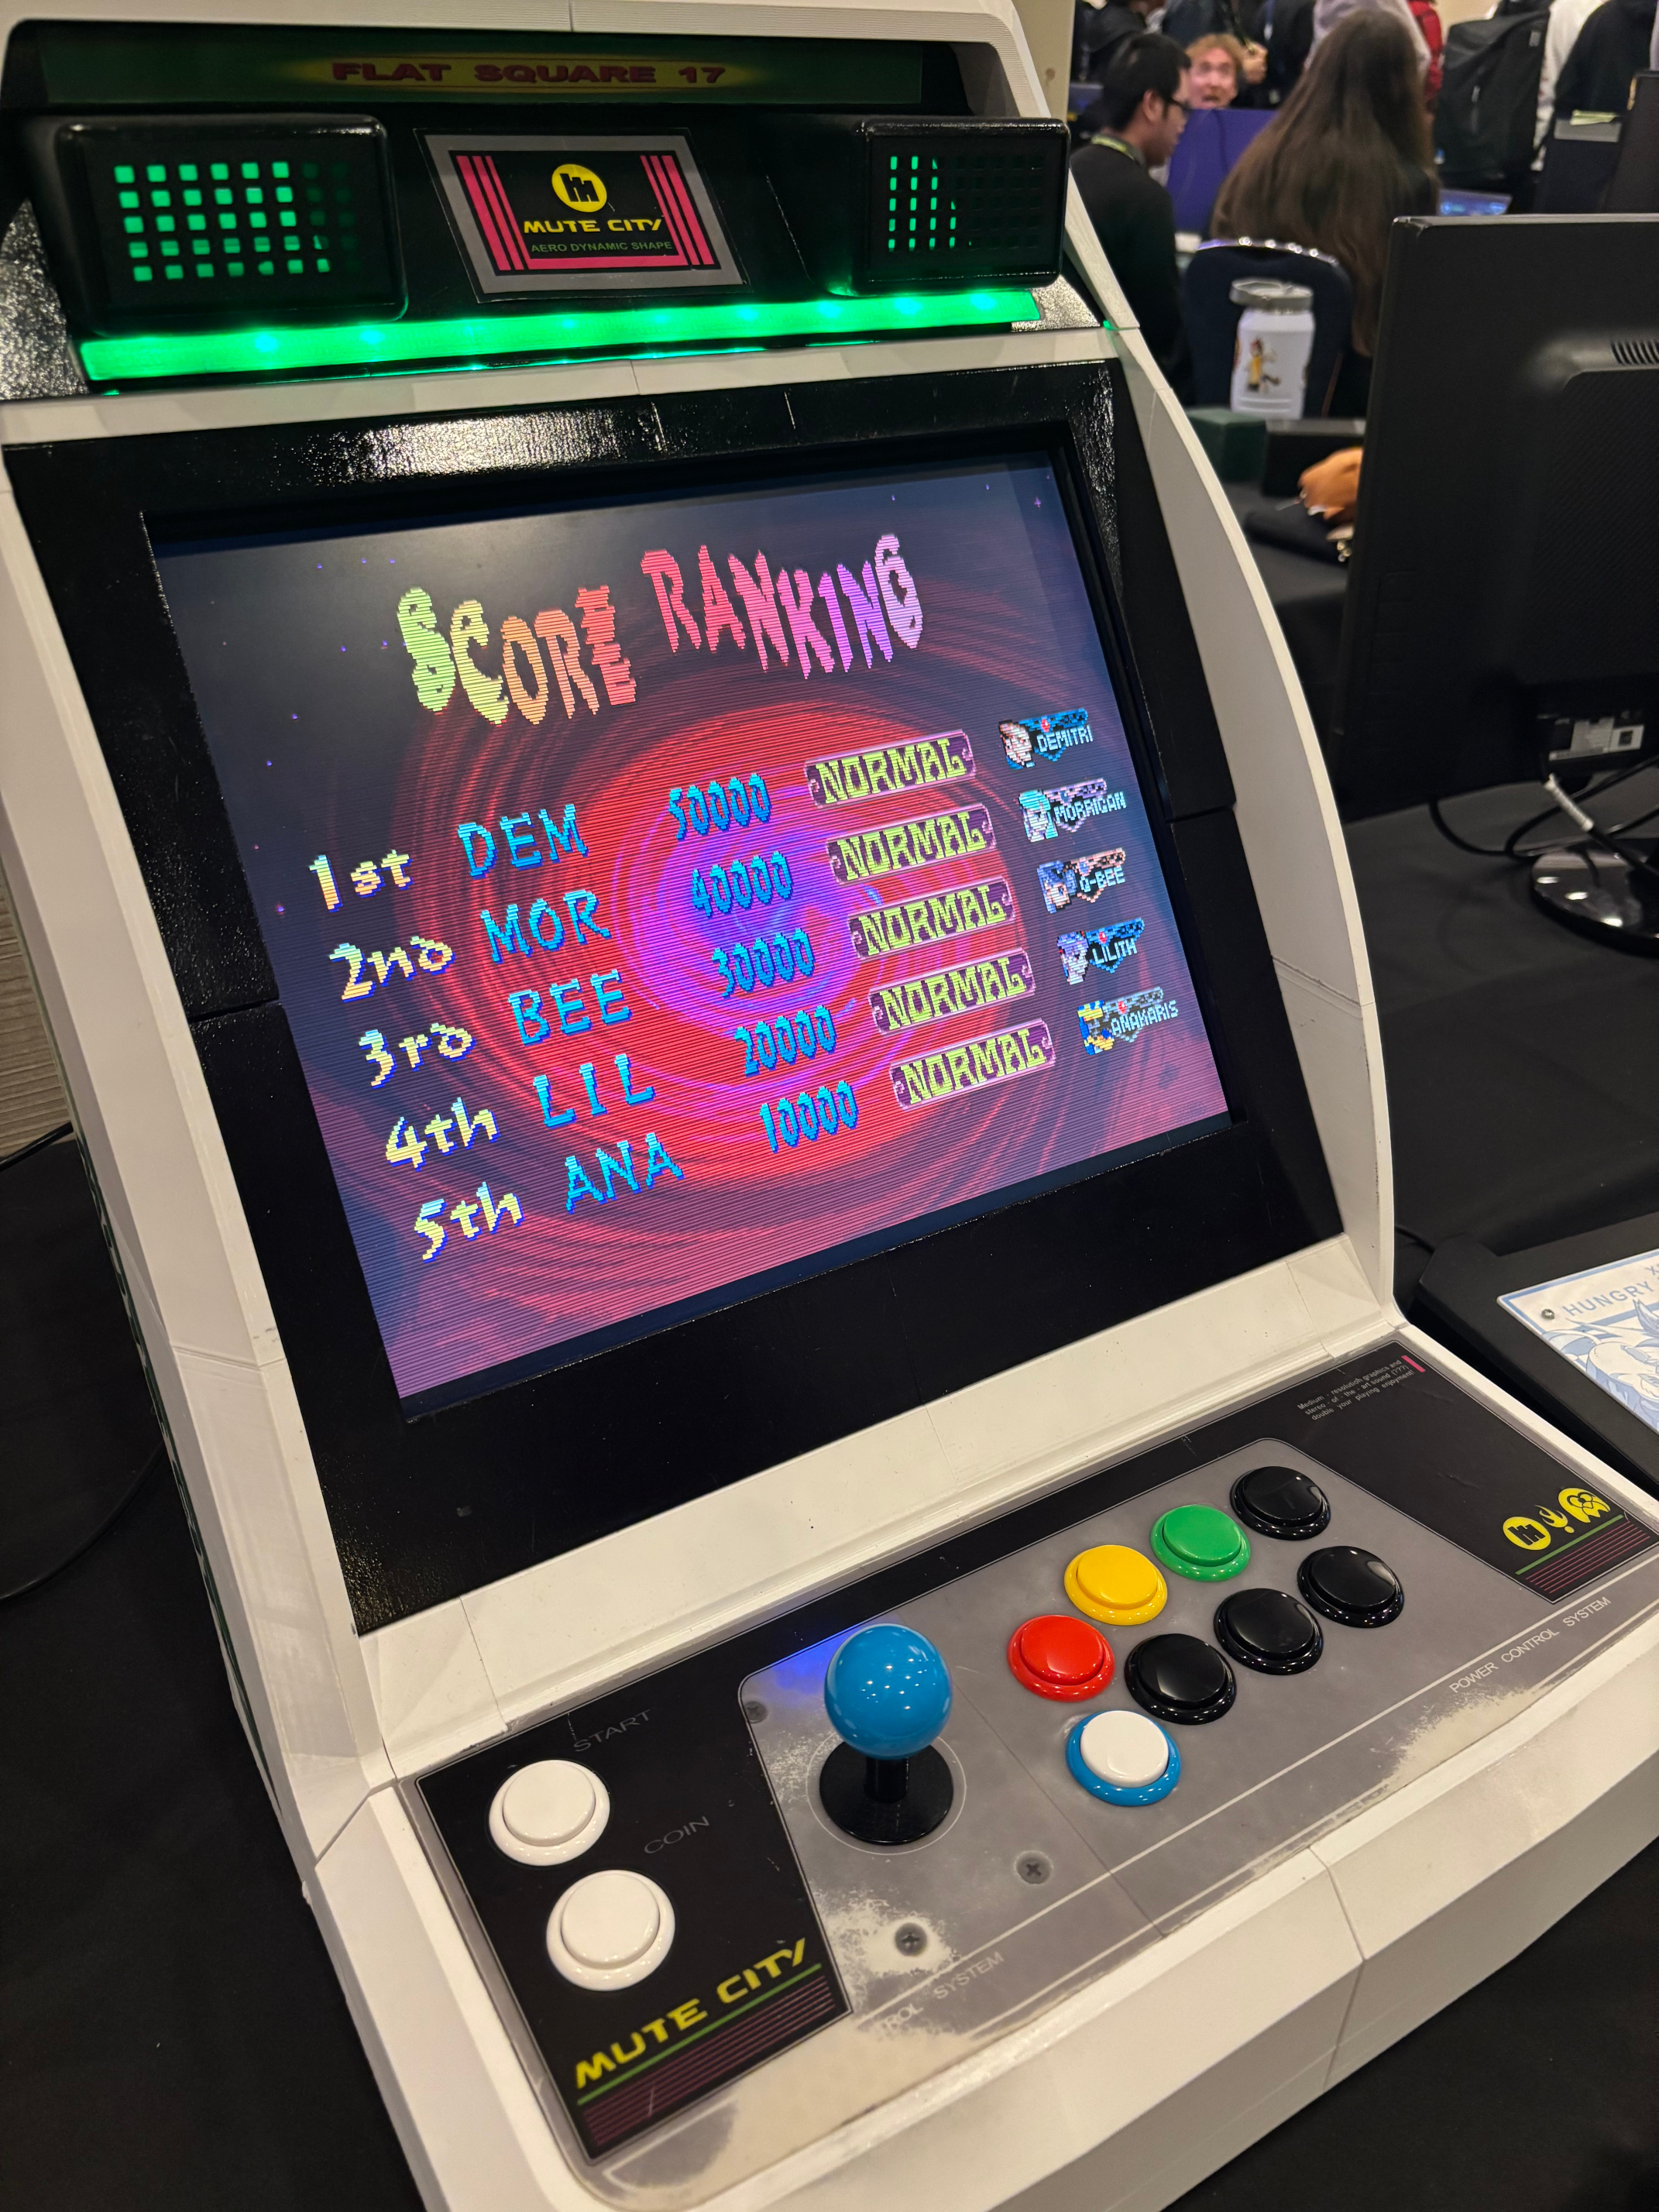
One example of a substantial edit was to export the MNAC topper speaker box as a model I could further edit in Blender, so I could shrink the speaker openings slightly and add a lightbar below them, which was an iconic feature of the original arcade cabinet missing from the MNAC design.
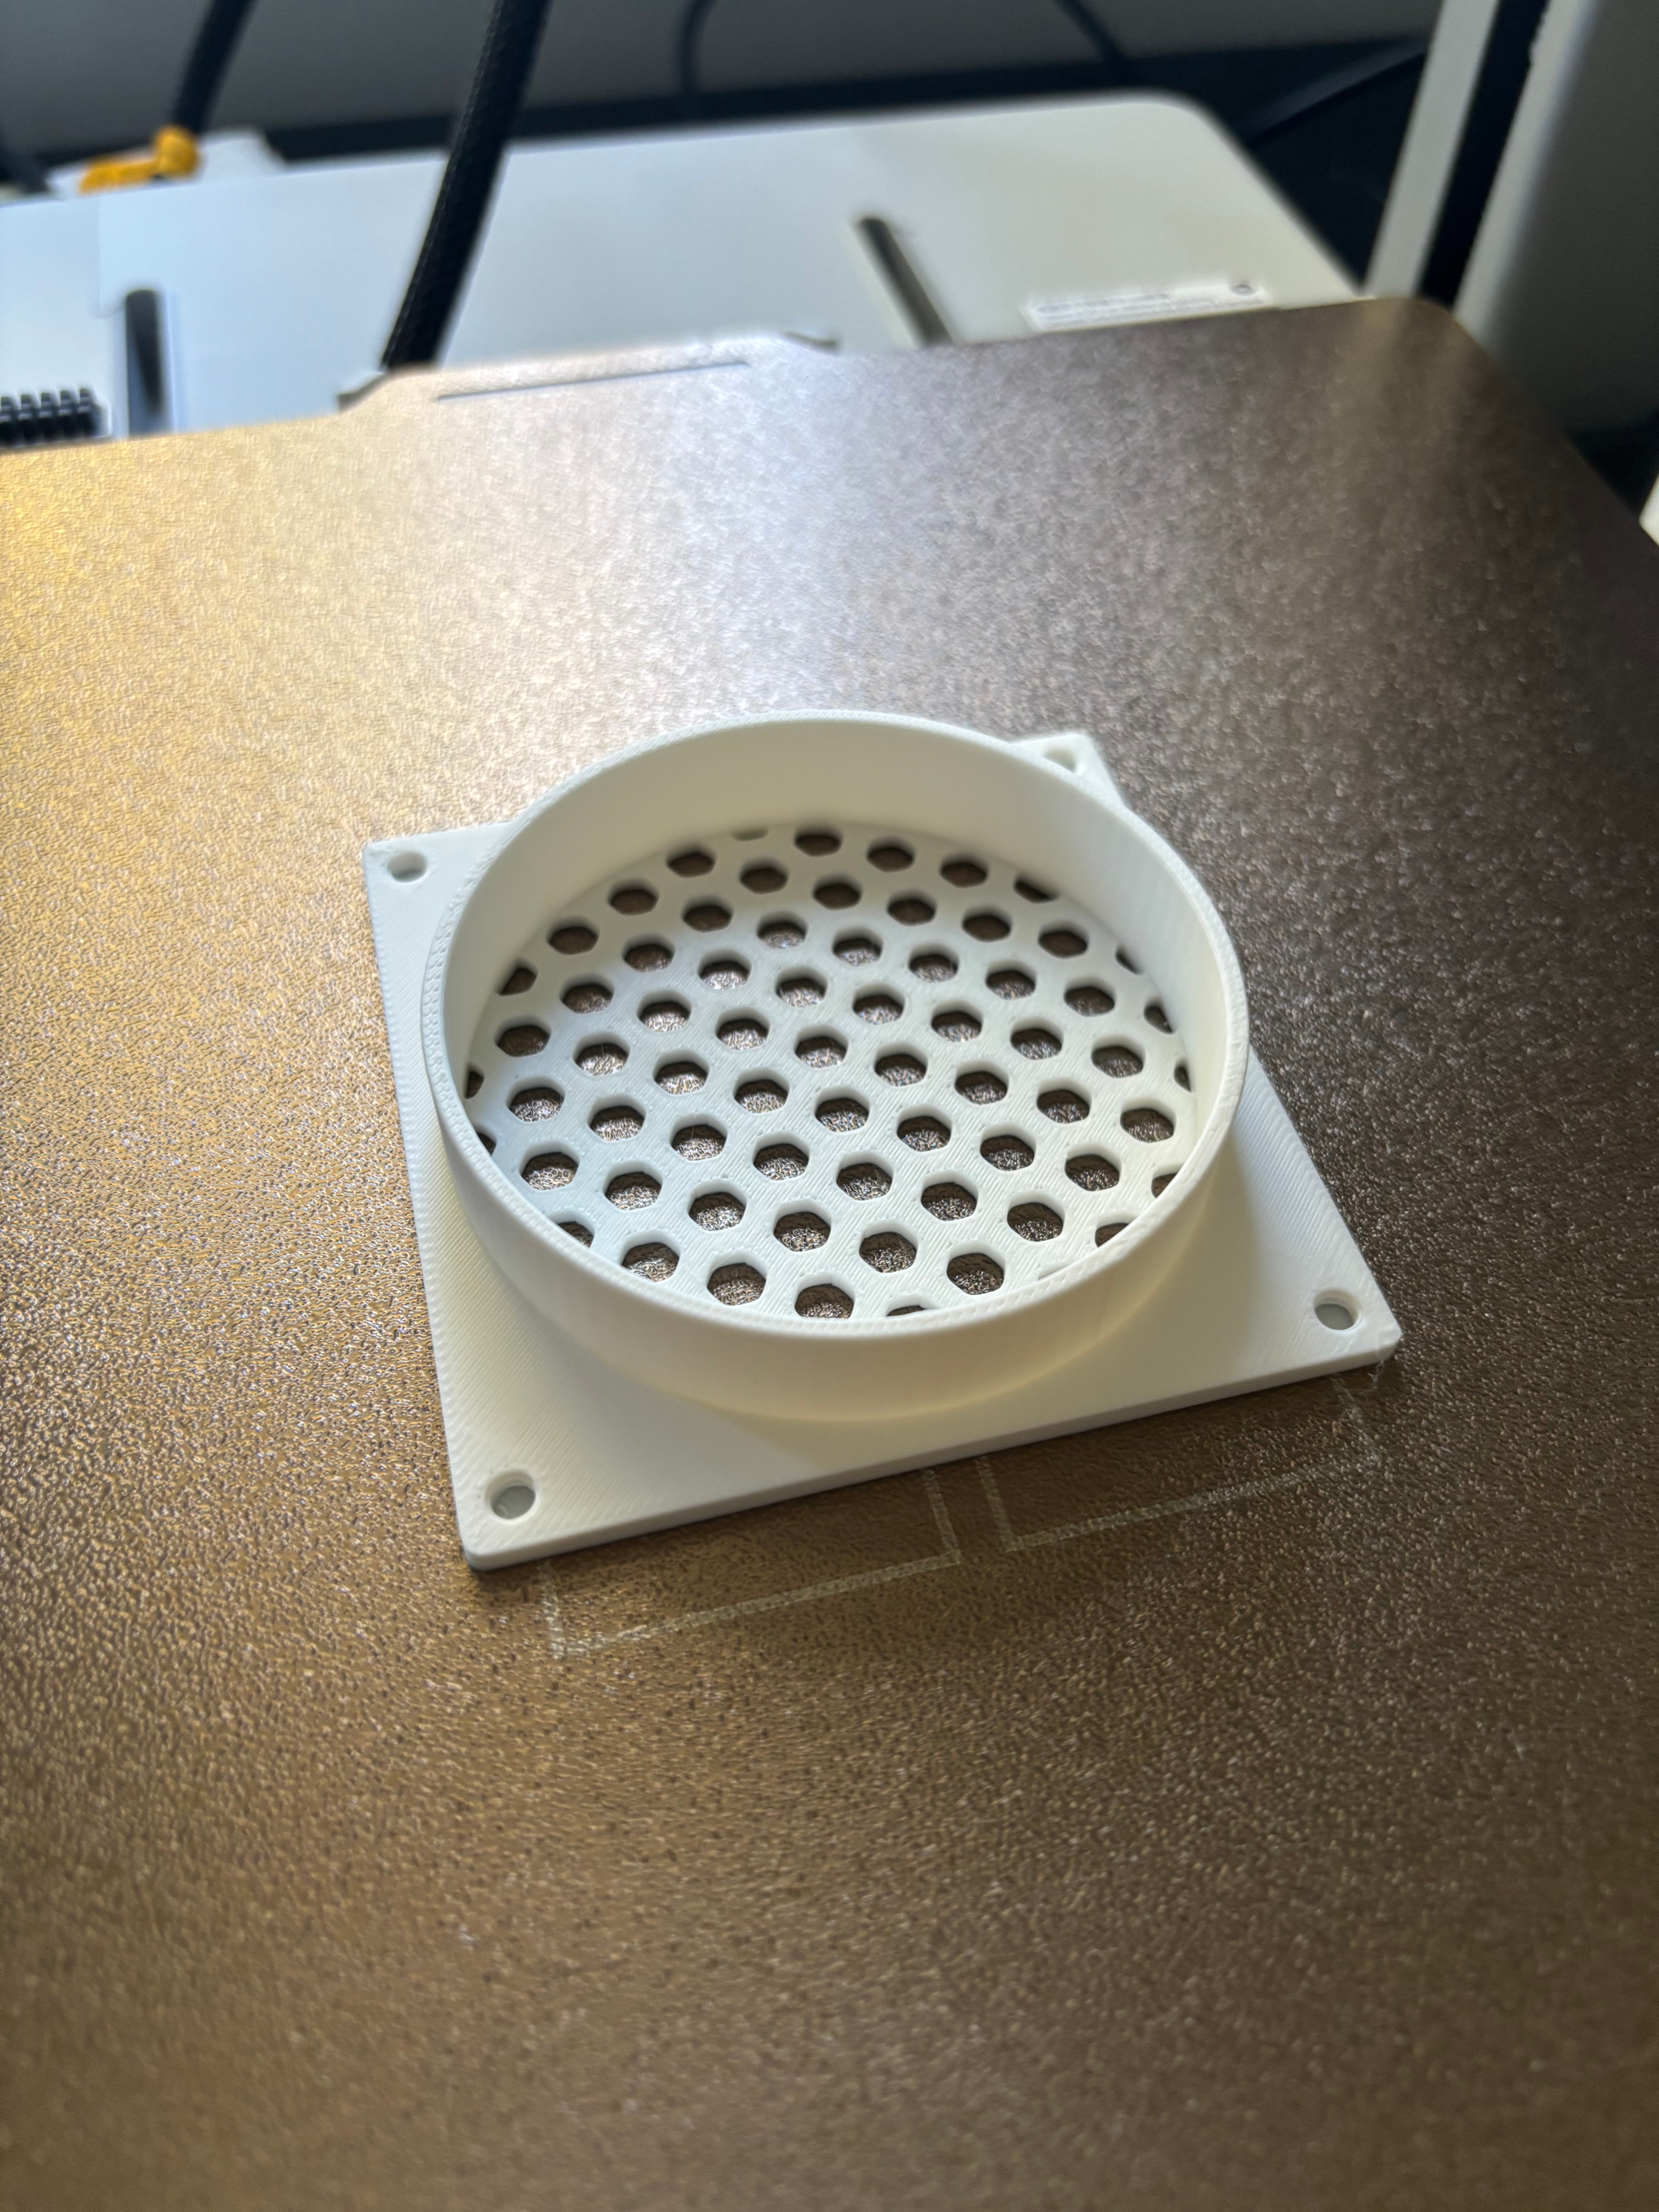
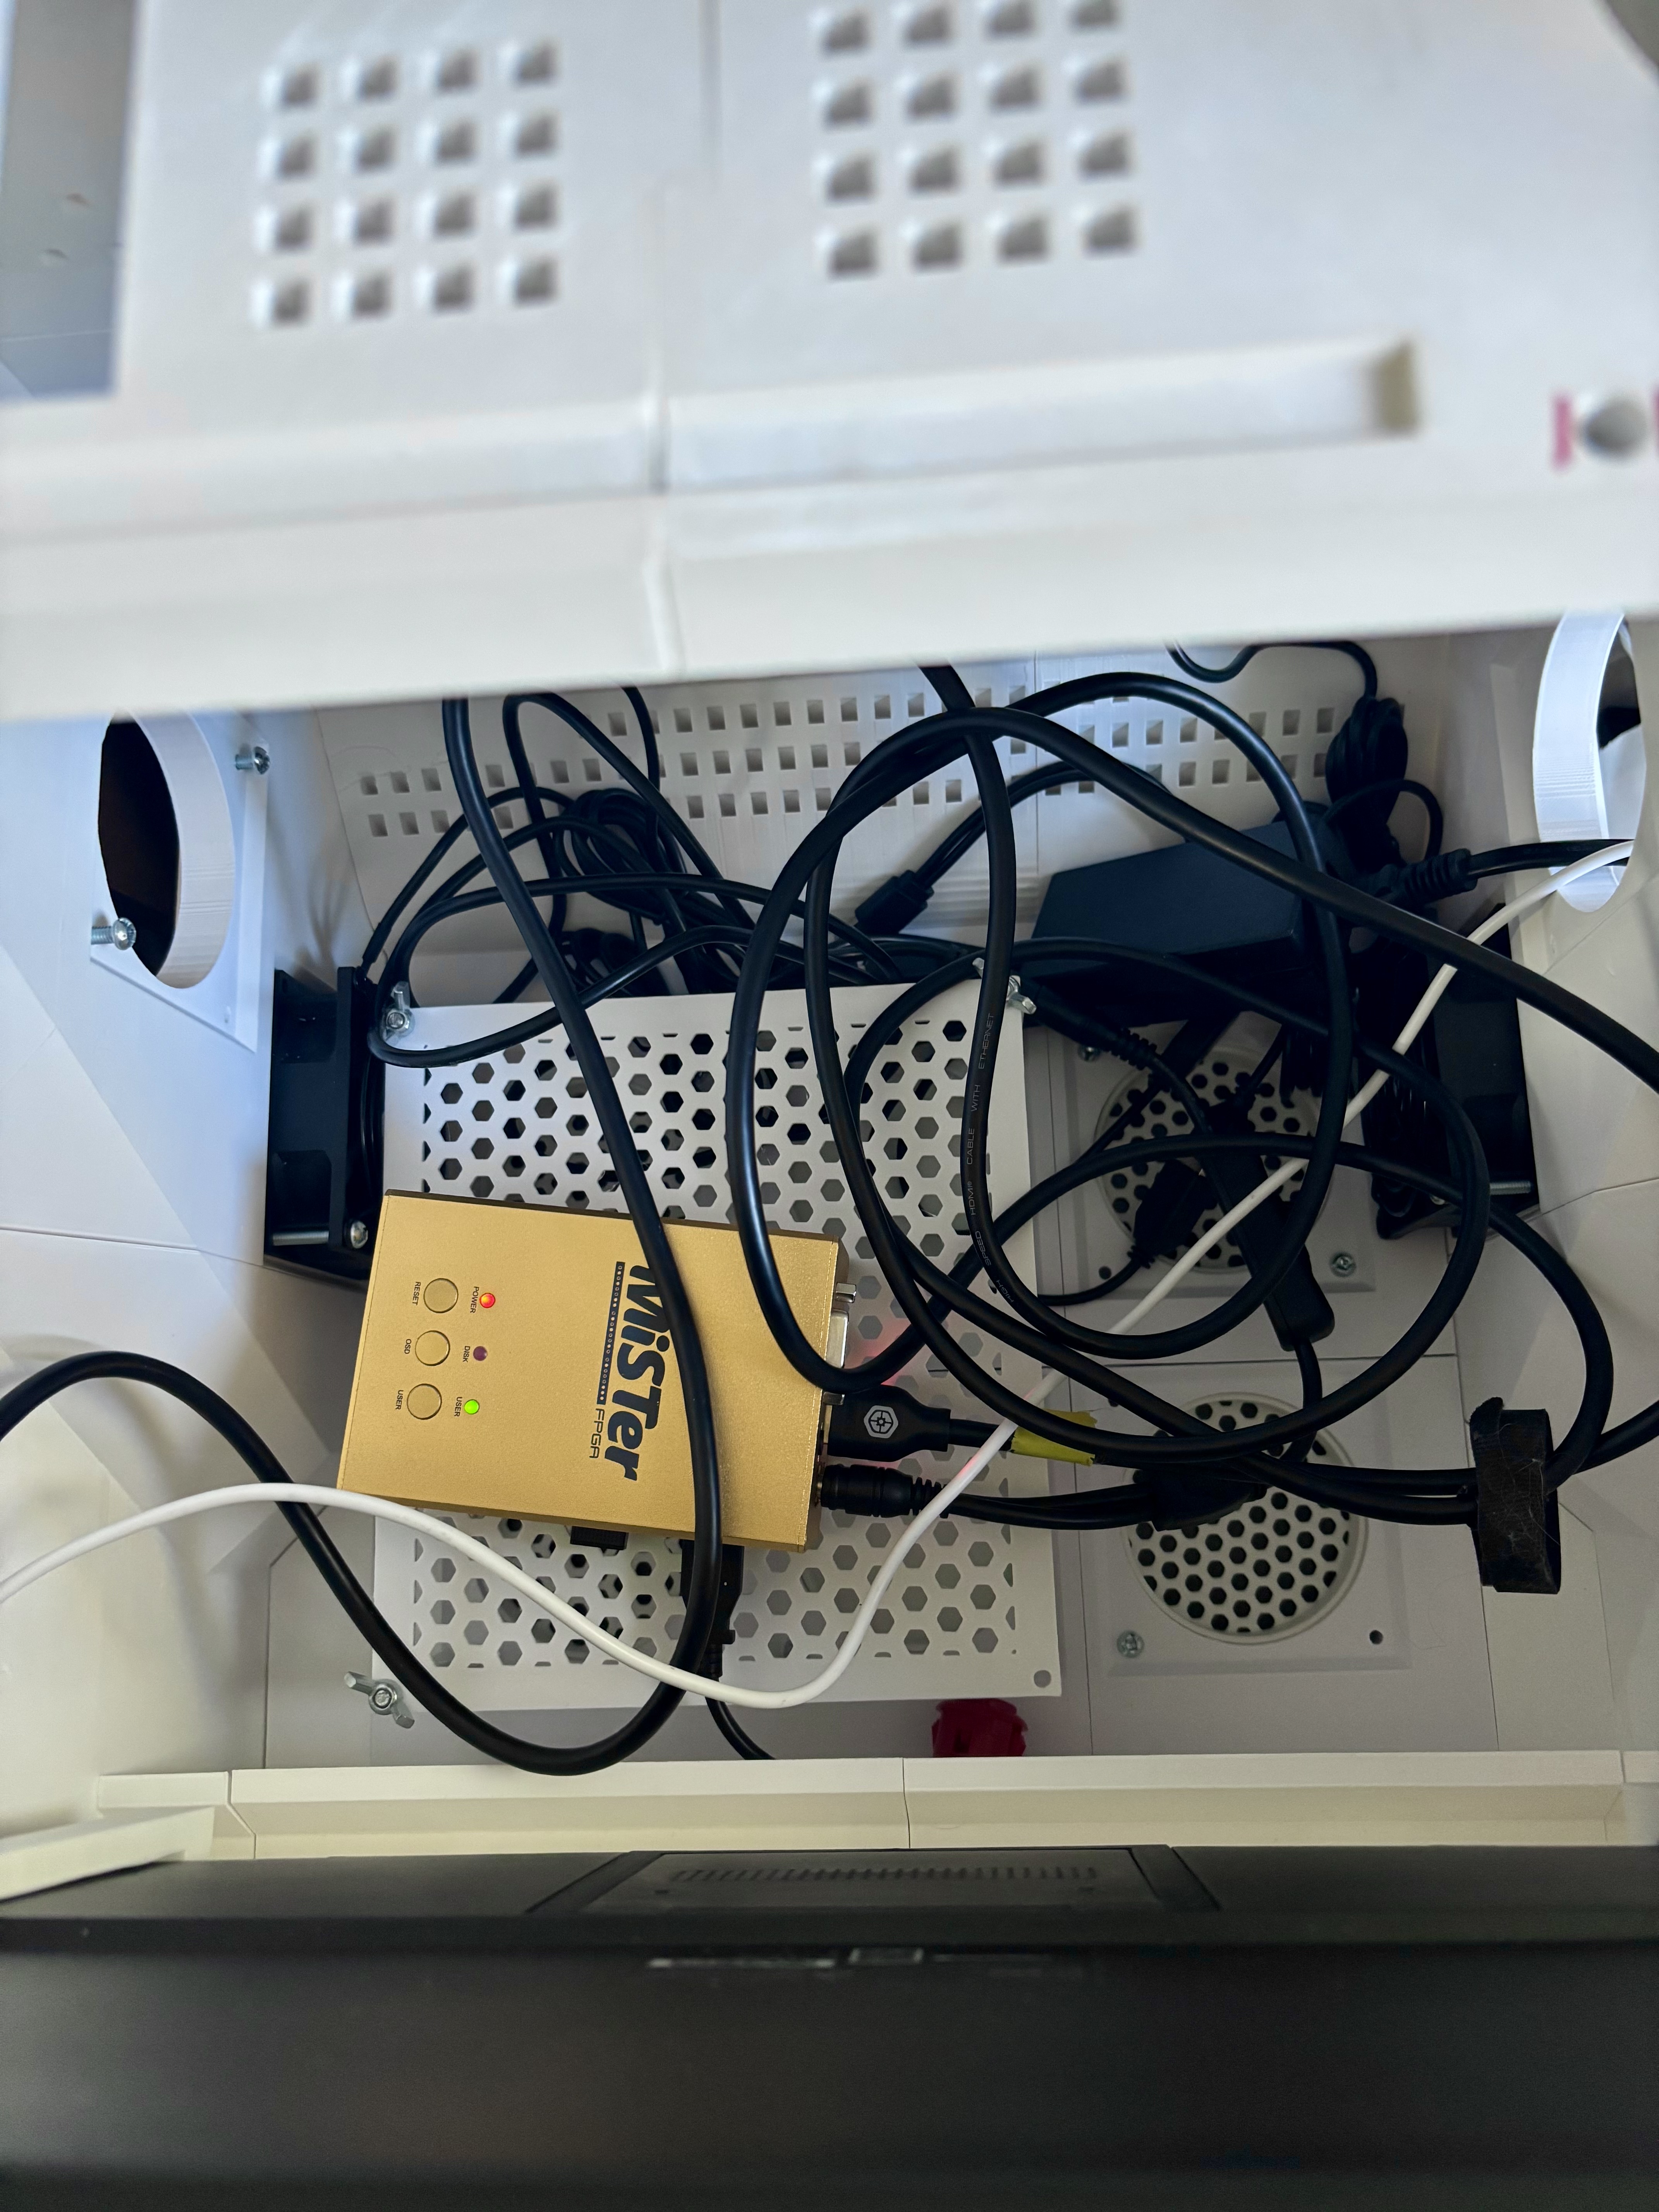
I made use of a very handy parametric grille generation tool that was created by a user of Maker World (Bambu Studio's online portal for posting printable models), to generate various fan port covers for the ports: grilles, solid covers, and indented covers for peripherals. The tool was able to add screw thread holes to the corners of the cover models, and then afterwards in Bambu Studio I added a thin solid layer at the base of those holes. This meant that the port covers could be screwed in from the inside, leaving them unable to be removed easily from the outside.
I was even able to use that same tool to create an interior square shelf that exactly overlapped the four fan ports below it, using threaded screw rods as standoffs to raise the shelf up.
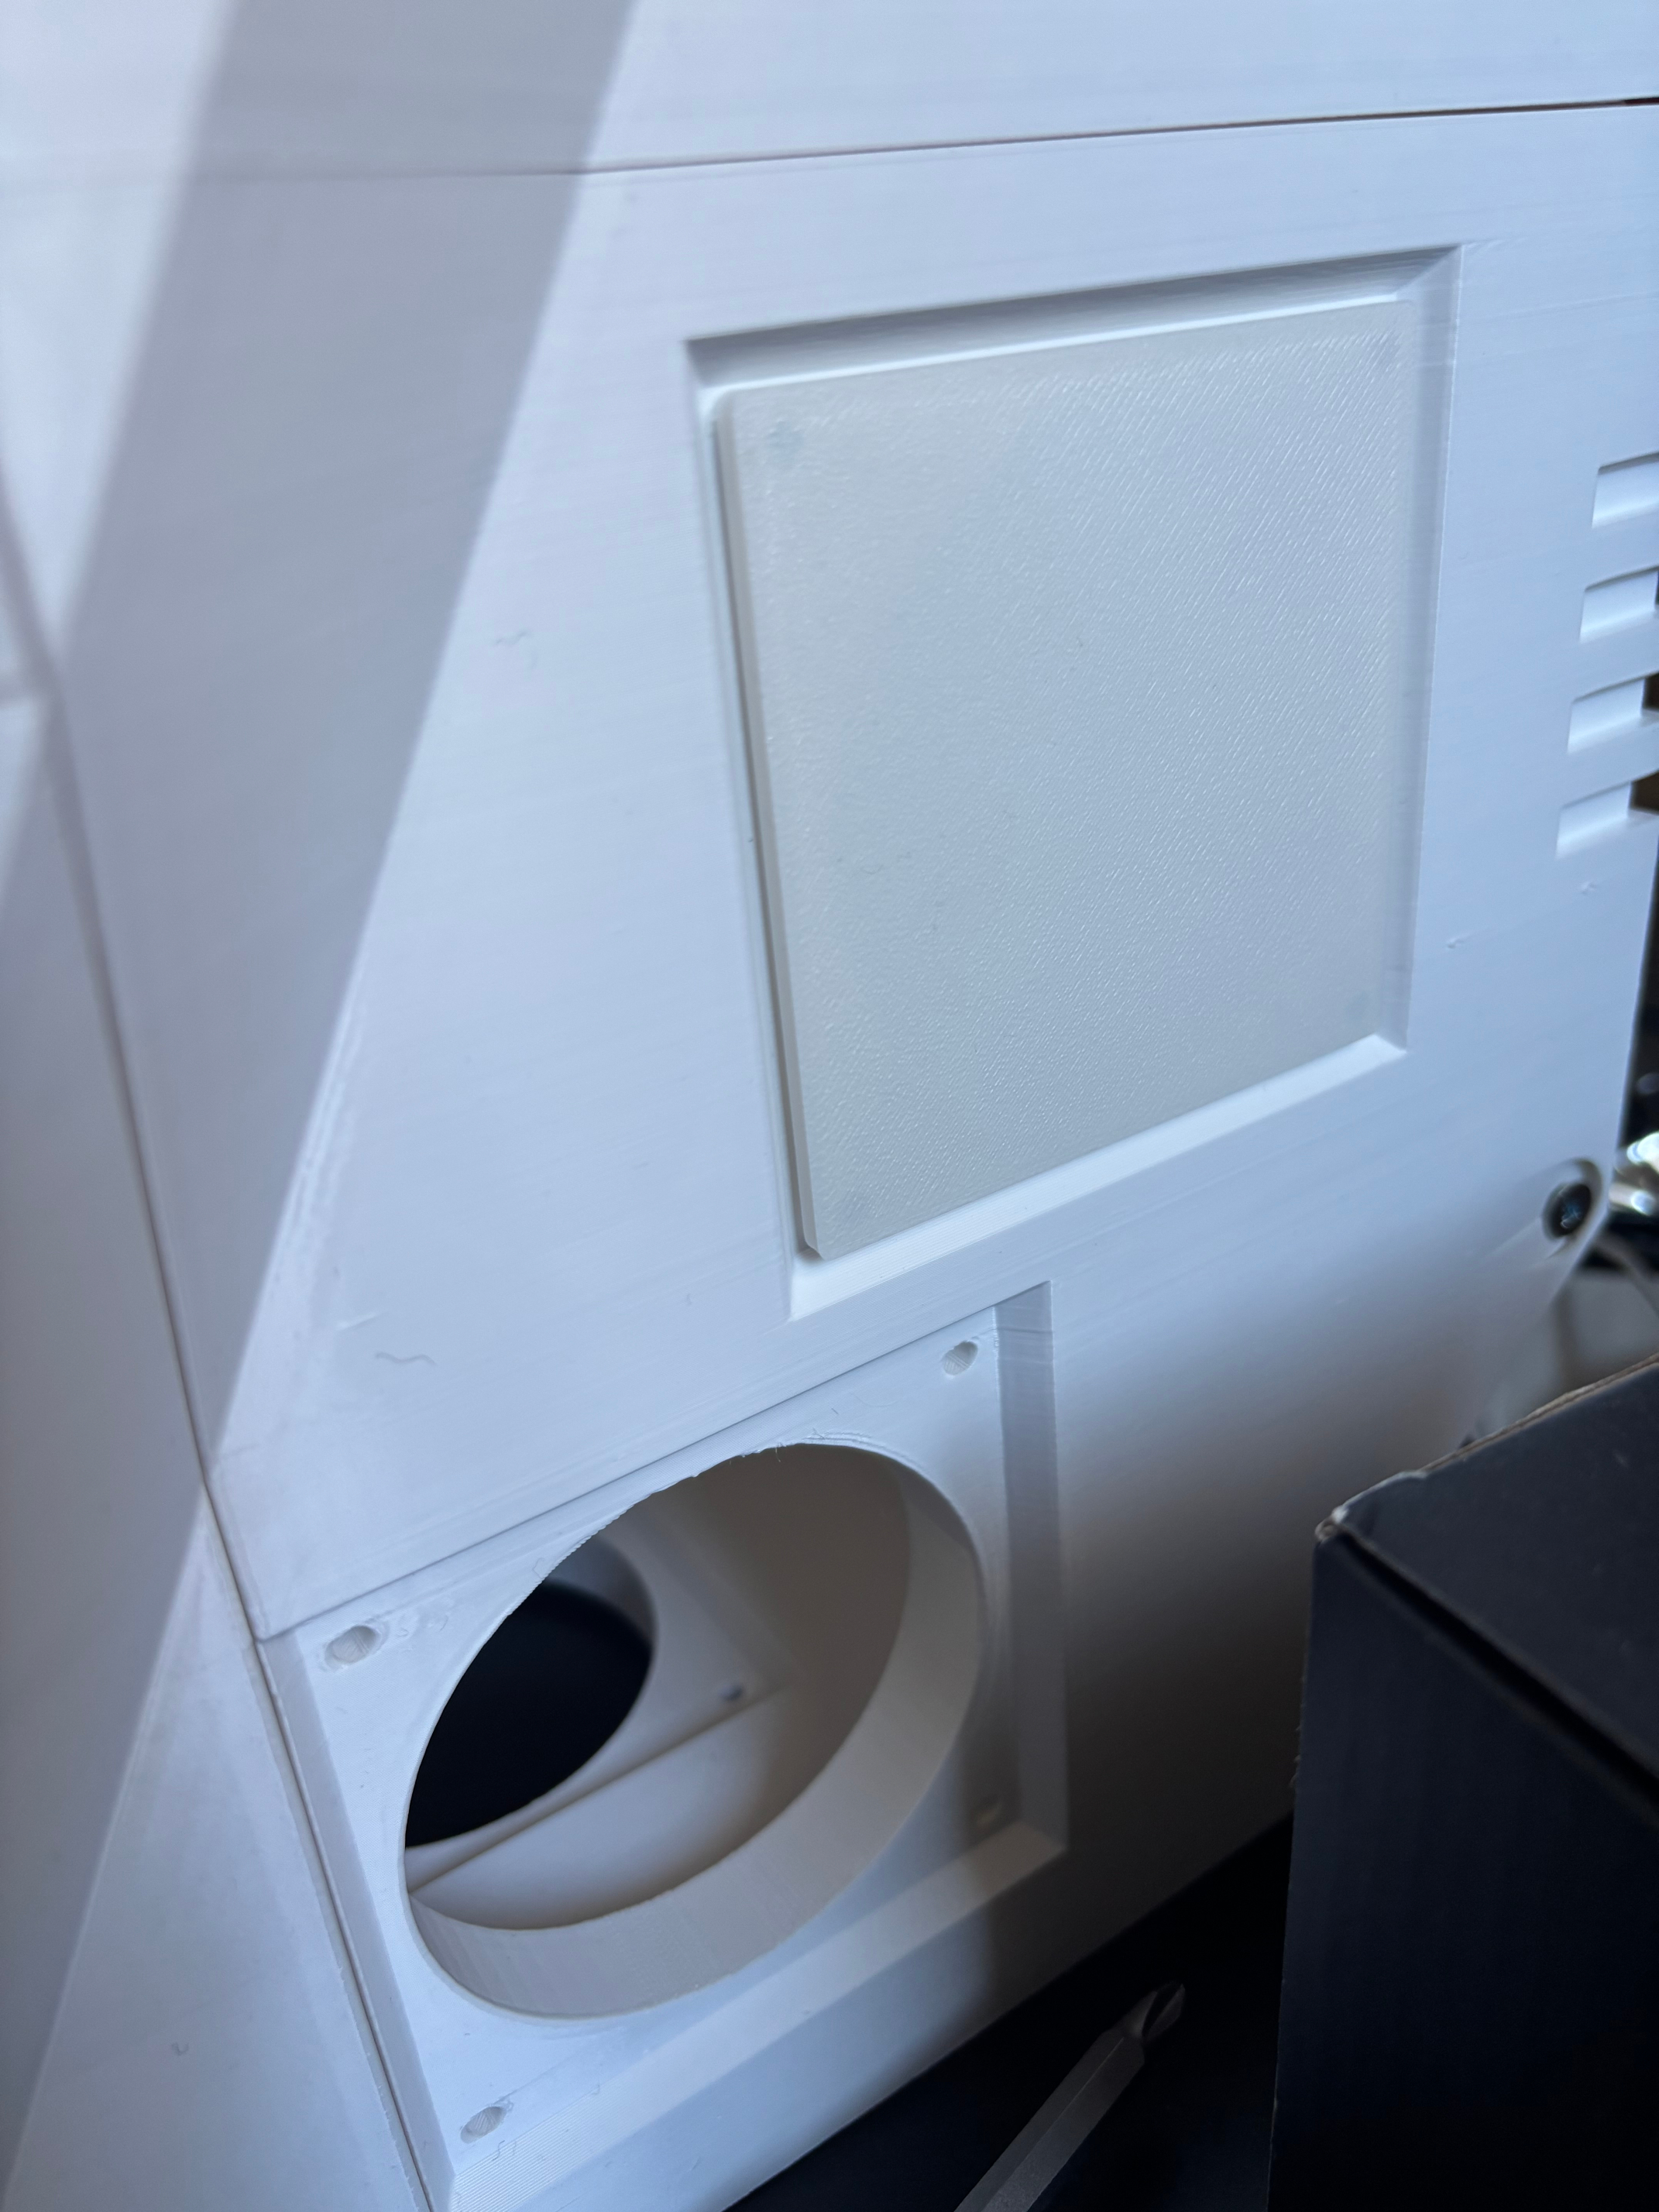
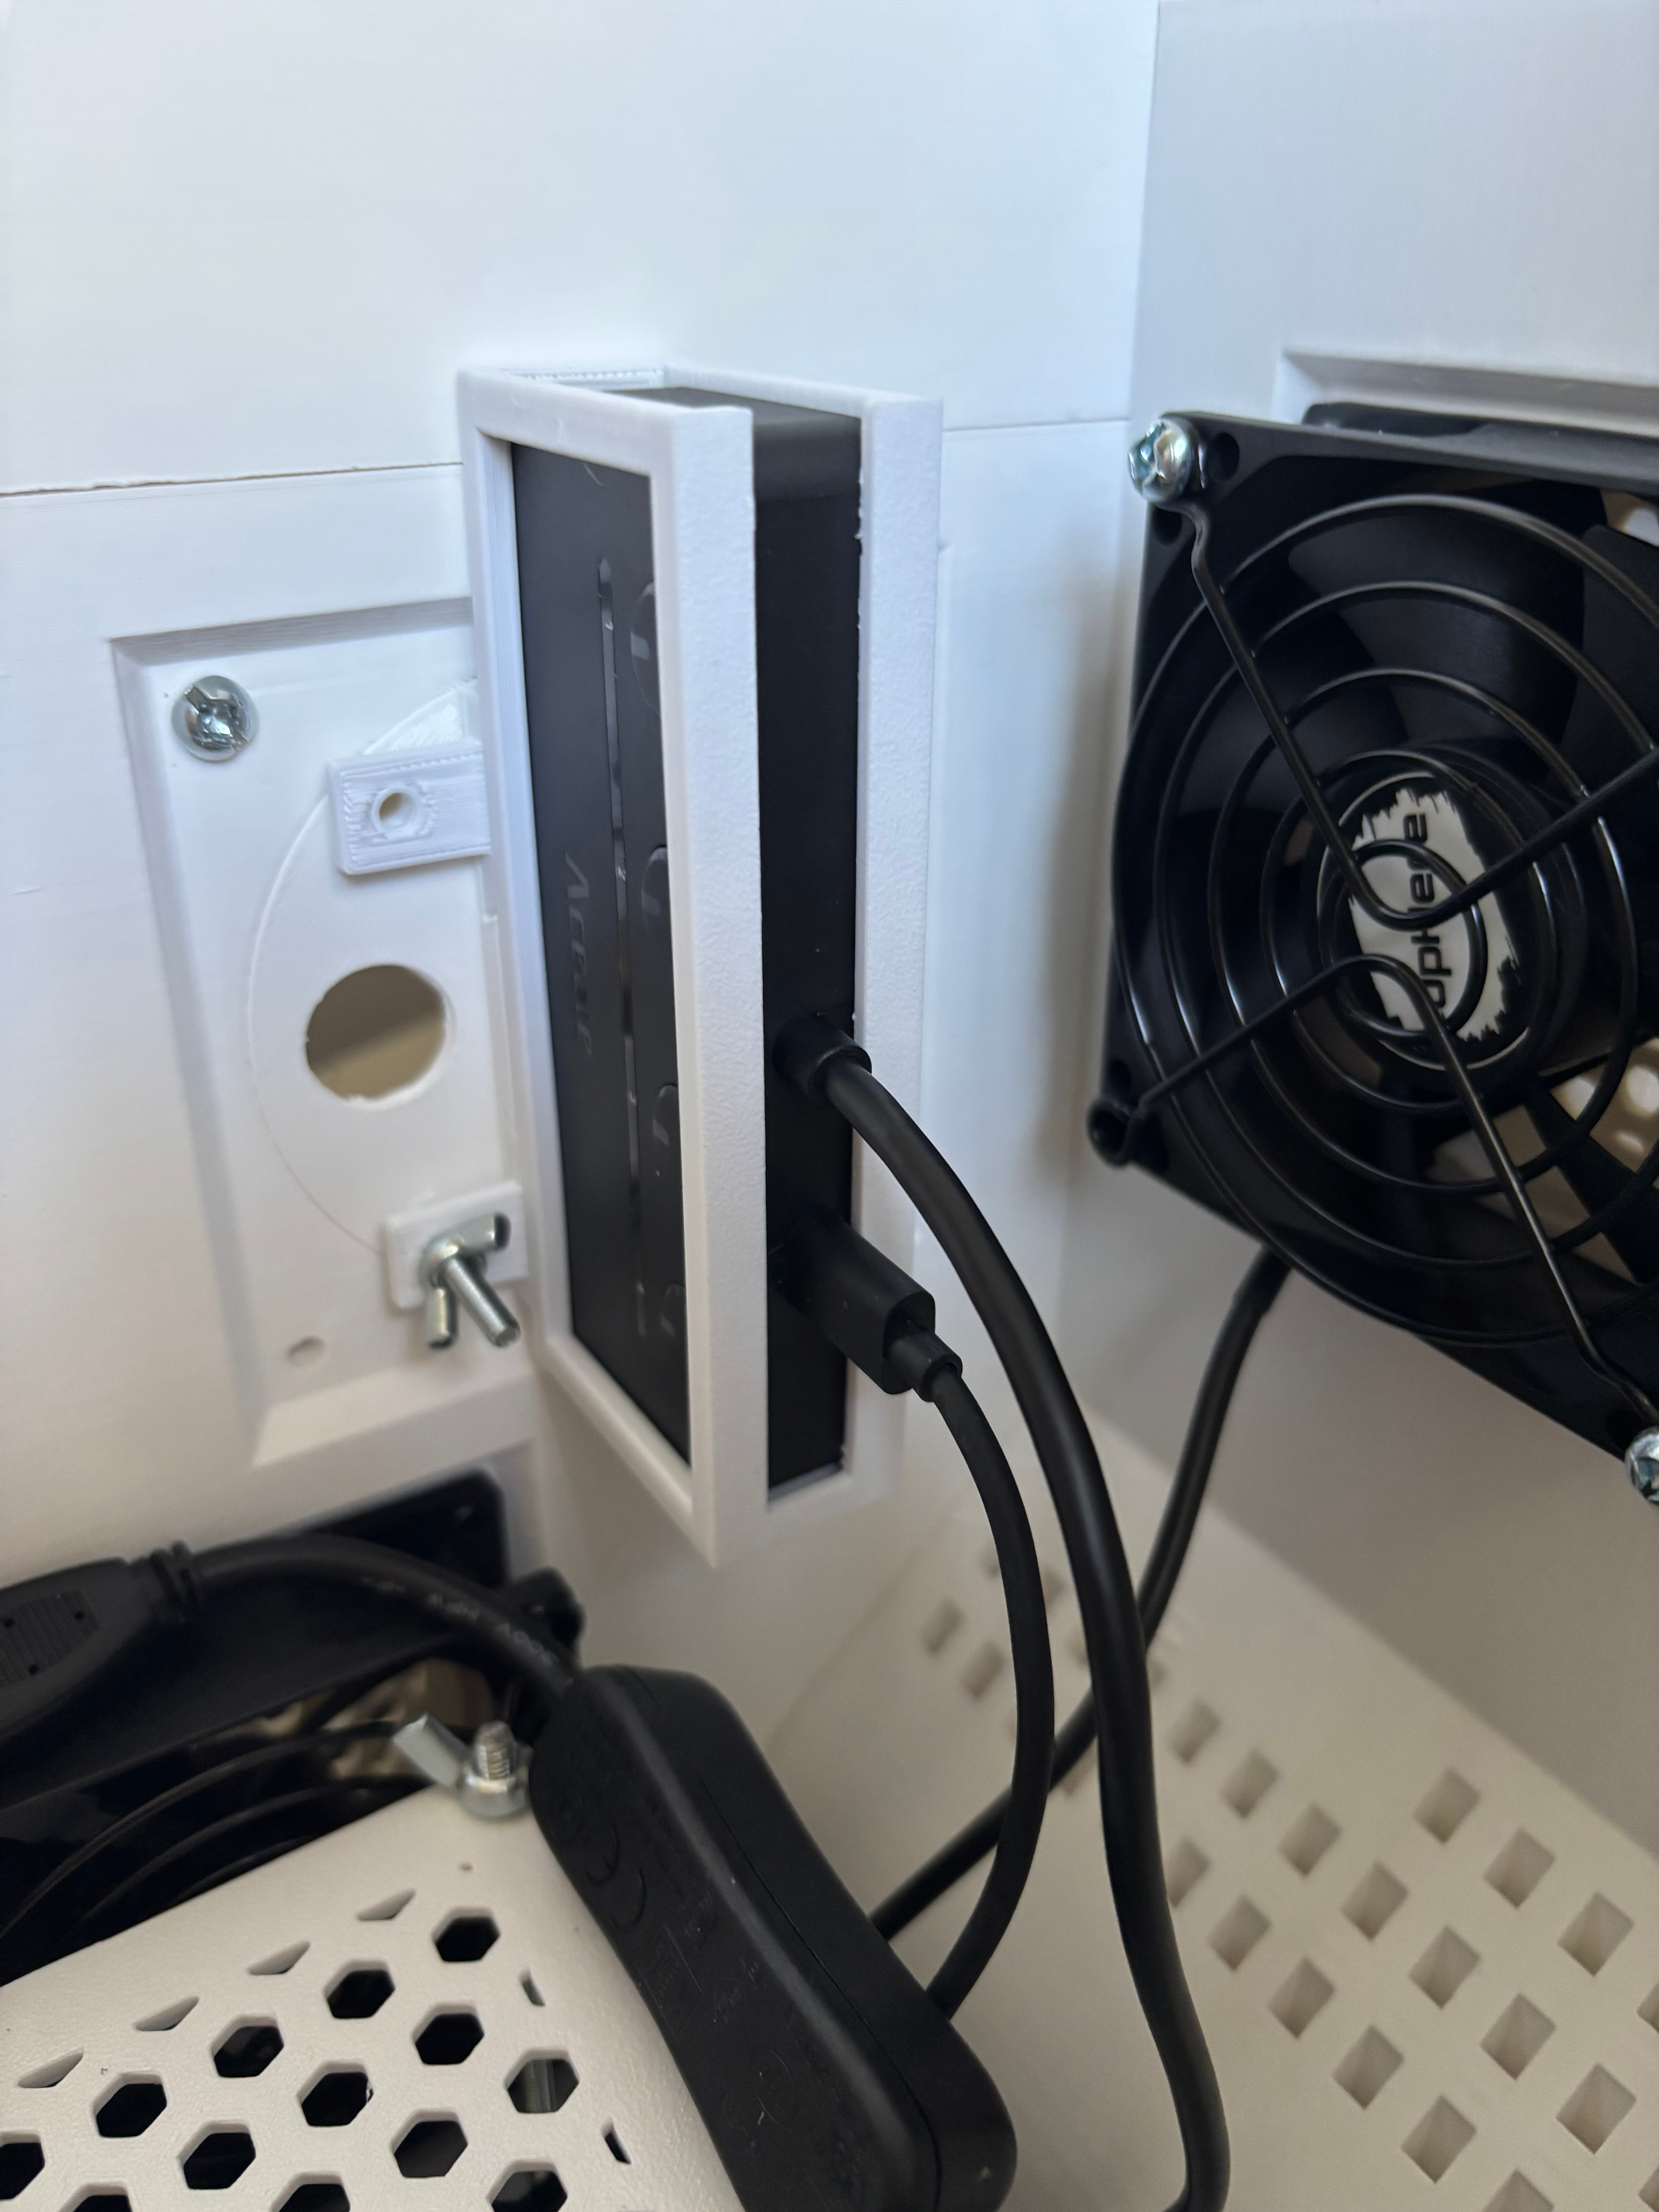
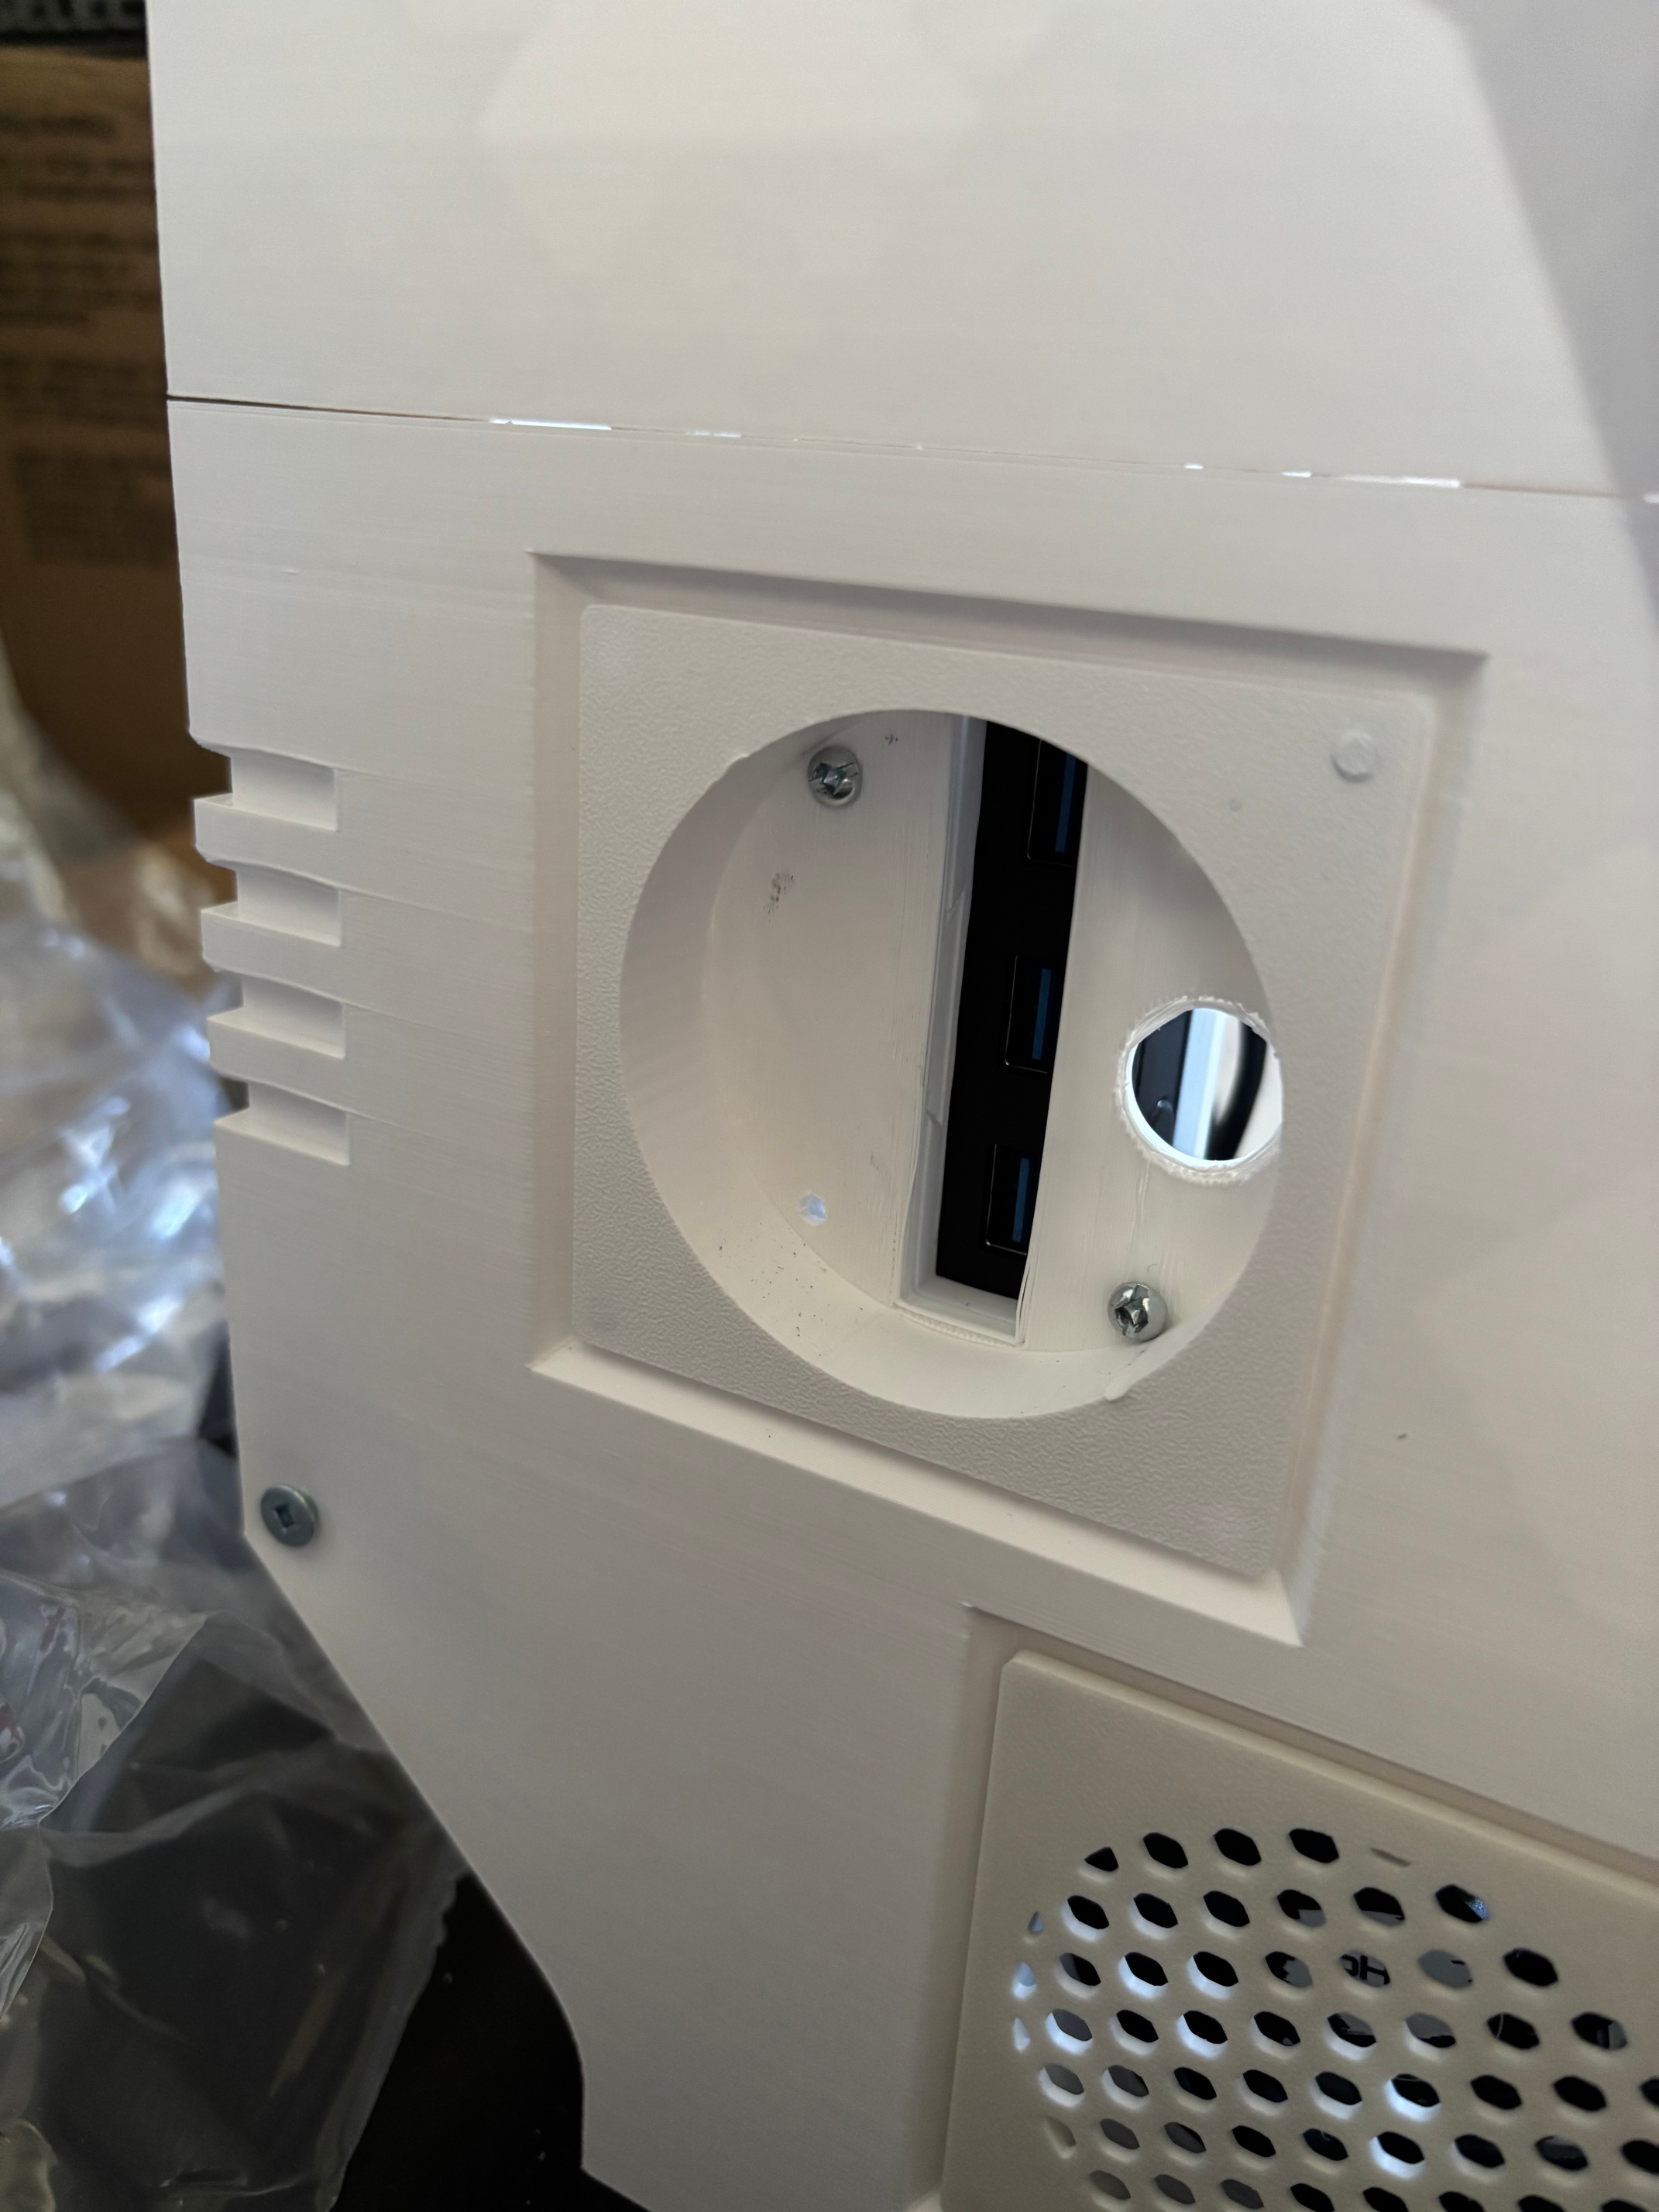
I adapted one of those indented port covers to be the mounting point for a USB hub enclosure, to be accessible from the exterior of the cabinet so people could connect additional controllers. I did this by measuring the USB hub, creating a negative volume in Bambu Studio of that size, copying that volume and scaling it up and changing it to a positive volume with a negative volume inside it. This created an enclosure that I already knew the hub would slide neatly into. I added further negative volumes to allow for ventilation and make the ports and buttons accessible from outside.
I freely admit the dovetail joint I added to attach the enclosure to the cover wasn't a great idea.
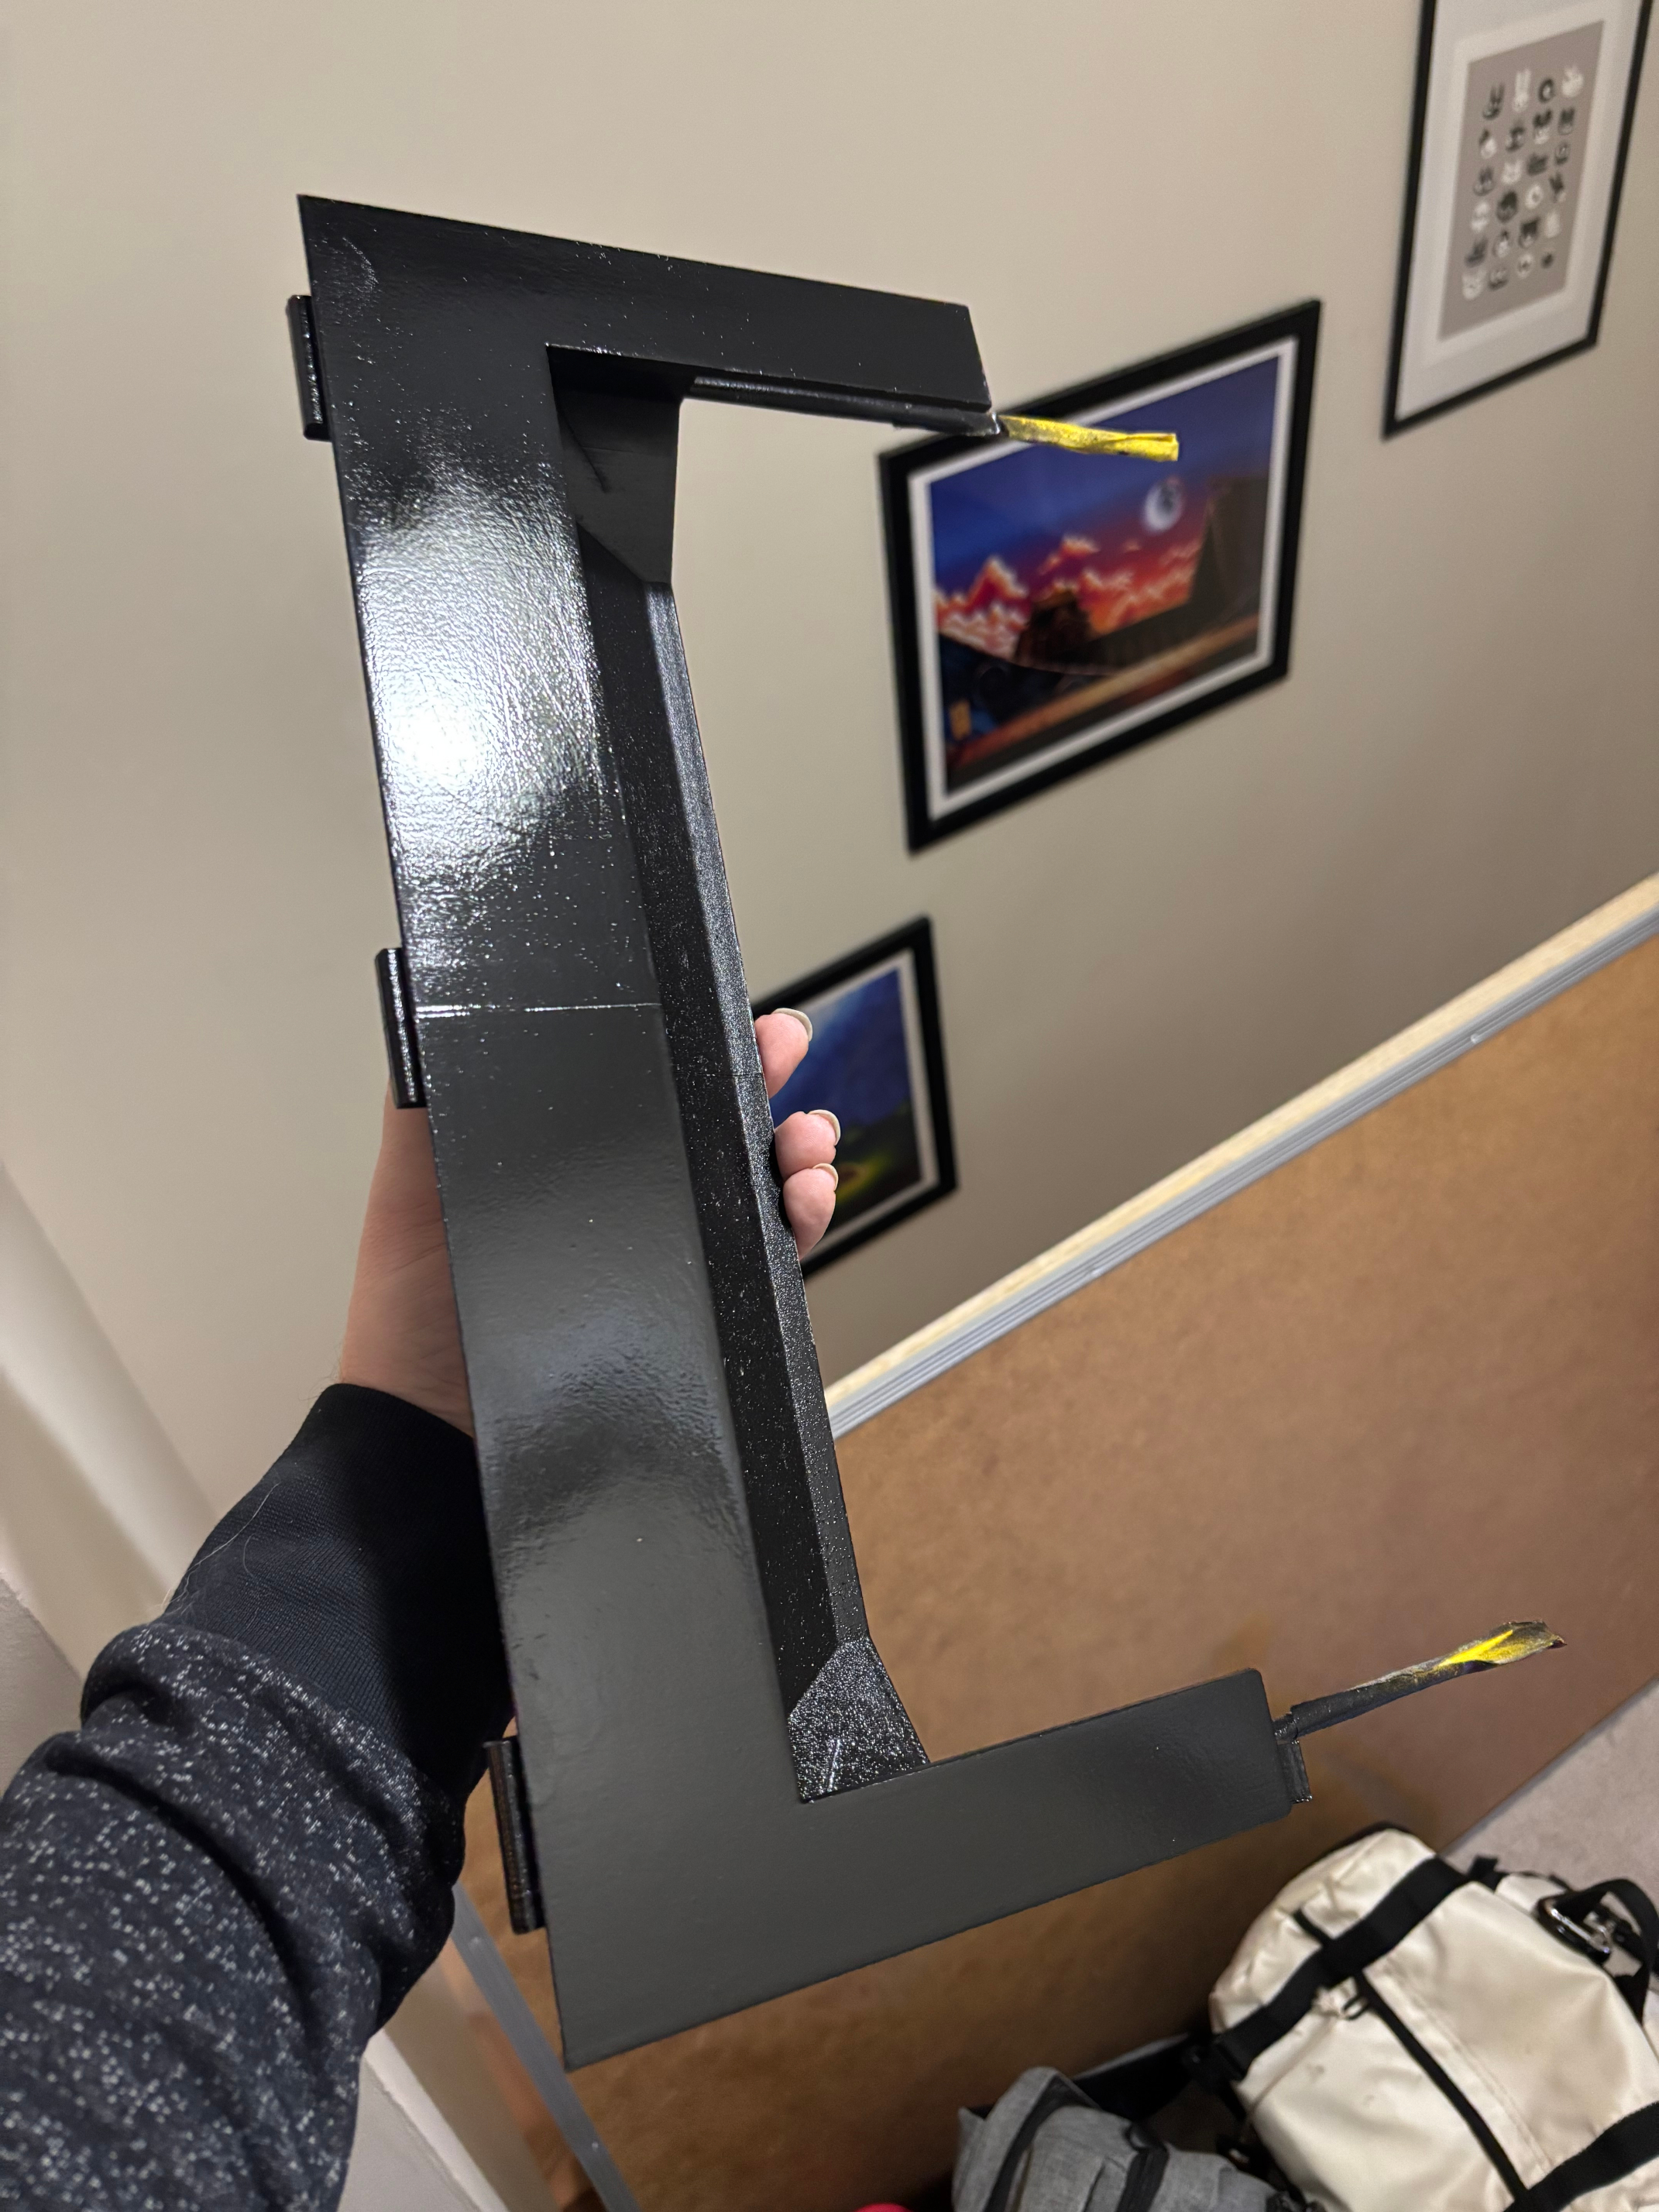
The monitor bezel design that came with the MNAC design was intended for a specific size of screen, which obviously didn't scale up properly, but the design they'd used to affix it into the cabinet was quite clever and I wanted to keep that intact. I created a replacement bezel design by exporting it into Blender, and removing the monitor aperture, leaving me with a solid flat surface. That allowed me to use a similar trick to the USB hub, where I would use a "negative" model of the monitor to carve out a space it would fit nicely into.
This didn't work out as planned, of course. First I made a monitor enclosure for the 16:9 LCD, but realized once it was complete that it looked quite small in the frame. Functional, but not ideal.
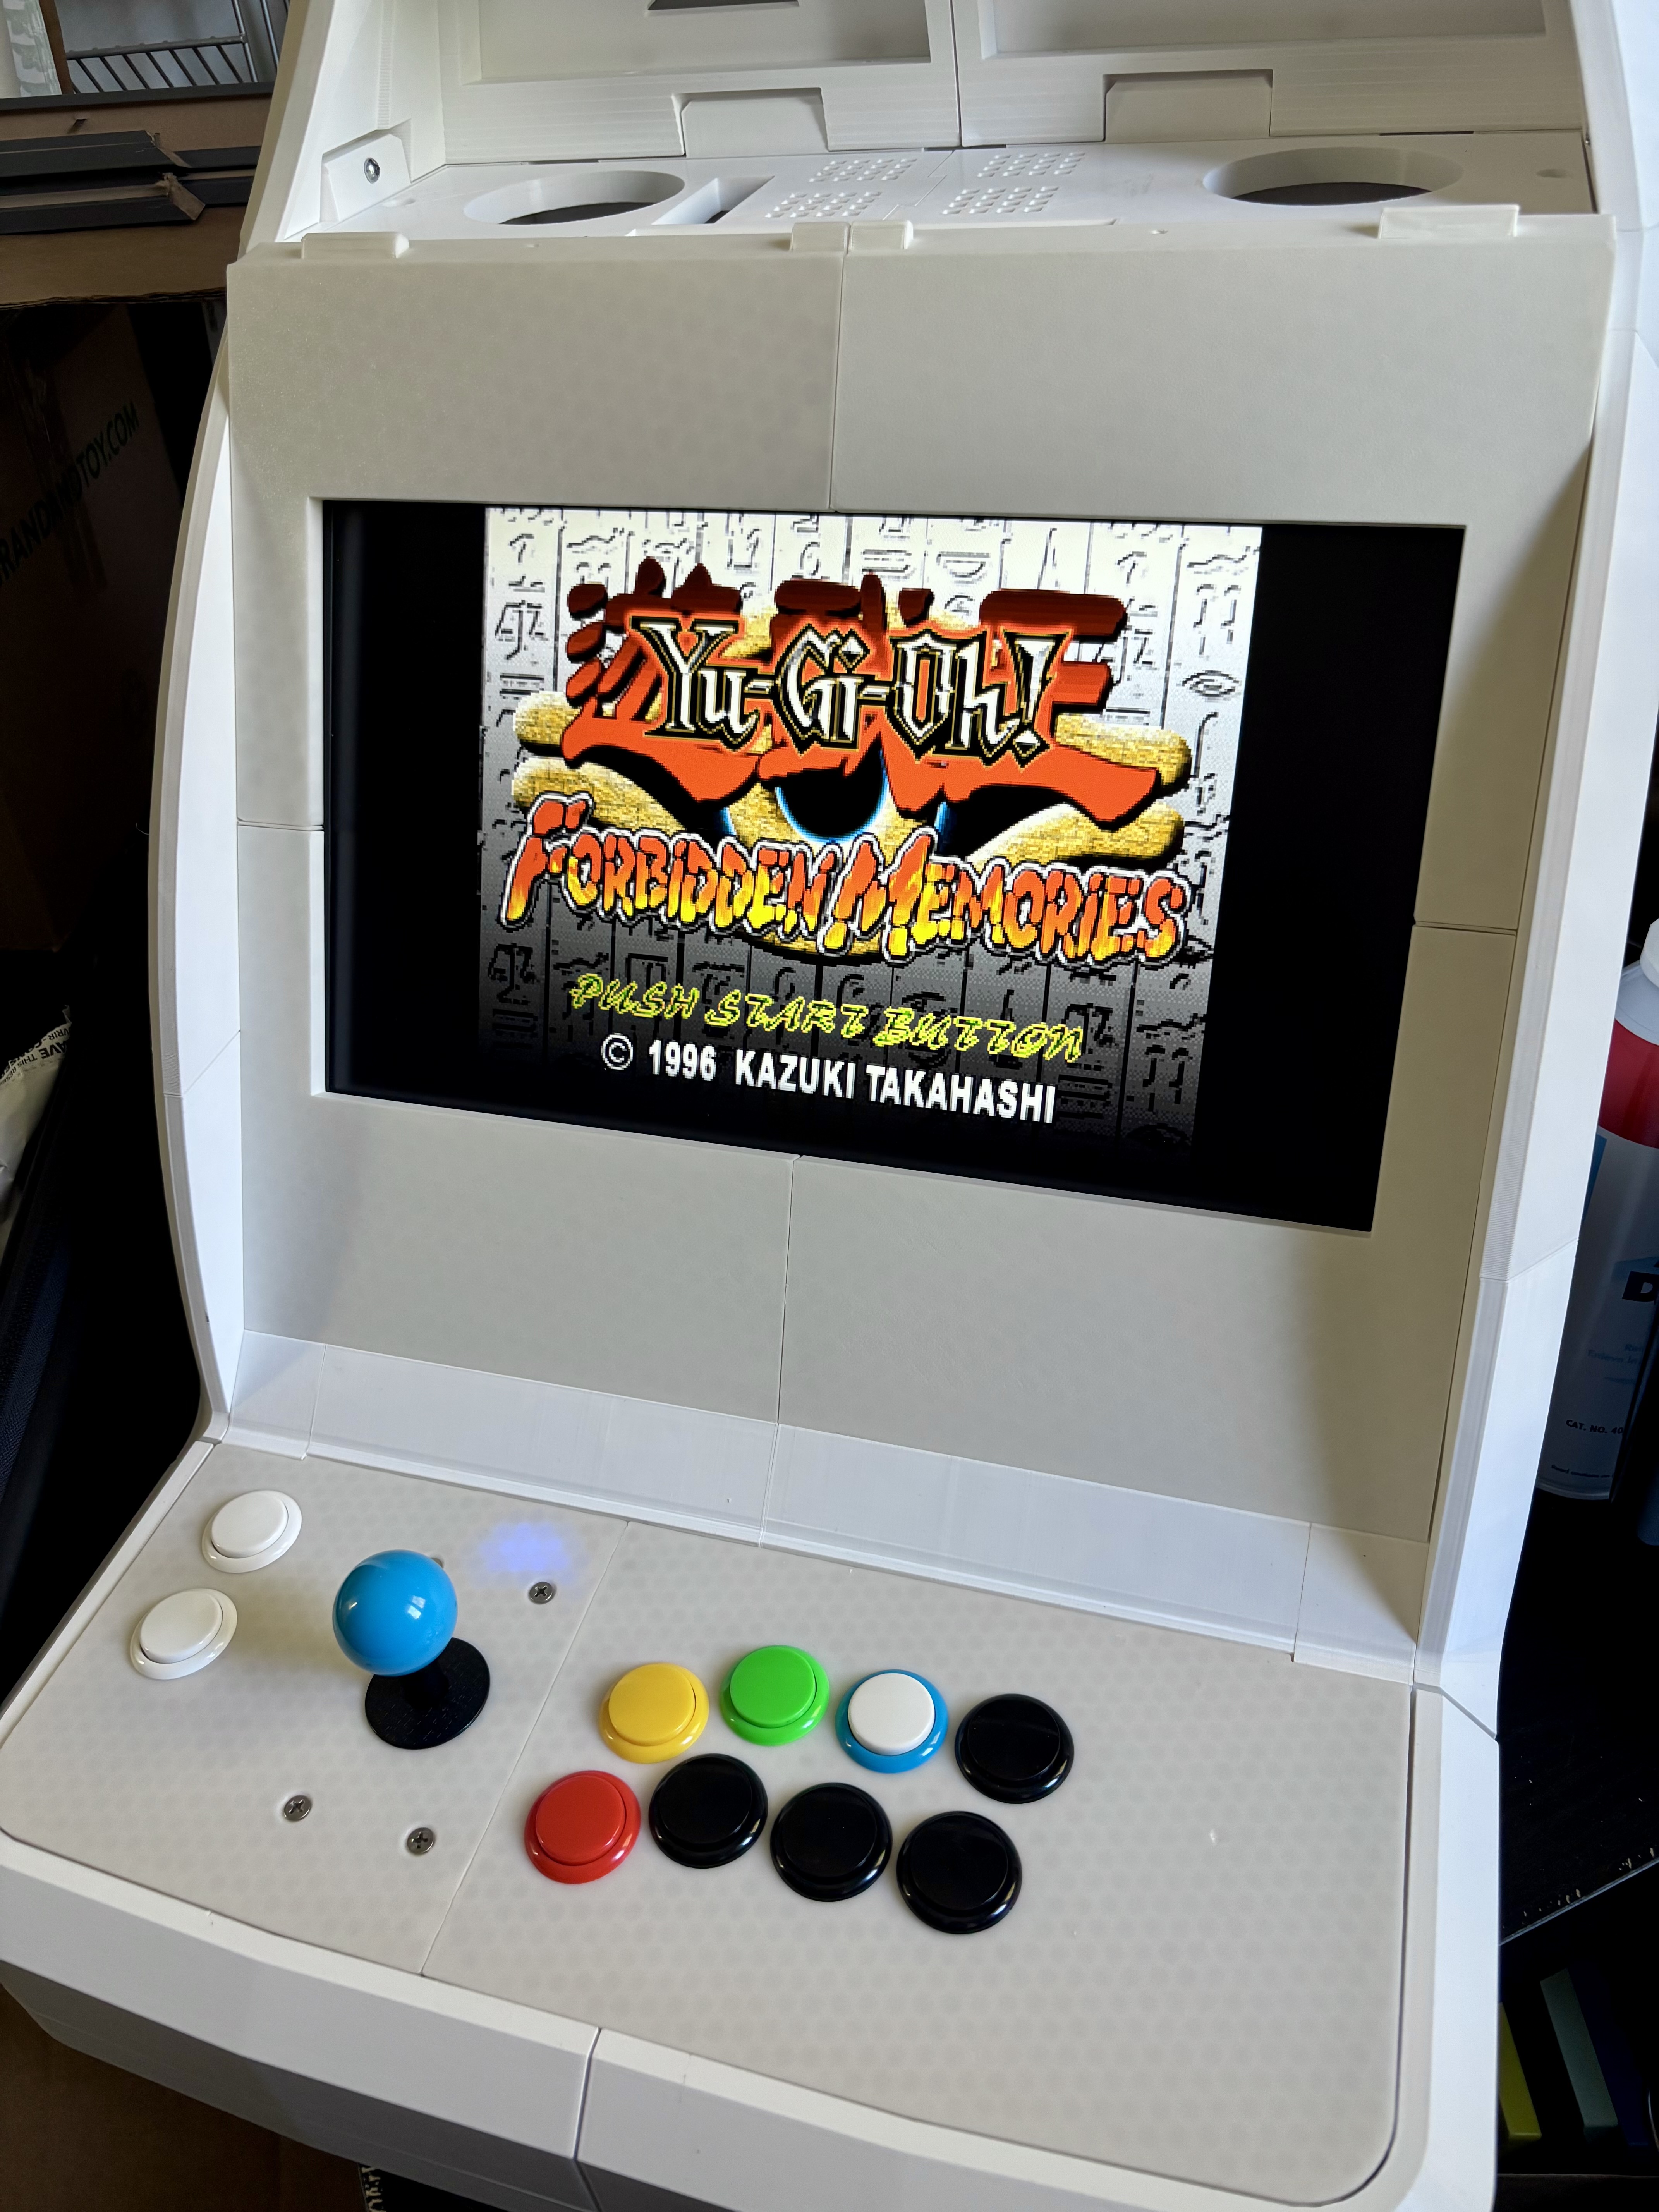
I then set about designing one for the much larger and heavier 4:3 LCD, which only just fit, so I had to do multiple redesigns and tweaks as I went. I ended up using my remaining threaded screw rods to hold the enclosure together, and once it was confirmed solid, I was able to paint it black to reduce glare.
Final Touches and Thoughts
With all the pieces collected, I just had to add everything and fit it all together nicely, which took a substantial amount of time but came together quite well.
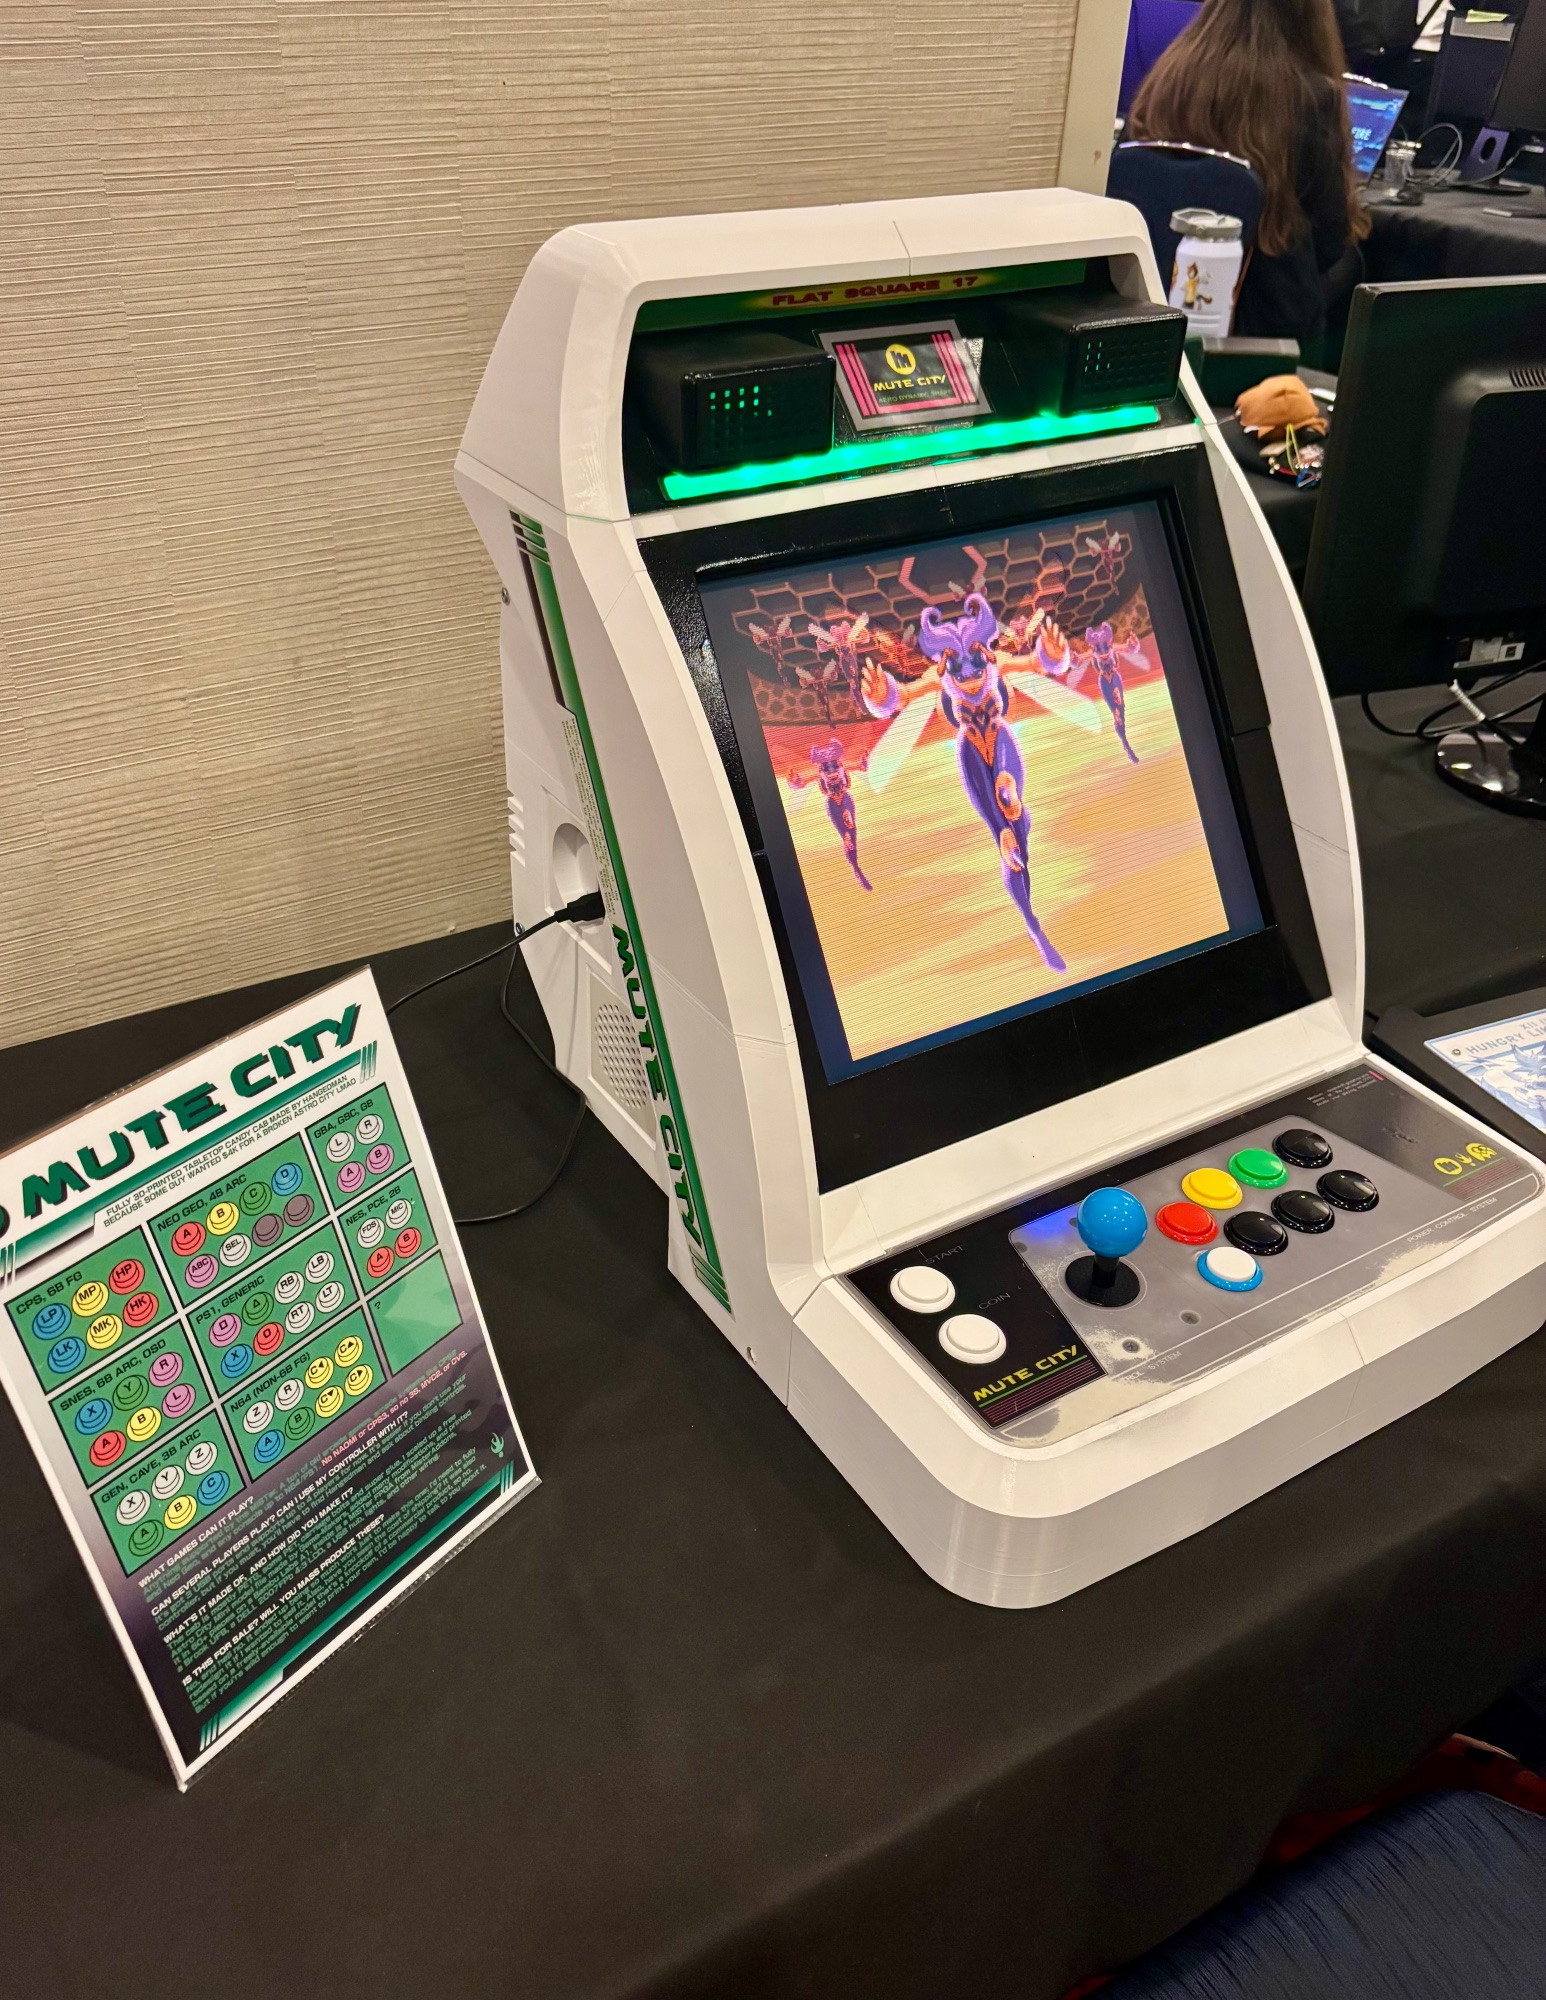
The last step was to get in contact with a friend who works at a local print shop, who was able to print me some vinyl stickers of an Astro-City-inspired design that I bashed out quickly.
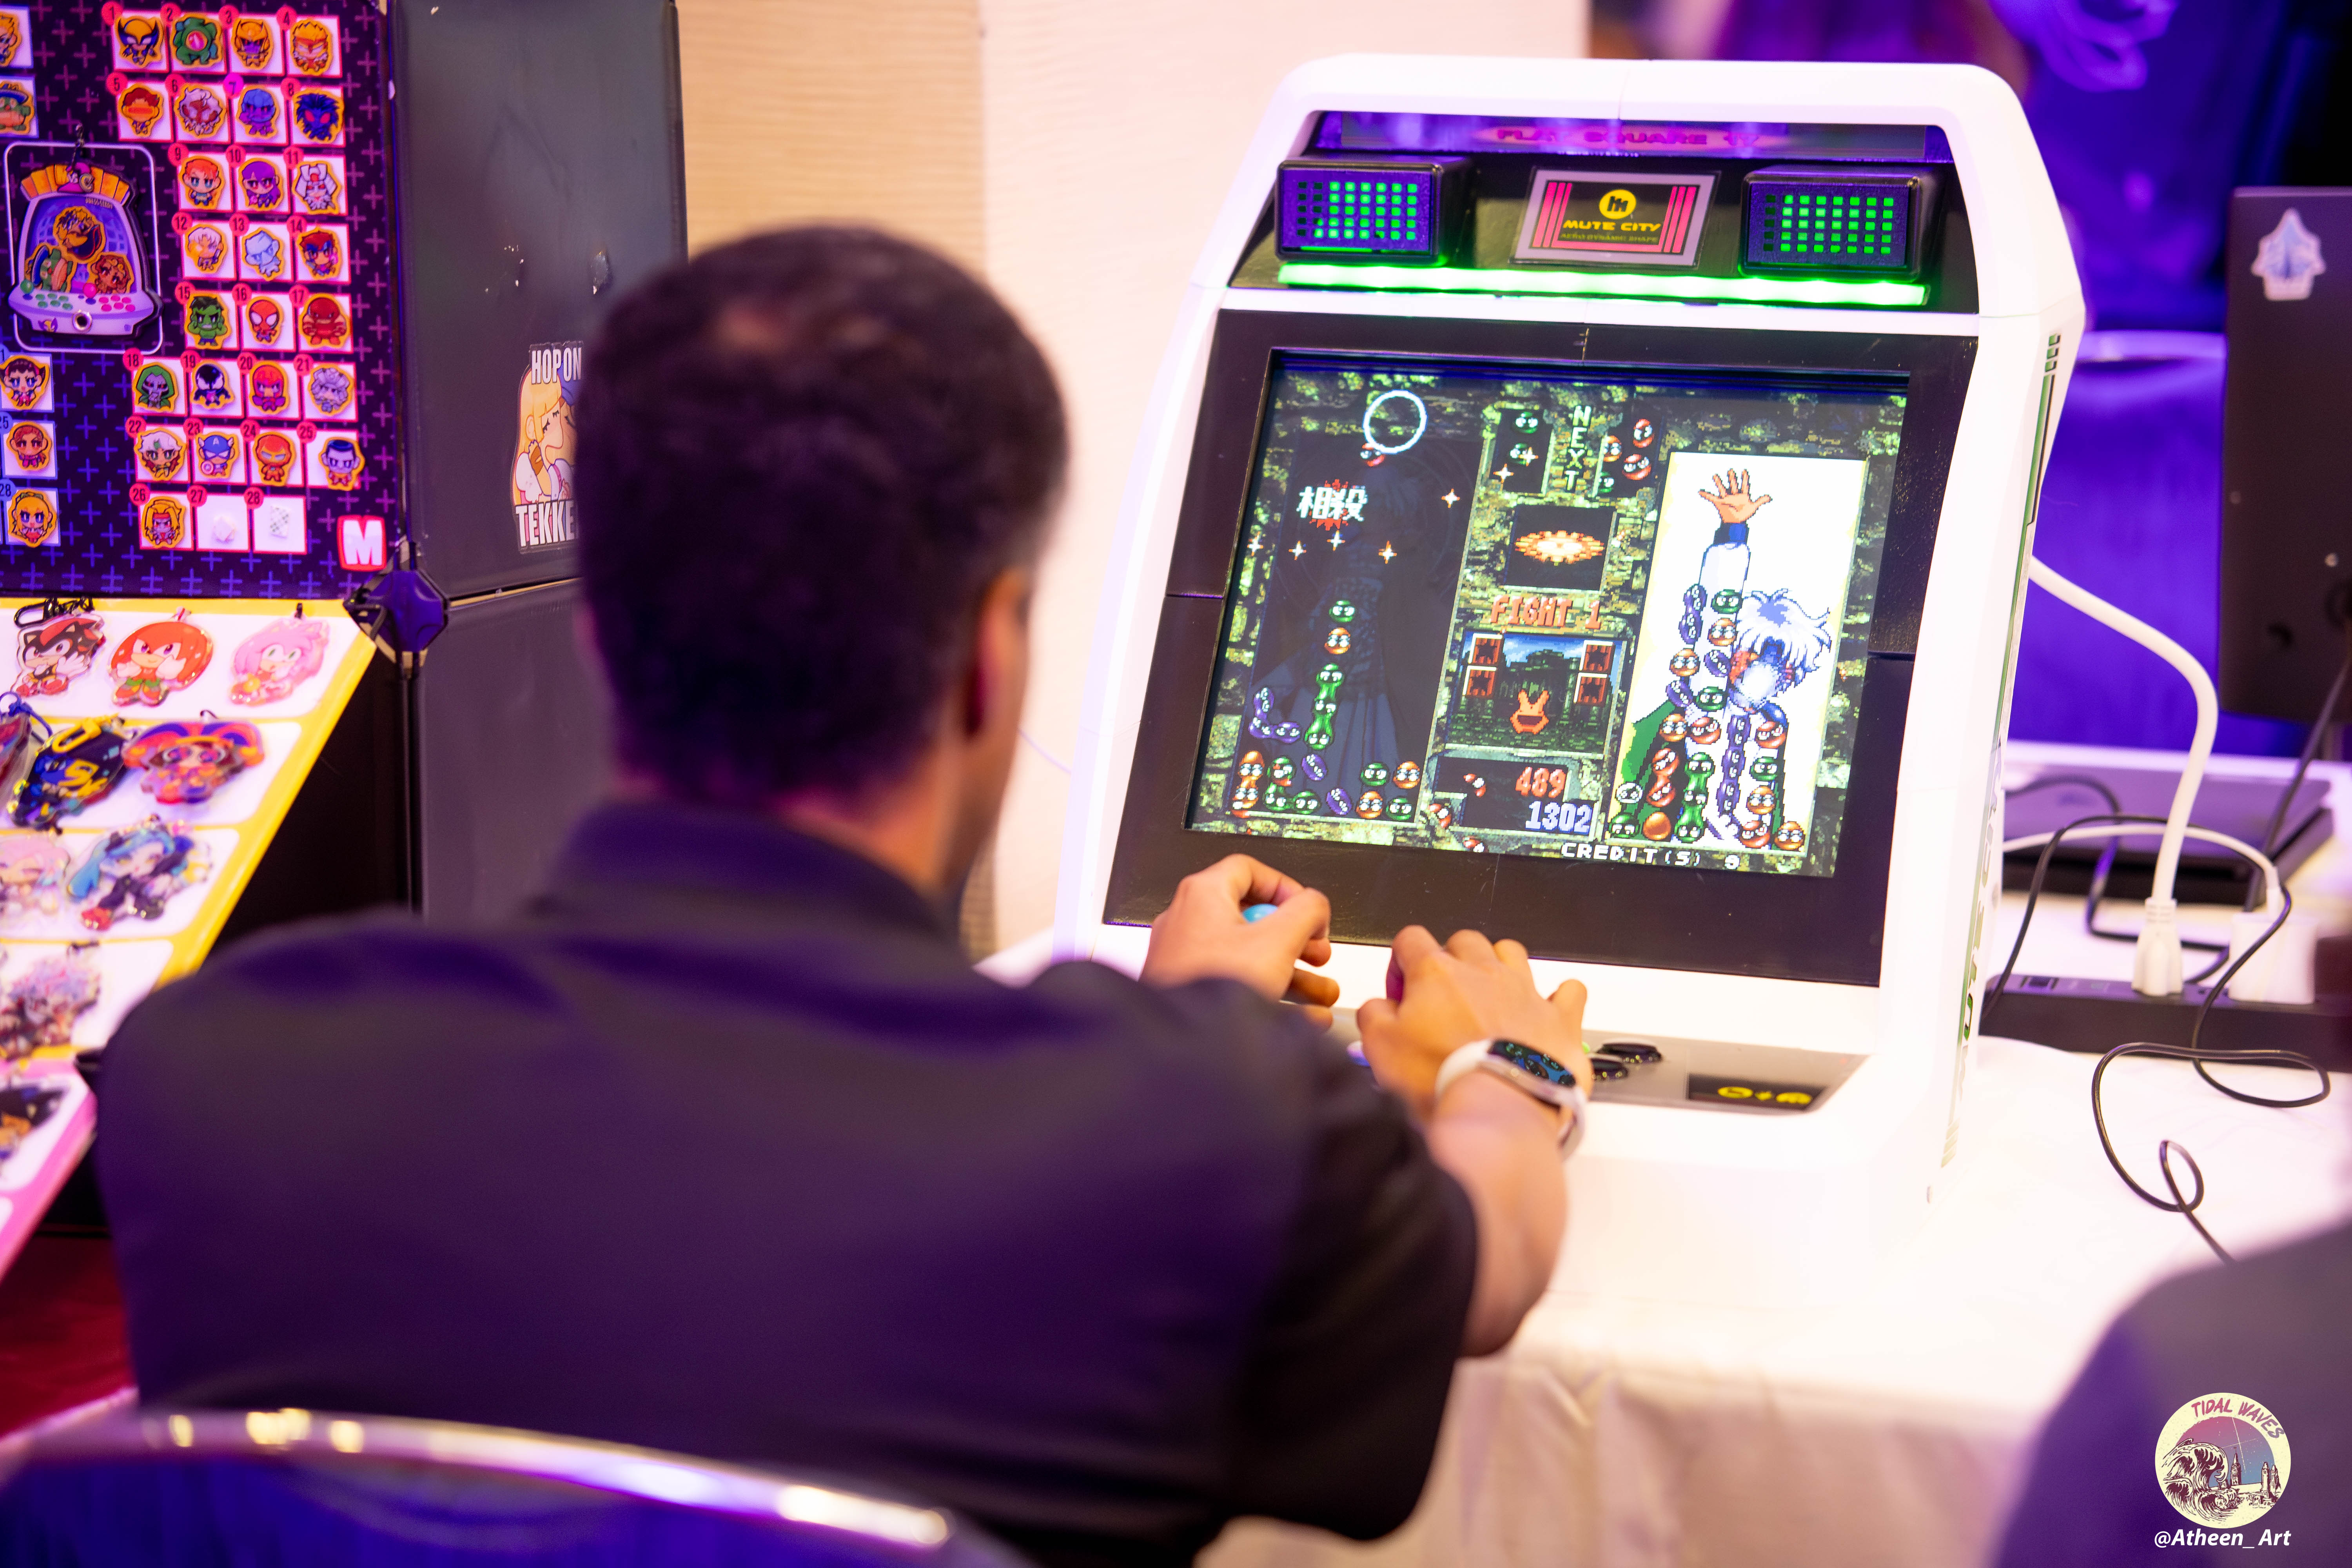
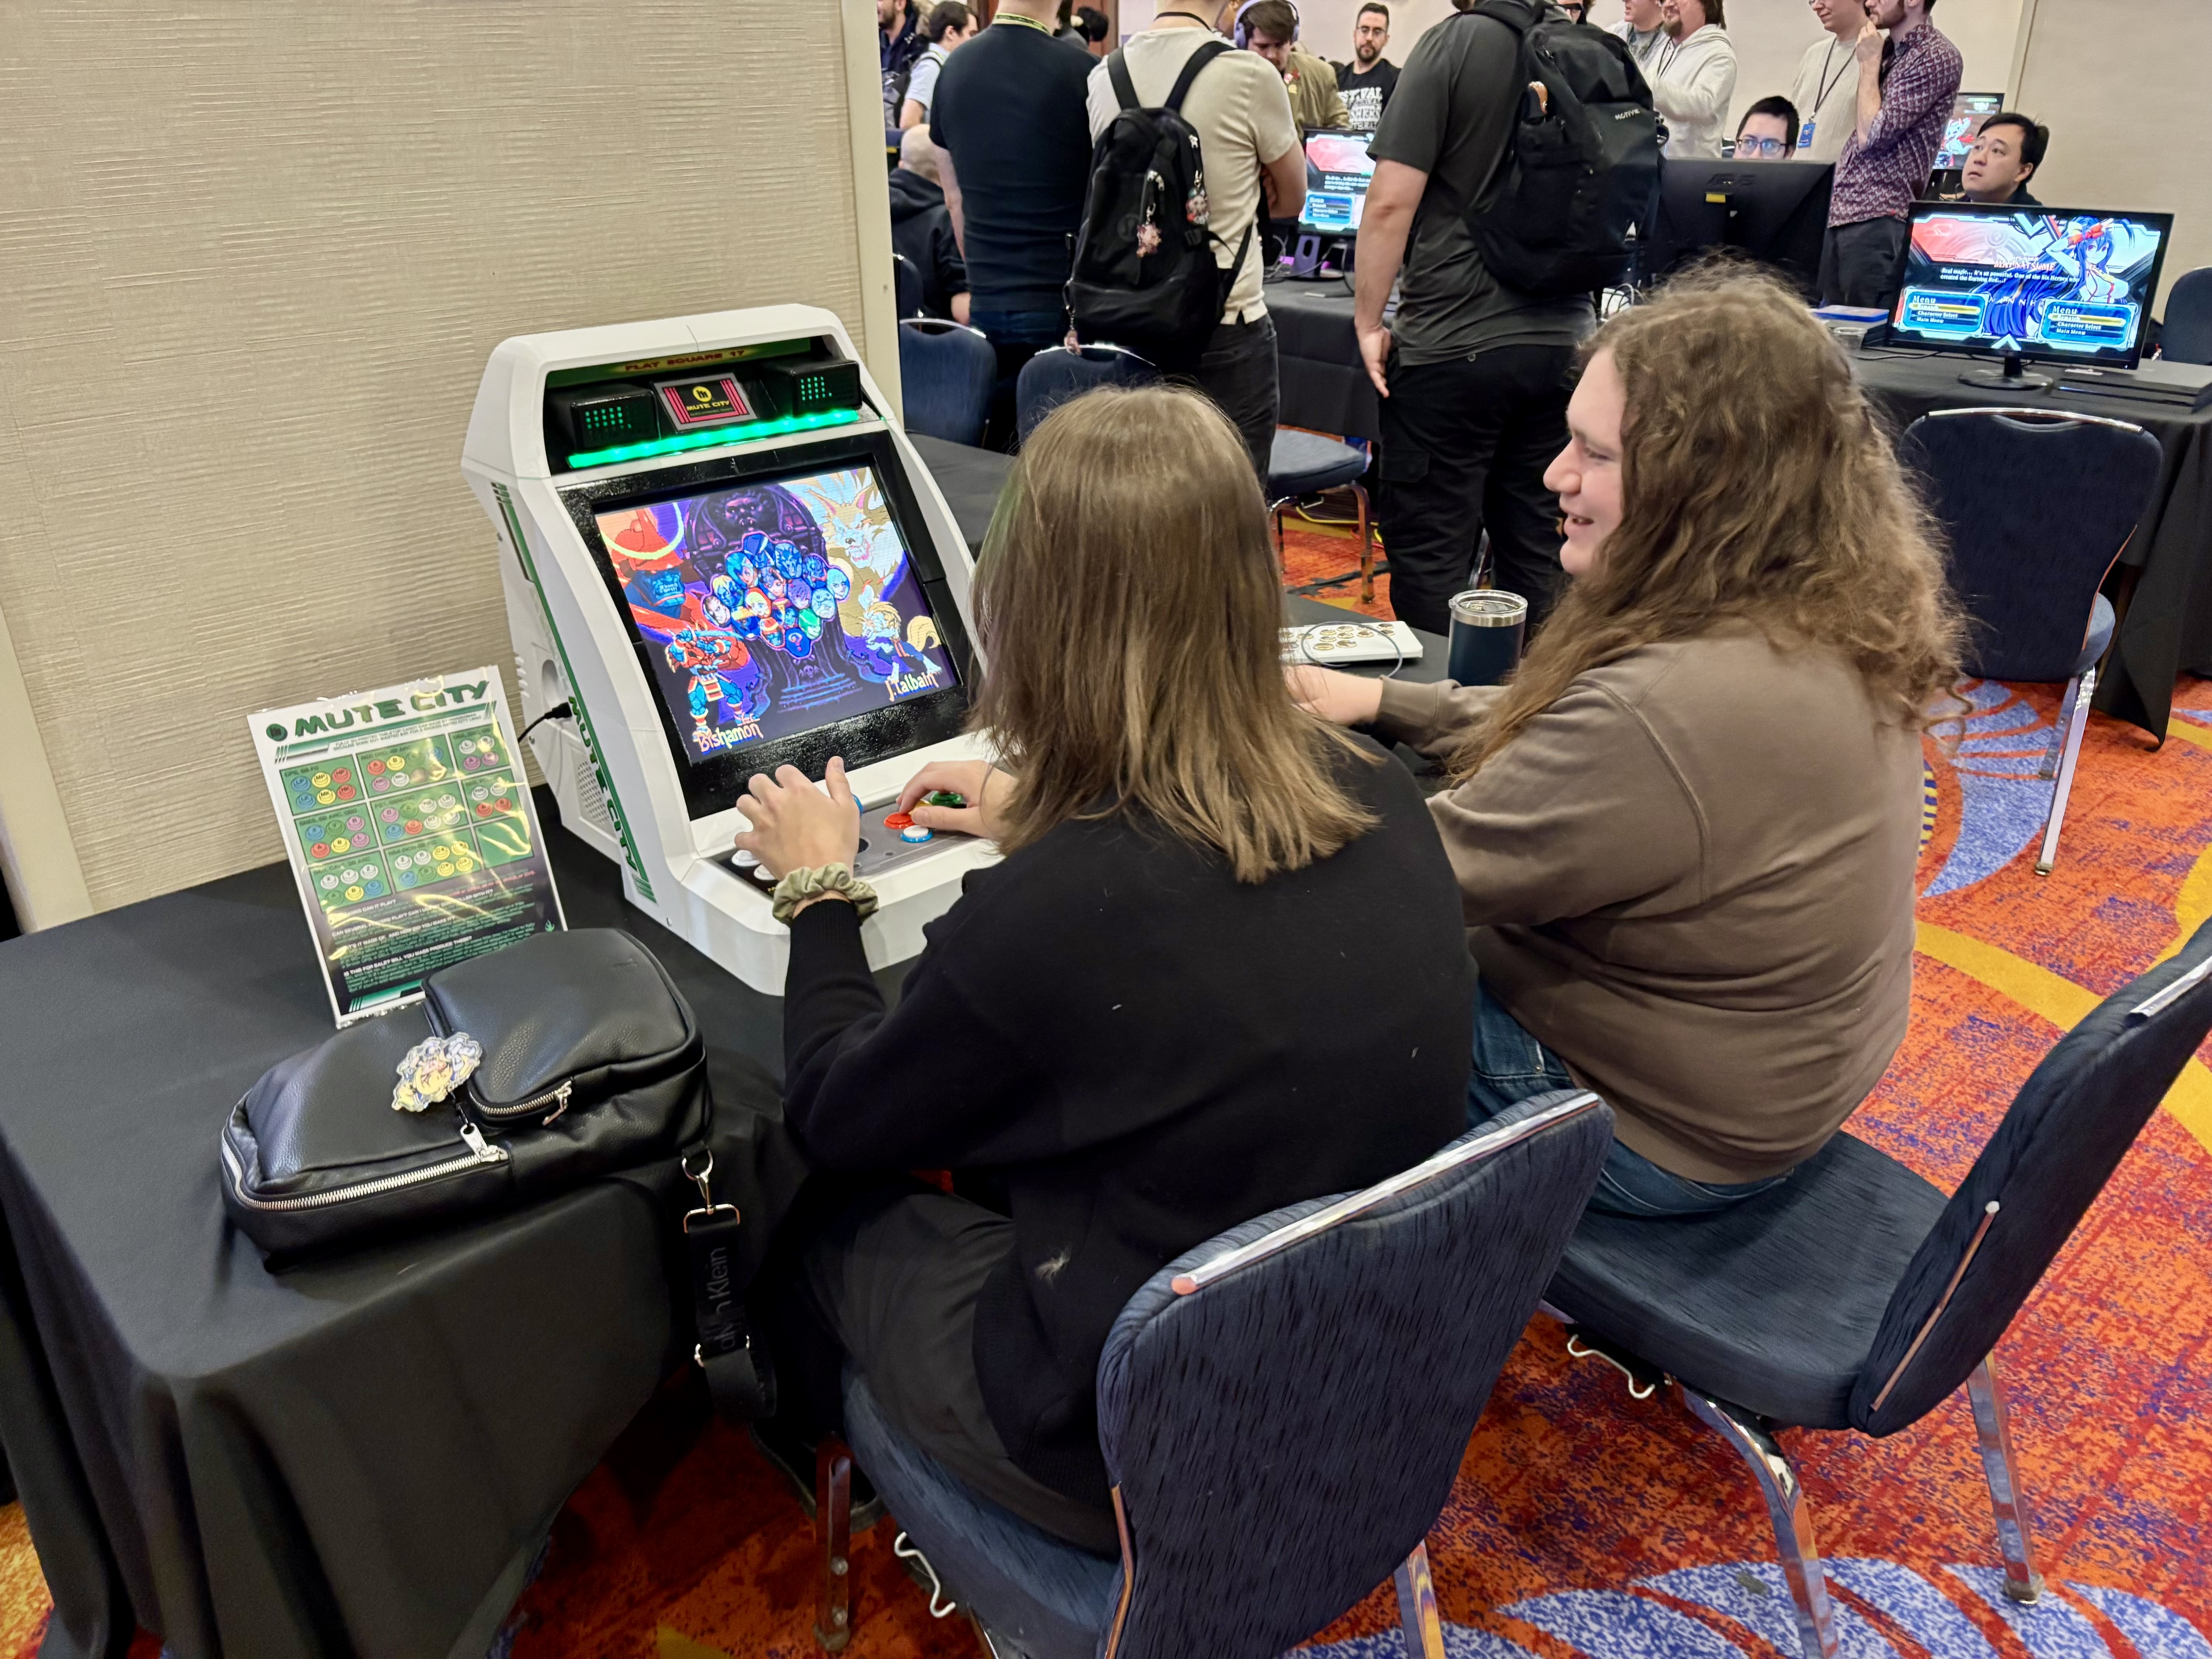
At the time wwe had a local fighting game tournament coming up (Tidal Waves, 2025), and that was the real motivator to finally get the project done and add a bit of polish.
In spite of all of my hurdles, mostly self-inflicted, it came together pretty well, and the response has been very positive.
I feel a lot better about it now, but as I've said to so many people, if I was making a second one I'd do just about everything differently. So it goes.

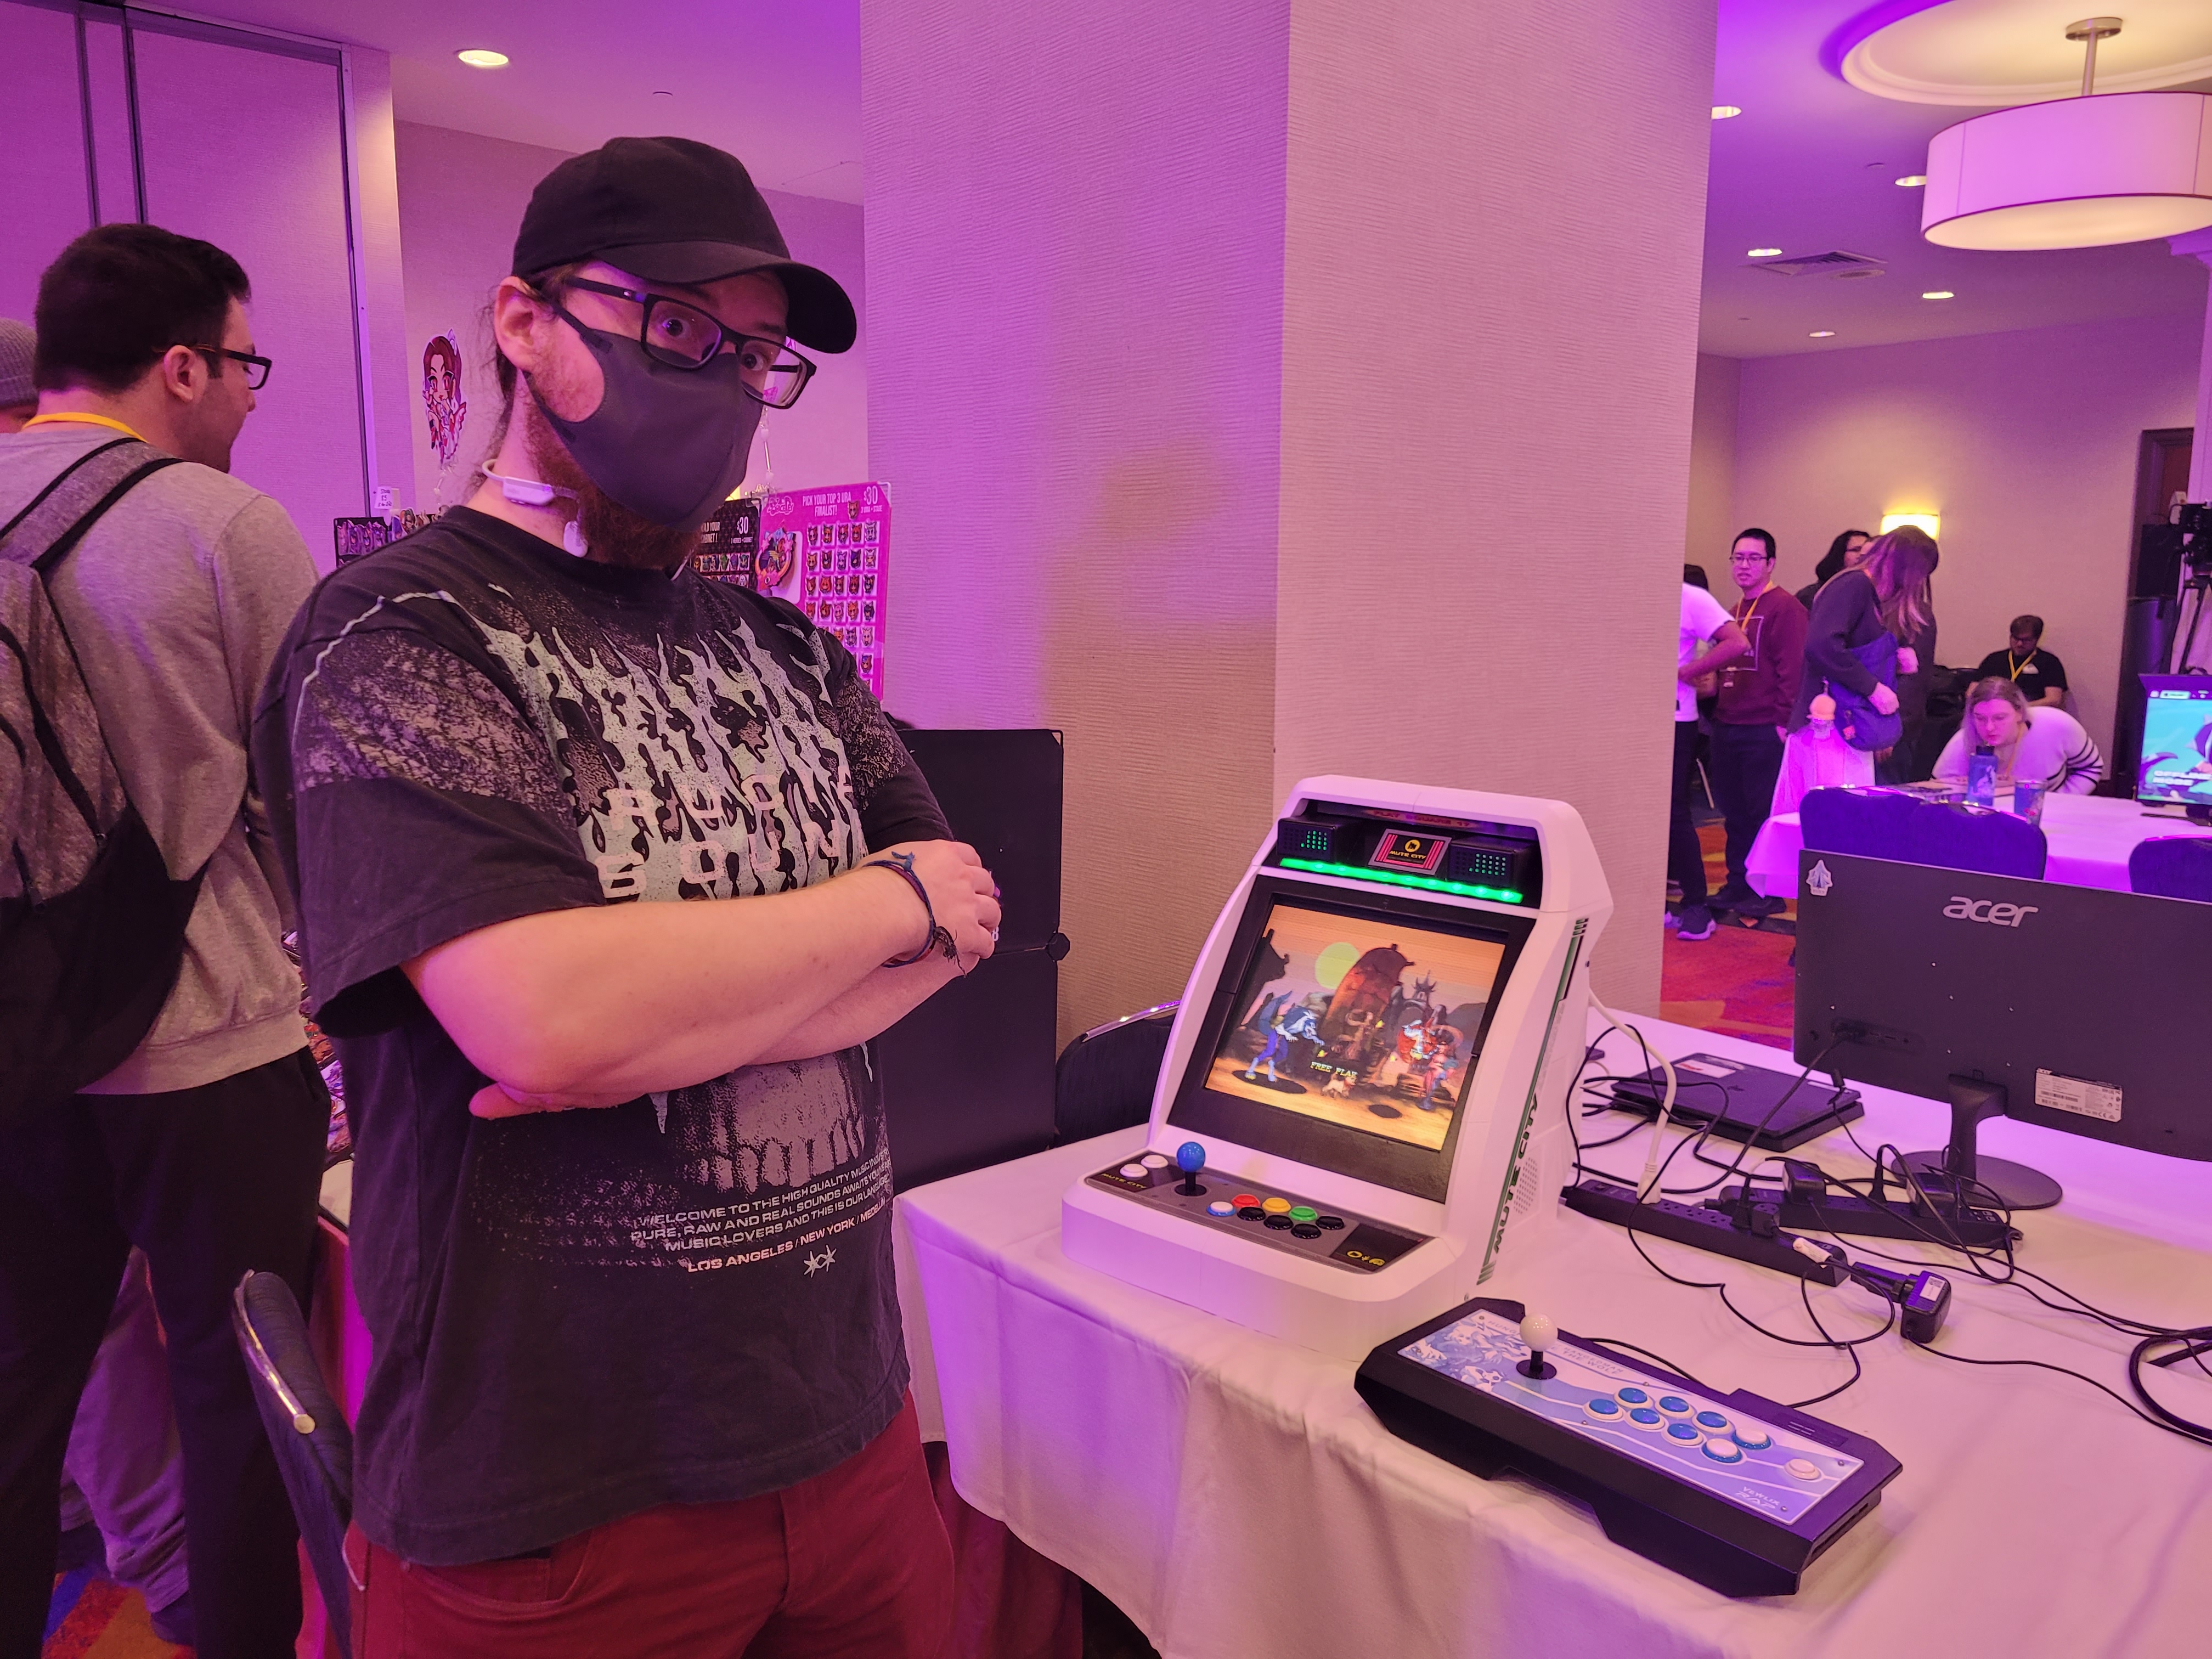
Ahead of Perfect Storm this year, I put together some signage, with various controller bindings and an FAQ for the cabinet. I still got plenty of questions about the assembly process and availability for sale, which is why this write-up exists.
For many reasons, I've no interest in turning this into a commercial product, and also couldn't even if I did want to. But if anyone out there is willing to dive into making something this absurd on a home-use printer with little knowledge of industrial design, it turns out it's totally possible, although maybe not very practical.
If there's any part of this that isn't clear, or anything else about the cab or the process that you're wondering about, feel free to get in touch.
I'm happy to help out in small ways or talk through some of the things I learned, but if you want one of your own, that's up to you.